Carol Stamps
  • Carol Stamps
  • Compendium of Curiosisties 3 Challenge - Gallery
  • Tim Holtz
    • 12 Tags of ...
    • Creative Chemistry 101
    • Creative Chemistry 102
    • Creative Chemistry 103
    • Summer of Creative Chemistry 2016
    • #hipforsummer 2017
    • #sharewithsizzix
    • #holtzforhalloween
    • #holtzfortheholidays
    • Share-a-Scare
    • Tim Holtz Christmas photo holder
  • Simon Says Stamp Challenges
    • Simon Says Create
  • Frilly and Funkie Challenges
  • Sunday Stamper
  • More Than Words
  • Creative Carte Blanche
  • Altenew
  • Seven Hills
  • Hero Arts
  • WOW! Embossing Powder
  • Graphic 45
  • Dyan Reaveley classes, 2015
  • Marjie Kemper Classes
  • OnLine Card Class
  • Just playing around
    • Art Swaps
    • Club Posh
    • Stencil Girl
    • Ranger Kits
    • Stamptember
  • Lindy's Stamp Gang
  • WOW! Challenges
  • Ellen Huston
  • Virginia's View Challenge
  • Marjie Kemper classes

My July Progress in my 2018 Organization Resolution

7/31/2018

0 Comments

 
Back at the end of December, 2017, I blogged about the mess my craft space was in, and how I hoped that, in 2018, I would make some progress in getting it all put back together and neatened up. I posted my January progress here. My February progress report on that organization is here. My March organization efforts can be found here. My April report is here. And my May report is here,  and my June report is here.

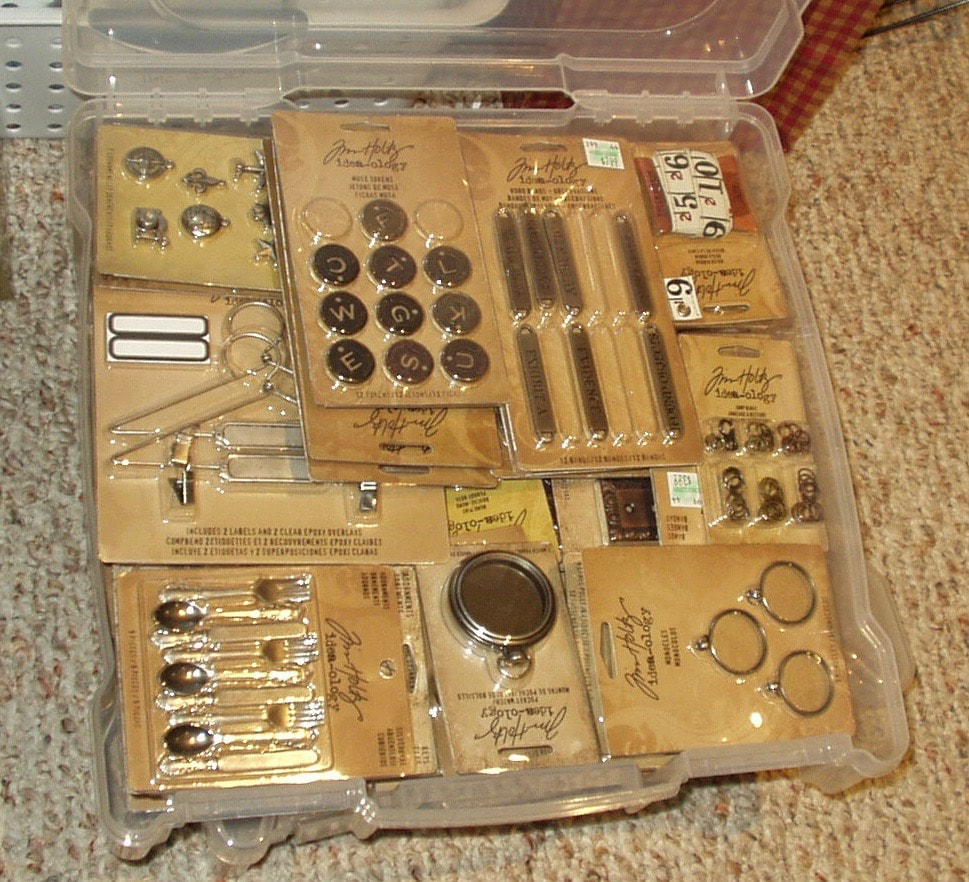
On July 10, I set about eliminating the zip-lock bag storage system I was using for my Idea-ology metal ephemera. I used an ArtBin storage box like the one i used to store  paper ephemera and layered all the packets in it:
Picture
Over the July 14 weekend, a "mystery" package of Stitches Glitter glues arrived from Ranger. After packing, it was clear that they would NOT fit in the drawer with my other "Stickles" bottles:
Picture
so I pulled out one of my spare "Alcohol Ink" storage tins and it was perfect!
Picture
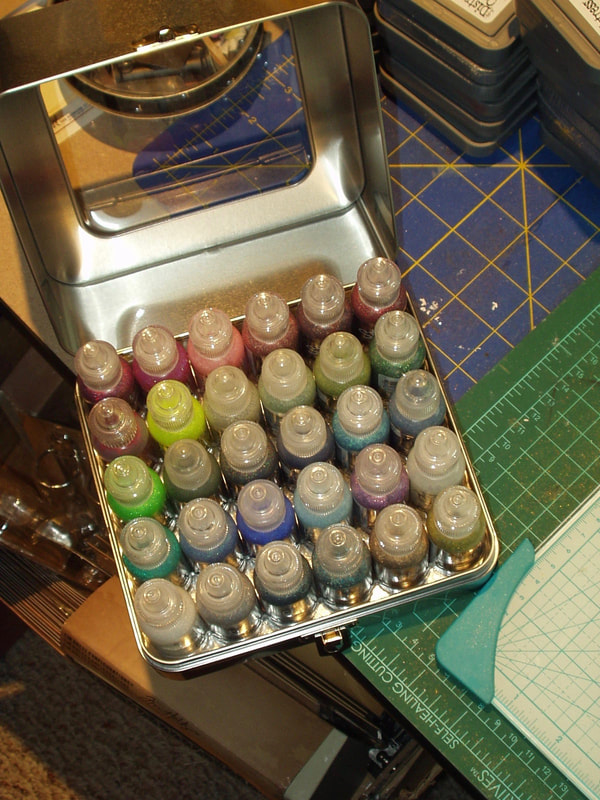
Some don't have color names on them and one doesn't even have a label at all but I did arrange them in a more-or-less rainbow order. Labeling not necessary (IMO) because it's pretty clear what colors they are from above...

​On July 26, I decided to do something about my punches. I keep them in a bin in the bottom of a cabinet and if I want to find a particular punch (usually circle punches or corner rounders), I have to pull out that bin, and then go through the tangled mess of punches before I find the one I want. Here is what it looked like before I tackled the mess:
Picture
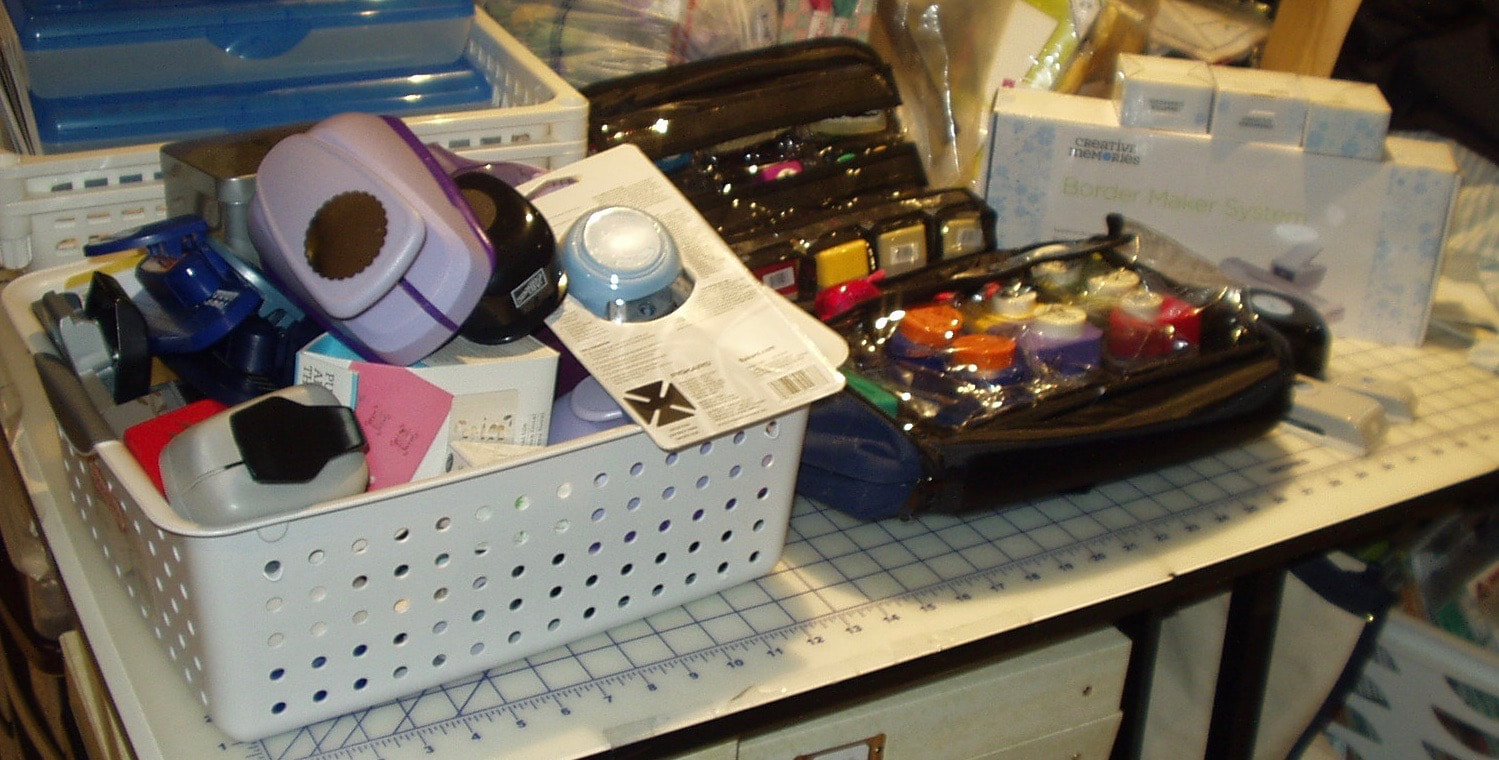
On the left, the bin with the majority of my punches... the black "Go-bag" to the right holds a number of smaller punches I have rarely, if ever used, and being as they are in that bag, they are out of sight, out of mind. The box behind the bag is a border punch set, never used...
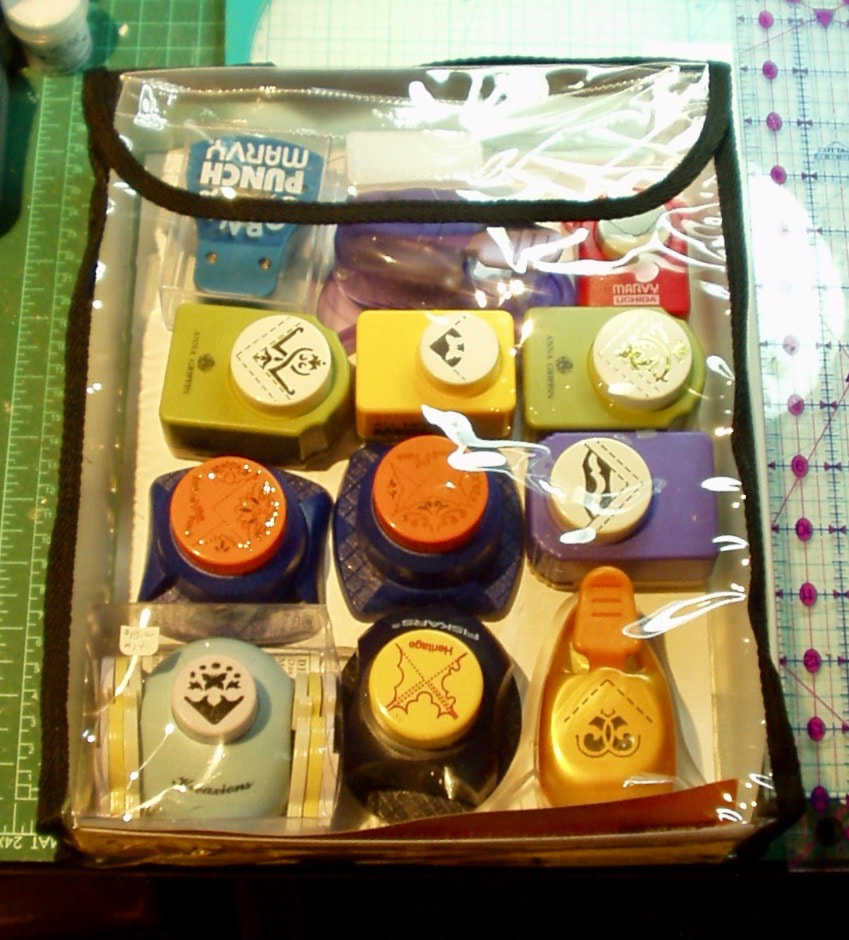
I decided to sort punches by "style" (that is, circles, squares, corners, borders, patterns, etc.) and put them in some Totally Tiffany Punch and Stamp Sets. (I ordered two sets and what came wasn't as described.. Instead, I got two 1.5" and one 2" bags in the set instead of one each 1", 1.5" and 2". OK, I guess, as I didn't have all that many small punches and they worked in the 1.5" bags. Sure wish they had some deeper ones, though, because there simply was no way to get those mega punches in those bags).

I sorted and bagged...
Picture
Corner punches
The Totally Tiffany suggestion is to "xerox" the layout in each bag so that, one one punch is removed, it is clear where it fit in the jog-saw puzzle of a full bag.I decided to put that off for the time being. Instead, I continued to sort and bag until I had five bags in total:
Picture
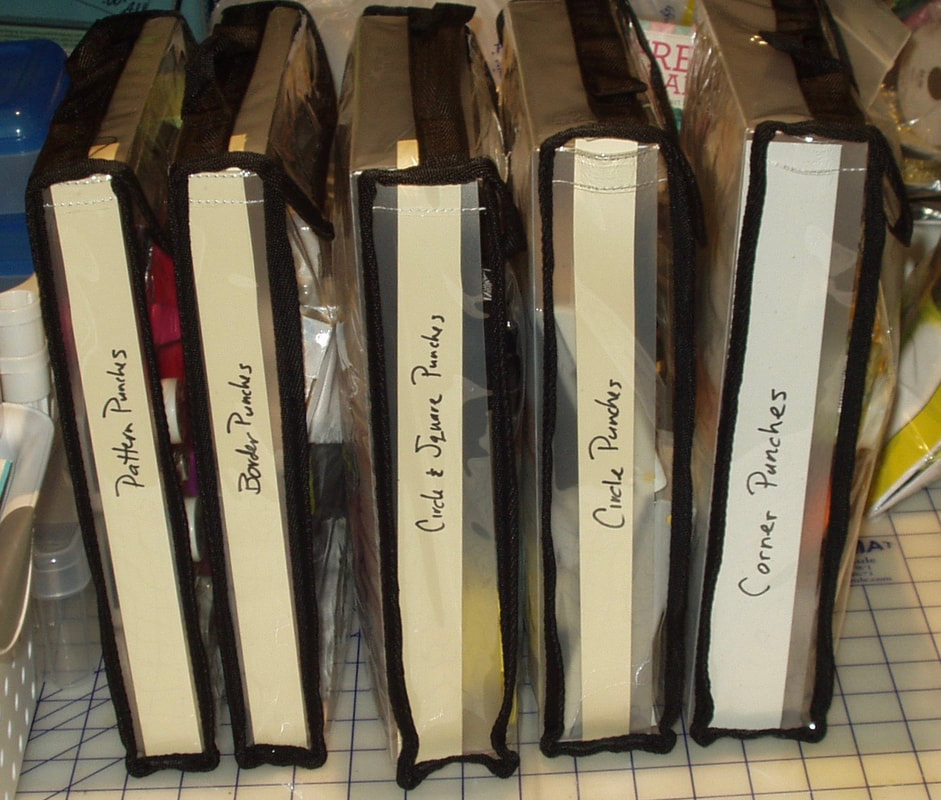
I had NO idea I had so many circle punches!

​The mega punches and some Fiskars order punches, however, remain in the bin, but at least they are only one layer deep...
Picture
The bin went back in the cabinet; the bags are still on my cutting table awaiting a place where they can be stashed; and the go-bag for punches is now living with my cropper hopper go-bag...

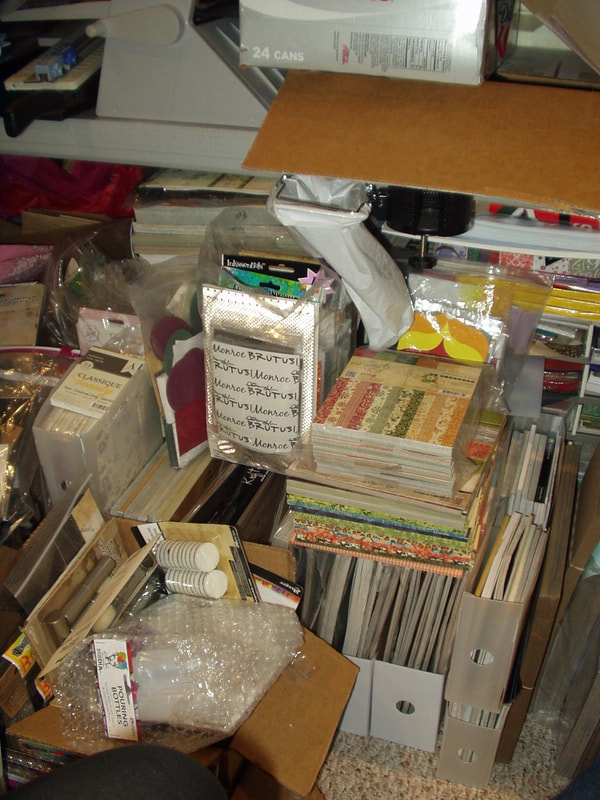
On July 27, I decided to start tackling the disaster next to my chair. Behold, a tangled pile of assorted paper types' all piled on one another in front of my 8.5 x 11 baer files. Every time I need solid paper, I have to move all of this first. 
Picture
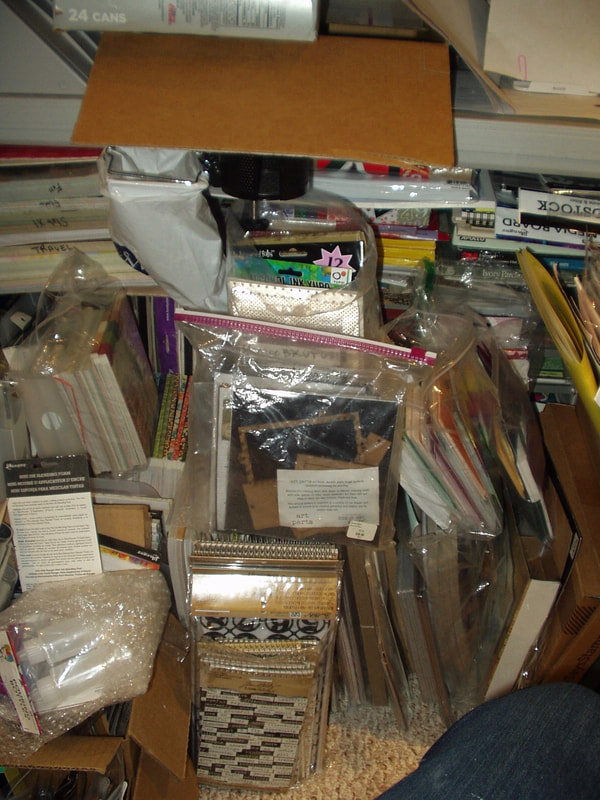
And if I want anything like 12x12 or 8x8  Tim Holtz or Graphic45 pads, or 6x6 patterned paper pads, I have to dig.  ​
Picture
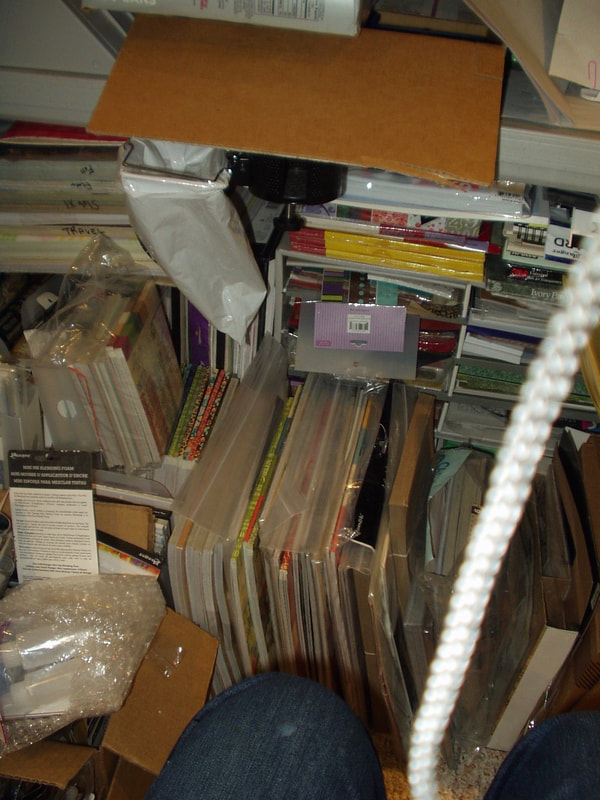
I I pulled out all the Totally Tiffany paper storage items I had and got to work, sorting. Now, all the patterned 6x6 (except the Graphic 45 pads) are in Totally Tiffany 6x6 paper handlers (there is one more on order), and all my 12x12 collections are in five file boxes that hold 12 x 12 paper, also from Totally Tiffany.

Picture
Piled loosely on top of the rest as are the odd bags of paper shapes, specialty 4.25 x.5.5 papers, matching card/envelope sets, etc. Packs of grunge board and chip board are still stacked by the 12 x 12 collections. 

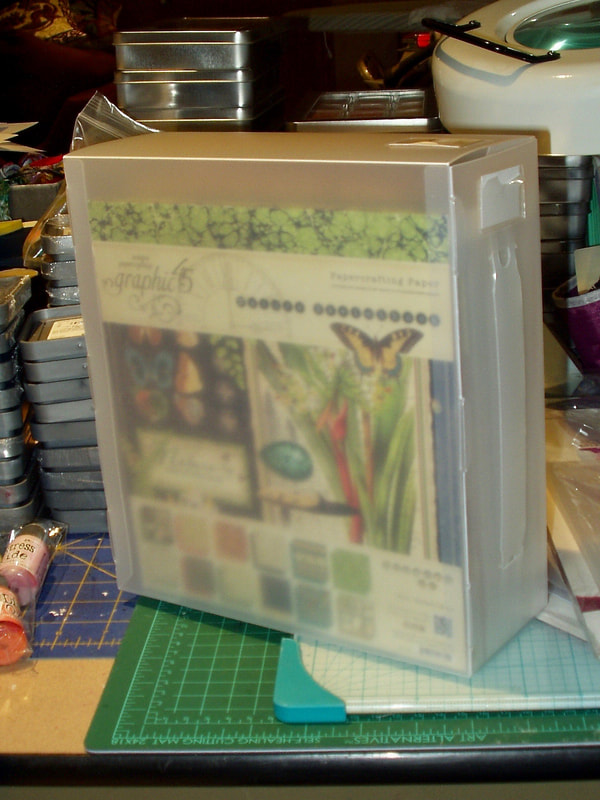
I had 
8x8 paper handlers on order and these arrived on July 28...so the 8x8 Graphic45 pads are now neatly contained: 
Picture
Still a hot mess, but at least getting to the 8.5 x 11 solids is a little easier. The 12 x 12's no longer slip and slide and fall over when I sort through them and I have a pretty good idea what is in each file. I will alphabetize, consolidate and tab these files in th coming weeks. And, eventually, all these files will have a home of their own (I HOPE).

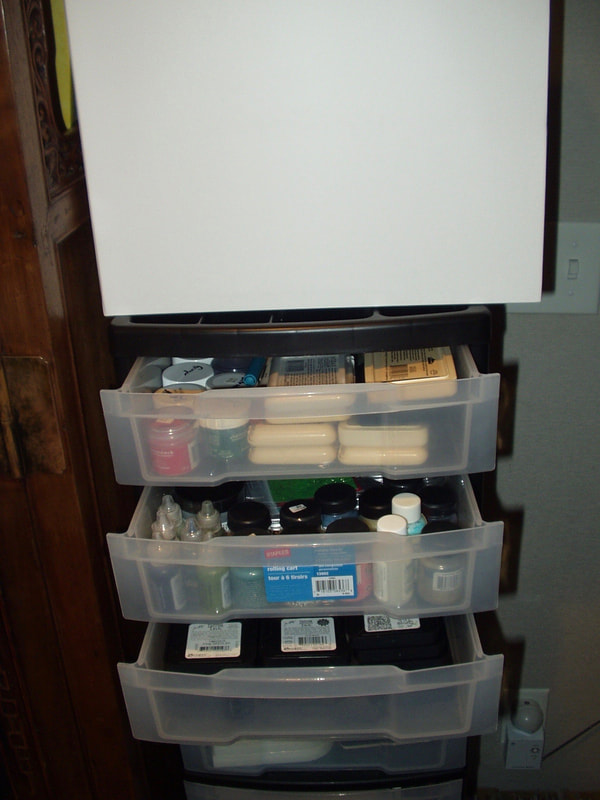
Next up, that cardboard box full of blending tools, pens and watercolors... which means I need to tackle the cabinet where I keep markers, paints and pencils first... Aaargh! Organization always seems to result in chaos before it gets 
resolved and I seem to be in mid-chaos right now!

But I digress. Financial records are calling my name (I'm six months behind! EEEEW!).]

​And, as of August 1,I had all my records up to date, and  receipts filed! Woo Hoo!

0 Comments

Challenge: Rainbow

7/30/2018

0 Comments

 
WOW! Embossing Powder fans jumped the gun a little with the August 2018 challenge but here I go...

I started by heat embossing the feathers from the WOW! stamp set "Flights of Fancy"> I used a placement technique I saw doe o line where the stamper left the stamps i place on acetate to place them on the card i a stamp platform, After adhering the stamps and acetate to the lid, the acetate sheet was removed and all the stamps left on the lid.

I stamped with Vrsamark and embossed with six colors of WOW! embossing powder:

Picture
My versa mark pad/embossing powder wasn't perfect but I was going to add sentiments so I could cover up the "bald" spots. My first sentiment addition was an embossed oval with a phrase from A Concord & 9th stamp set. I layered the oval on cream card and fussy cut it:
Picture
I die cut a word for the same two scraps of black and cream card, and layered int before attaching the word and oval to the card:
Picture
Products used in the making of this card were:

  • Stamps: WOW! “Flights of Fancy” (STAMPSET32); Concord & 9th “Butterfly Beauty” (10164)
  • Dies/Punches: Stamping’ Up oval punch; Sizzix “Shadow Script #2” (662685)
  • Inks: versamark
  • Embossing Powders: WOW! “Primary Apple Red Super Fine” (WH01SF), “Primary Lemon Yellow Regular” (WH06R), “Metalline Green Regular” (WG03R), “Oceanic” (WL21R), “Earthtone Blueberry” (WJ06R) and “Blueberry Cheesecake” (WL09R)
  • Papers: The Paper Studio notecard “white” (225459); scraps of black and cream
  • Adhesives: Wendy Vecchi “Perfect Card Adhesive” (62134)
0 Comments

Challenge: Wild Things

7/30/2018

2 Comments

 
In the Simon Says Stamp Monday Challenge, July 30, 2018, the design team says:

"...use some wild animals, wild flowers, or maybe you would prefer to use wild and funky colours!"

​Well, for me, wild is WILD - and I don't think one can get more wild than animals of teh African continent. I decided to go with a lion for this card, 

​The lion is a layered stamp set from Hero Arts and i used Distress Oxide Inks. I fussy cut him, mounted him on an arched tag with an embossed sentiment, and mounted that on a card base made from Graphic45 paper:

Picture
Products used in the making of this card were:

  • Stamps: Hero Arts “Brave Lion” (CM177)
  • Dies: Sizzix Thinlits  “Stacked Archway” (662692)
  • Inks: Distress Oxides “Fossilized Amber” and “Vintage Photo”; Versamark
  • Embossing Powder: Ancient Gold “African Gold” (EGJ00761); Snowman Extra-fine Marker “gold”
  • Papers: The Paper Studio notecards “white” (225359); Graphic 45 Safari Adventure Collection 8x8 “Birds of a Feather” (4501366); scraps of cream and grey-green
  • Adhesives: Wendy Vecchi “Perfect Card Adhesive” (62134); RedLine 1/8” Embossing Tape
2 Comments

Challenge: "Relax"

7/30/2018

1 Comment

 
The July 2018 Mini-Challenge at More Than Words is to make a small project (card, postcard, tag or ATC) which clearly displays the word "relax"!

I decided to make an ATC and started by blending three Distress Oxide Inks over a white-embossed image of a flower on teh matte back of a blank playing card. After the ink was dried, I overstamped in a darker Archival Ink:
Picture
I die-cut the word "relax" and coated it with silver Wink fo Stella for a little shimmer (which really doesn't show up well in this photo). I mounted the inked card on a silver back and added a dragonfly charm to finish the ATC:
Picture
Products used in the making of this ATC were:

  • Stamps: Stampers Anonymous “Wildflowers” (CMS253) and “Mini Purely Random” (CSS27843)
  • Inks: Distress Oxides “Wilted Violet”, “Dusty Concord” and “Seedless Preserves”; Versamark; Archival “Majestic Violet”; Wink of Stella “silver” (GL102)
  • Embossing Powder: Top Boss “white”
  • Papers: Marco’s Paper Artist Trading Card Assortment; River City Blank Deck Playing Cards; scarp of black card
  • Embellishments: Just Nan “Silver Painted Dragonfly” charm (JNC15)
  • Adhesives: RedLine 1/8” Embossing Tape; Glossy Accents; Wendy Vecchi “Perfect Card Adhesive” (62134)

​I'm also entering this in the Simon Says Stamp Monday Challenge, July 30, 2018: Wild Things 

1 Comment

Challenge: Anything Goes, Art Impressions

7/27/2018

1 Comment

 
The Simon Says Stamp Wednesday Challenge for July 25, 2018, was to do anything we wanted although the design team is focusing on Art Impressions products.

I do have several Art Impressions stamps but I got sidetracked when sorting punches and putting away some recent purchases and decided to go with a new stencil I got this past week from Stencil Girl. I used the medium sized "tile" stencil by Gwen LaFleur, a foam blender, and Distress Oxide Inks to create an "ombre" detail on a white card:
Picture
All it needed was a sentiment:
Picture
Products used in the making of this card were:

  • Stencils: Stencil Girl Product StencilClub for July 2018 by Gwen LaFleur (SC-07-2018 LaFleur)
  • Dies: Sizzix Thinlits “Shadow Script #2” (662685)
  • Inks: Distress Oxides “Picked Raspberry”, “Seedless Preserves”, “Wilted Violet” and “fFaded Jeans”
  • Papers: Paper Studio notecard “white” (225359); Paper reflections Holly Days background paper “burgundy”; scrap of metallic gold card
  • Adhesives: Xyron 500 sticker maker; foam squares
1 Comment

Challenge: Christmas in July

7/23/2018

1 Comment

 
There is a "Christmas in July" Blog Hop as part of the July 23, 2018 Challenge, over at Simon Says Stamp Monday. To quote teh design team:

"Did you know that there are only 21 weeks left to Christmas! It’s time to make a start on your preparations!

"We are showcasing the fabulous Tim Holtz Products this week! You don’t have to use them to join in, but I think most, if not all, of us have at least one of his products in your supplies so please use them!"

Well, no, I didn't know that there were only 21 weeks to go until Christmas and I really, really didn't want to hear that. When put into actual numbers, it is downright unnerving! But hand-made Christmas cards had been on my mind of late so I decided to experiment ... using a new Simon Says Stamp stamp set and lots of Tim Holtz product!

​I started with a card base using Idea-ology paper stash papers from the "Tidings Collection" and a white base card:
Picture
There you have part of my "Tim Holtz" products, a cut of patterned paper matted with its reverse from the Idea-ology 8x8 paper pad.

Now for a topper. I have this ziplock bag of pre-cut ovals, rectangles, and squares, source lost in the distant past. I pulled some of those in Christmas colors and set to work making an focal image using an elf from the Simon Says Stamp "Naughty & Nice Elves" set, stamped in Archival "Jet Black" on an antique white oval. The elf was too large for the oval in the stash so I stamped him so he'd overlap onto a red square (which I used as an off-set mat). I colored the elf with Intense pencils, Distress Markers, a Signo Uniball white gel pen, and black, gold and silver markers. I assembled the "topper" using the aforementioned red square and a forest green oval, also offset.

I stamped a sentiment from the "elf" stamp set in Archival "Red Geranium" and edged it in gold. I added gold dots to the center of some of the strs/snowflakes in the base card and attached the topper and sentiment to it:
Picture
This took a little long to be a complete model for the 150 hand-made cards I will need if I actually go through with my hope to make all home-made this year. But It gave me some idea as how I might approach this insane project!

Products used in the making of this card were:
  • Stamps: Simon says Stamp "Naughty & Nice Elves" (SSS101914)
  • Inks: Archival "Jet Black" and "Red Geranium"; Inktense pencils "Poppy Red" (0400), "Apple Green" (114), "Ink Black" (2200) and "Madder Brown" (1920); Distress Markers "Festive Berries" and "Mowed Lawn"; Signo Unibazl gel pen "white"; Snowball "gold" pen (EFGP); Pigma Micron 05 "black" archival" pen; "Marvy Uchida "Liquid Silver" Marker
  • Papers; Idea-ology 8x8 Paperstash "Tidings" (TH93325); Paper Studio noetacrs "white" (225649); pre-cut ovals in antique white and forest green and square in red;  cut of white  hand-made paper
  • Adhesives: Wendy Vecchi "Perfect Paper Adhesive" (WVA62134); RedLine 1/8" Embossing Tape
1 Comment

Challenge: Planes, Trains and Automobiles

7/19/2018

4 Comments

 
Over at Frilly and Funky, the challenge for July 18, 2018 is to:

"Think folded maps, cruise ships, road signs, compasses, passports, trains, planes or automobiles. As long as your project features a travel theme, you're headed in the right direction."

​My first task was to find a background, I decided to use one I had made earlier using Duylusions sprays:
Picture
I blended Distress Oxide Inks over the top of this background, spritzed with water and Distress Marker "Picket Fence", and added some random "stars" with a white gel pen to creat a "galaxy sky":
Picture
Here is where I diverged "slightly" from the challenge in my travel them is space travel!

I had just 
received a couple of stamp sets from a company new to me and was eager to try them out. I selected two stamps (a space ship and a sentiment) and stamped them in Archival "Jet Black" on a scrap of white paper. I touched them up with a silver pen, and fussy cut them. 

I used a stencil and a silver pen to add a "Warp Speed" plume and colored over the silver with a Distress Marker "Seedless Preserves" to dull the silver a little. I glued the sentiment strip and the space ship to the card and attached the card base to a pre-folded burgundy card:
Picture
Can't think of a more exciting trip than one with the crew of a starship! And yes, I am a Trekker - have been from all the way back to the original Star Trek!

Products used in the making of this card were:

  • Stamps: Kindred Stamp”s “Space Explorers”
  • Stencils” Altenew “Warp Speed” (ALT2195)
  • Inks: Dylusions sprays “Crushed Grape”, “Bubblegum Pink” and “Vibrant Turquoise”; Distress Oxides “Seedless Preserves, “Faded Jeans”, and “Black Soot; Distress Markers “Picket Fence” and “Seedless Preserves”; Signo Unibazl gel pen “white”; Marvy Uchida marker “Liquid Silver”; Archival “Jet Black”
  • Papers: Burgundy card; Neena Solar White; scrap of white
  • Adhesives: Wendy Vecchi “Perfect Card Adhesive” (WVA62134); redLine 1/8” Embossing Tape
4 Comments

Challenge: Use a Die and/or Punch

7/19/2018

1 Comment

 
Simon Says Stamp Wednesday challenges us to use either dies and/or punches in the July 18, 2018 challenge.

I decoded to use one of the dies in my "new purchases" box that I had yet to try out. I blindly reached in and pulled out with a set of nesting Spellbinders embossing dies. I chose two from the set and used them to emboss and die-cut a scrap of shimmery silver card. Then I pulled two dies from a Sizzix set of shadow script dies and cut a sentiment in the center of the nesting diet space:
Picture
The outer border was embossed; the inner border was die-cut. The hearts dictated the sentiment.
I wanted to put some color behind this card so I searched through some 6x6 paper pads to find something that showed enough color through the die-cut spaces. I selected a sheet of striped paper from Pebbles. After gluing the silver card down, I glued in the cut-outs from the "o's", "e'e and "s"':
Picture
I trimmed the layered card to fit a white card front:
Picture
Products used in the making of this card were:

  • Dies: Spellbinders “Imperial Gold” (S4-424) and Sizzix Thinlits “Shadow Script #1” (66284)
  • Papers: Neena Solar White; Pebbles “Happy Hooray” paper pad (732622); scrap of silver card
  • Adhesives: Xyron 500; Wendy Vecchi “Perfect Card Adhex=sive” (WVA62134); RedLine 1/8” Embossing Tape
1 Comment

Summer in my Husband's Garden

7/17/2018

0 Comments

 
From sun (front garden...):
Picture
Picture
Picture
To shade (back garden:)
Picture
0 Comments

Challenge: Add a Little Sparkle

7/16/2018

1 Comment

 
"Who doesn’t like a little bit of sparkle! Most of us love shimmer and shine so this week we are adding a little bit extra bling to our projects!"

​So say the Simon Says Stamp Monday Design team as they issue a challenge for July 16, 2018: Add a Little Sparkle! 

​For me, the best way to add sparkle is glitter, even if it does (and did) get all over me, my desk top, and the floor around me! So I pulled some coordinating WOW! glitters (well, actually, the only three WOW! glitters that I own!) and set to work.

​I started by making a top-folding notecard from Neena Solar white and die-cutting an aperture in the front with the 
Simon Says Stamps die "Everglade Collage". I backed the opening with a sheet of double-sided tape, poured the three different glitters over the sticky area, and rubbed it down using the release paper from the tape:
Picture
The excess glitter on the card was poured into a mini-mason jar for future use --- mixing the three colors make a interesting fourth shade of blue-green!
For a sentiment, I die cut the word "hello" from two different colors of card stock, one matte and one glimmery:
Picture
Products used in the making of this card were:

  • Dies: Simon Says Stamp “Everglade Collage” (S485) and Sizzix Thinlits “Shadow Script #2” (662685)
  • Glitters: WOW! Sparkles “Santorini” (SPRK005), “Jade” (SPRK004) and “Seahorse” (SPRK-15)
  • Papers: Neena “Solar White”; scraps of dark teal card stock and light teal glimmer card cardstock
  • Adhesives: Art Accents “Terribly Tacky Tape” (24-3030) and Xyron 500 sticker maker
1 Comment
<<Previous

    Author

    Born in New Jersey, I grew up in Southeastern Ohio. Attended university at Bowling Green State University (B.Sci  in biological science, 1964), University of Southern California (M. Sci in biological science, 1967) and University of Florida (Ph. D in zoology, 1971).
    Worked in environmental consulting for a little more than a decade and then seven years as an instructor in biological science at various community colleges in California and Texas. Moved to London in 1992, then Beijing (1996) and Saudi Arabia (1998), before returning to NW Ohio in 2002. I am currently living in NW Ohio with my husband and three Bombay cats.  I love to read (mystery, science fiction, history) and stitch (have done crewel, currently experimenting with free embroidery and needlepoint but blackwork and cross stitch are my main genres); have been known to knit; and now I'm heavily into papercrafting!
    Retired upon the return to the US so lots of time for our hobbies...

    Archives

    June 2023
    January 2022
    October 2021
    December 2020
    November 2020
    October 2020
    September 2020
    August 2020
    July 2020
    June 2020
    May 2020
    April 2020
    March 2020
    February 2020
    January 2020
    December 2019
    November 2019
    October 2019
    September 2019
    August 2019
    July 2019
    June 2019
    May 2019
    April 2019
    March 2019
    February 2019
    January 2019
    December 2018
    November 2018
    October 2018
    September 2018
    August 2018
    July 2018
    June 2018
    May 2018
    April 2018
    March 2018
    February 2018
    January 2018
    December 2017
    November 2017
    October 2017
    September 2017
    August 2017
    July 2017
    June 2017
    May 2017
    April 2017
    March 2017
    February 2017
    January 2017
    December 2016
    November 2016
    October 2016
    September 2016
    August 2016
    July 2016
    June 2016
    May 2016
    April 2016
    March 2016
    February 2016
    January 2016
    December 2015
    November 2015
    October 2015
    September 2015
    August 2015
    July 2015
    June 2015
    May 2015
    April 2015
    March 2015
    February 2015
    January 2015
    December 2014
    November 2014
    October 2014
    September 2014
    August 2014
    July 2014
    June 2014
    May 2014
    April 2014

    Categories

    All
    12 Tags Of 2015
    12 Tags Of 2016
    2018 Craft Space Clean-up
    All About ATCs
    Altenew
    Altenew Academy
    Art Swap
    Christmas Project
    Club Posh
    Compendium Of Curiosities
    Create 2014
    Create 2017
    Creative Carte Blacnhe
    Creative Chemistry 101
    Creative Chemistry 102
    Creative Chemistry 103
    Dina Wakely
    Dyan Reaveley
    Ellen Hutson
    Frilly & Funky
    Funkie Junkie Style
    Graphic 45
    Guest Designer
    Hero Arts
    #hipforsummer
    #holtzforhalloween
    #holtzfortheholidays
    Honey Bee
    InkRoad
    #Jennifer Mcguire
    Just Playing Around
    Lindy's Stamp Gang
    More Than Words
    OnLIne Card Class
    Seven Hills
    #sharewithsizzix
    Simon Says Stamp
    Stamptember
    Summer Of Creative Chemistry 2016
    Sunday Stamper
    Tim Holtz Kits
    WOW!

    RSS Feed

    Picture
    Picture
    Picture
    PAST PARTICIPATION

    Picture
    Picture
    Picture
    Picture
    Picture
    CHALLENGE BLOGS
    Simon Says Stamp Monday Challenge Blog
    Picture
    Picture
    Picture

    So proud!

    Picture
    for my August 2015 tag!
    for my entry into "Author, Author". October 5, 2016
 honored to be asked to be guest designer for Simon Says Stamp Monday Challenge, September 2017

for my entry in the Frilly and Funkie November 22, 2017 Challenge: Give Thanks
for my entry in the Frilly and Funkie December 9, 2017 Challenge: Most Memorable Gift
for my entry in the Funkie Junkie Boutique Blog Challenge, August 14, 2019 "Let’s Do It Again"

Online Card Classes

Picture
Picture
Proudly powered by Weebly