Carol Stamps
  • Carol Stamps
  • Compendium of Curiosisties 3 Challenge - Gallery
  • Tim Holtz
    • 12 Tags of ...
    • Creative Chemistry 101
    • Creative Chemistry 102
    • Creative Chemistry 103
    • Summer of Creative Chemistry 2016
    • #hipforsummer 2017
    • #sharewithsizzix
    • #holtzforhalloween
    • #holtzfortheholidays
    • Share-a-Scare
    • Tim Holtz Christmas photo holder
  • Simon Says Stamp Challenges
    • Simon Says Create
  • Frilly and Funkie Challenges
  • Sunday Stamper
  • More Than Words
  • Creative Carte Blanche
  • Altenew
  • Seven Hills
  • Hero Arts
  • WOW! Embossing Powder
  • Graphic 45
  • Dyan Reaveley classes, 2015
  • Marjie Kemper Classes
  • OnLine Card Class
  • Just playing around
    • Art Swaps
    • Club Posh
    • Stencil Girl
    • Ranger Kits
    • Stamptember
  • Lindy's Stamp Gang
  • WOW! Challenges
  • Ellen Huston
  • Virginia's View Challenge
  • Marjie Kemper classes

Just Playin' - with Backgrounds

6/30/2018

0 Comments

 
Jennifer McGuire had a tutorial on her blog abut ways to use background stamps and I thought I'd try a couple with the limited number of background stamps I have.

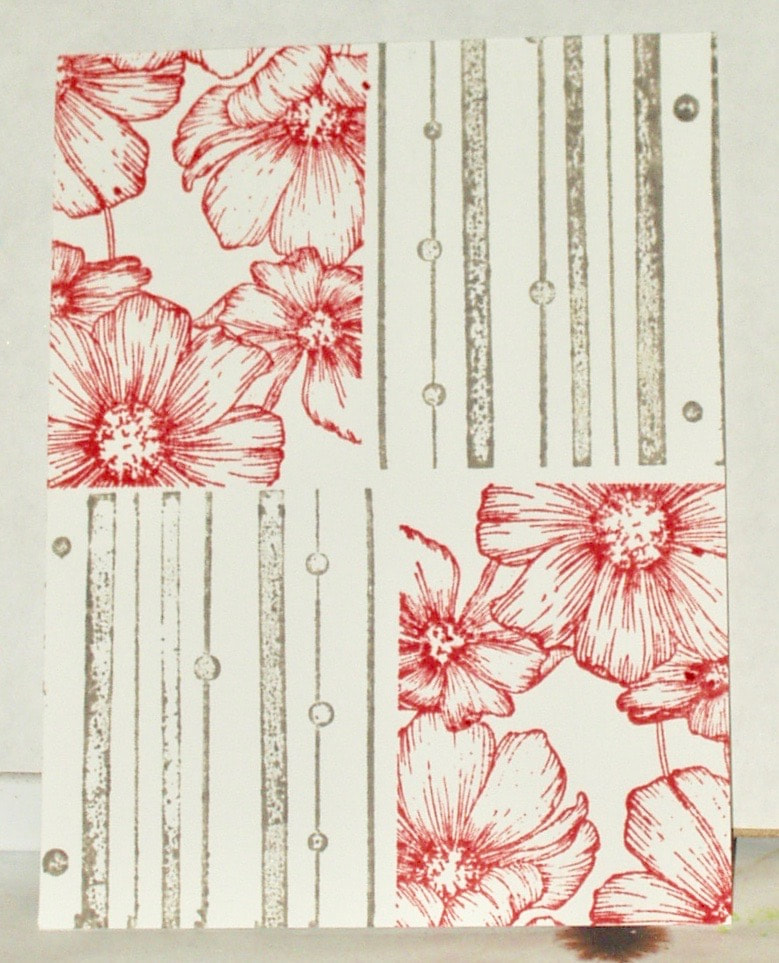
The first technique I tried were using a 4.15 x 5.5" piece of Neena solar white, dividing it into quadrants, and then using background stamps on the reverse side to create a totally different look from that using a single stamp! I made 2 versions, using different inks and different stamps:
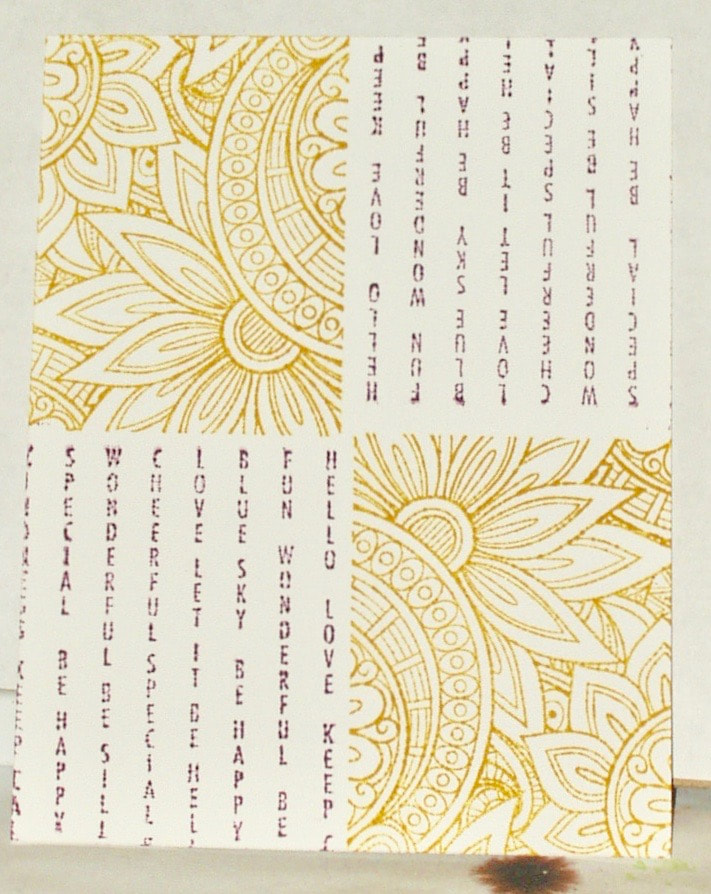
The stamp-ink combination on the left is Distress Ink "Seedless Preserves" with a Hero Arts "Keep Calm" background stamp and Distress Ink "Fossilized Amber" with a Simon Says Stamp "Ornate Background". The stamp-ink combination on the right is Distress Ink "Pumice Stone" with a Hero Arts "Dots and Stripes" background stamp and Distress Ink  "Abandoned Coral" with a Simon Says Stamp "Cosmos Background" stamp.

I simply laid the stamps down face up on my desk-top, inked a corner and placed the paper on top and rubbed the paper to get the image. 
The "Dots and Stripes stamp was new and clearly not "conditioned" as the Pumice Stone ink beaded up and didn't give full coverage. I can see that using a stamping platform might have been beneficial here  -

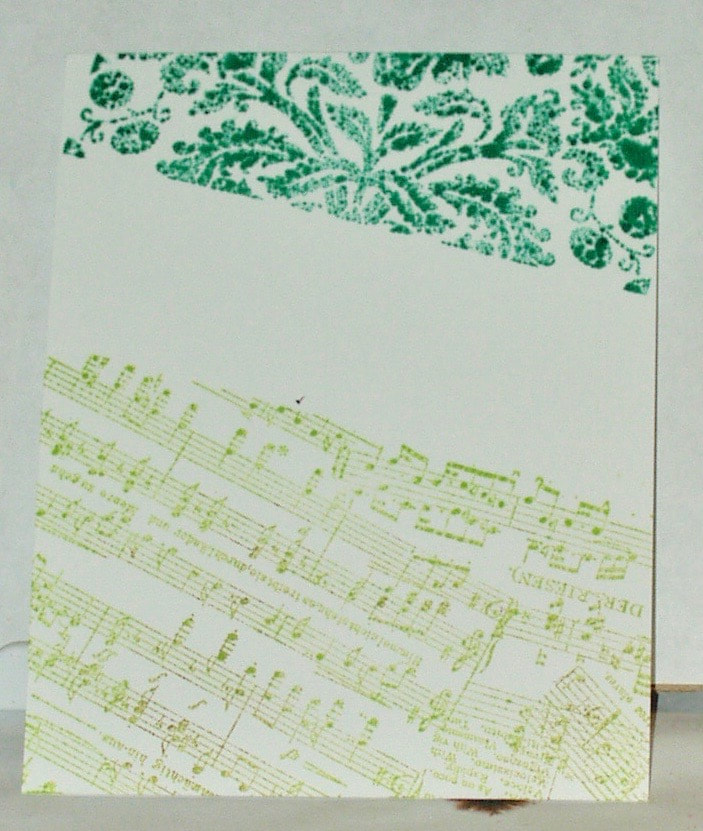
From the same blog post, Jennifer demonstrated how to make a background that allows for insertion of a sentiment on a single layer card:
Picture
The stamp-ink combination was Distress Ink "Lucky Clover" with Hero Arts "Classic Fabric Design" and Distress Ink "Twisted Citron" with Stampendous "Decor Music" stamp. ("Classic Fabric design" was another stamp where the ink beaded up on the surface and gave a blotchy result.)

In a completely different post, Jennifer showed several ways how to use the new 3D Embossing folders from Tim Holts to create backgrounds. I only have one of these folders at present so I tried to use a couple of the techniques she described but on one background. I started with a scrap of purple Bazzil cardstock: 
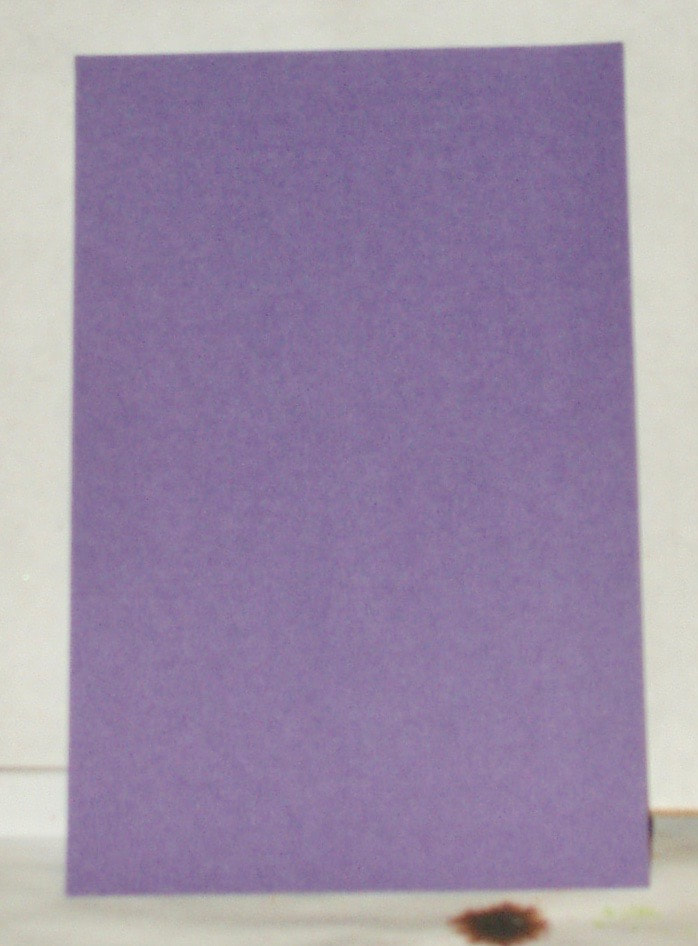
Picture
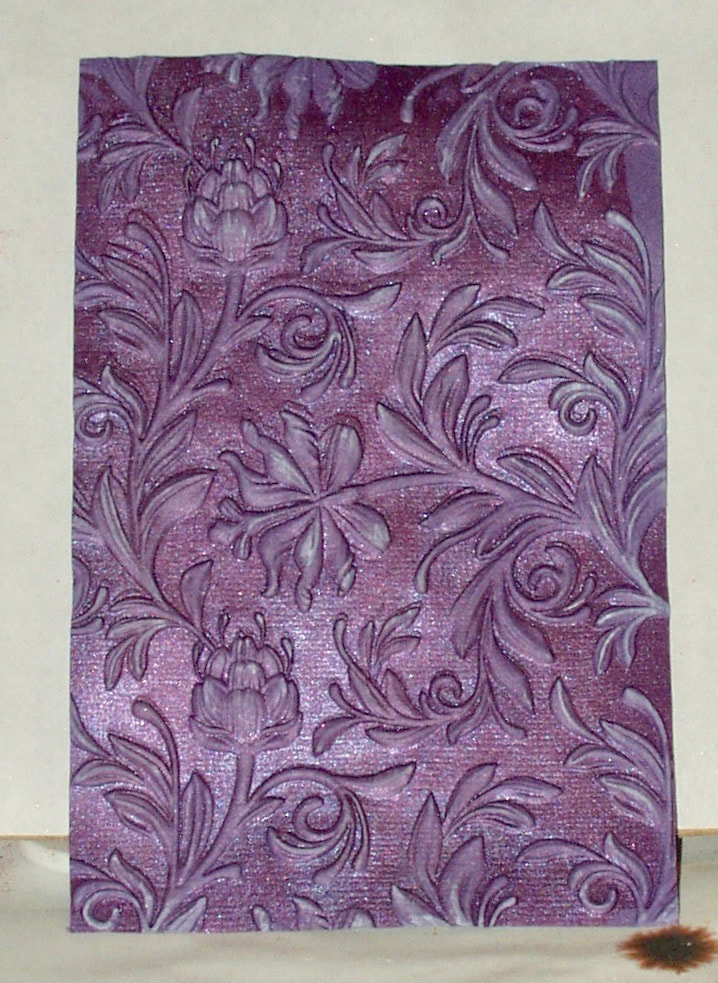
and, after lightly misting it with water (she didn't say to do this but the folder's instructions recommend it), used the "Botanical" folder which I had previously smeared with Distress Ink "Seedless Preserves. After embossing, I dusted the car with Perfect Pearls "Forever Violet" and the lightly rubbed the embossed features with a Distress Ink "Picket Fence" ink pad:
Picture
I had to run this through my Big Shot twice because somehow, I had inked the wrong side of the embossing folder the first time. Also, there is one bit of the embossing folder I clearly missed with the ink (upper right corner) and there were some paper "punctures" (for want of a better word) in some of the smaller features of the artichoke-like bloom in the upper left (cardstock not wet enough, or maybe that second time was too much for the paper?) but otherwise, this worked nicely fo me...

I will work on card ideas for these and maybe even try some of the other techniques Jennifer demonstrated at some future date (I do so enjoy her videos!).

Products used in today's experimentation were:
  • Stamps: Hero Arts "Keep Calm" (CG512), "Dots and Stripes (CG150) and "Classic Fabirc Design" (CG245); Simon Says Stamp "Ornate Background" (SSS01763) and "Cosmos Background" (SSS 101802); and Stampendous "Decor Music" (DCR 105)
  • Embossing Folders: Sizzix "Botanical 3D" (662716)
  • Inks: Distress Inks "Seedless Preserves", "Fossilized Amber", "Abandoned Coral", "Pumice Stone", "Lucky Clover", "Twisted Citron" and "Picket Fence"; Perfect Pearls "Forever Violet" 
  • Papers: Neena "Solar White"; Bazzill purple
0 Comments

Just Playin' - with stencils

6/29/2018

0 Comments

 
In the last week, I have received two different purchases from Stencil Girl: the monthly Stencil Club trio of stencils and a WHOLE bunch of other stencils by different designers. Time to play...

I pulled some different colored card stock and made card blanks, selected a few stencils from different designers,  and then made backgrounds.

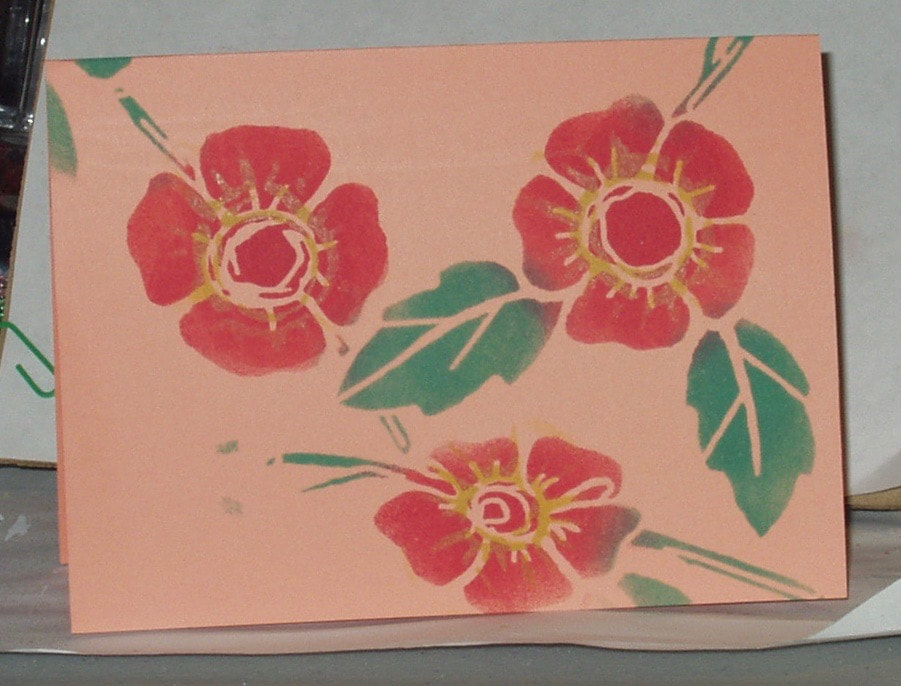
This first background, on coral card, used the large and medium StencilClub stencils for June 2018, "Rosie 'O" designed by
Desiree Habicht. I used a Tim Holtz Blending tool and three Distress Oxide Inks: "Lucky Clover" and "Candied Apple" through the larger stencil and "Fossilized Amber" through the medium one:
Picture
In my opinion, the "Fossilized Amber" was a fail --- not enough contrast with the underlying "Candied Apple" OR the coral card...

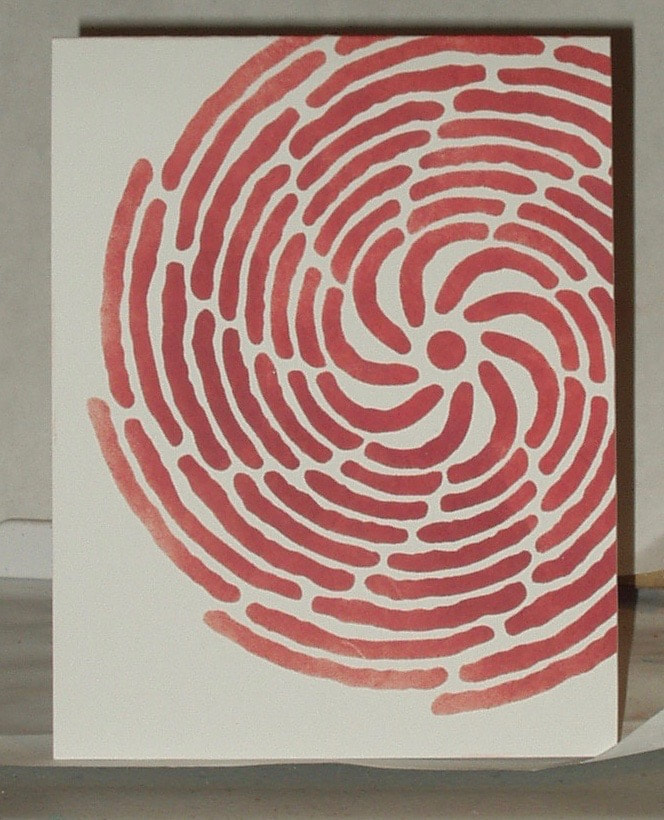
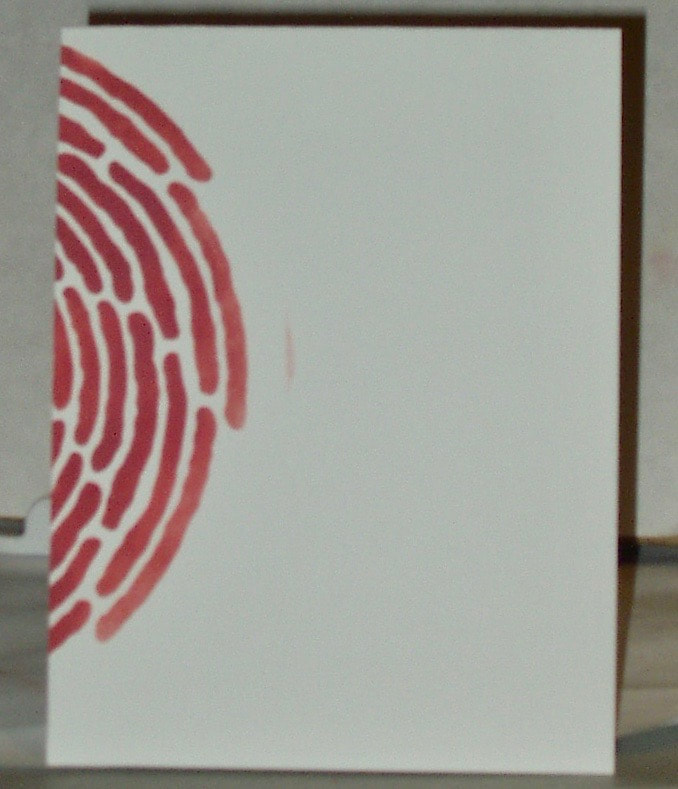
The second and third card bases used and 8.5 x 11 sheet of  Neena Solar White card. I used a blending tool and Distress Oxide "Fired Brick" through a medium mandala stencil "Spiral Petals" designed by Krista Taylor. I then cut the sheet in half to form two top-folding card bases:
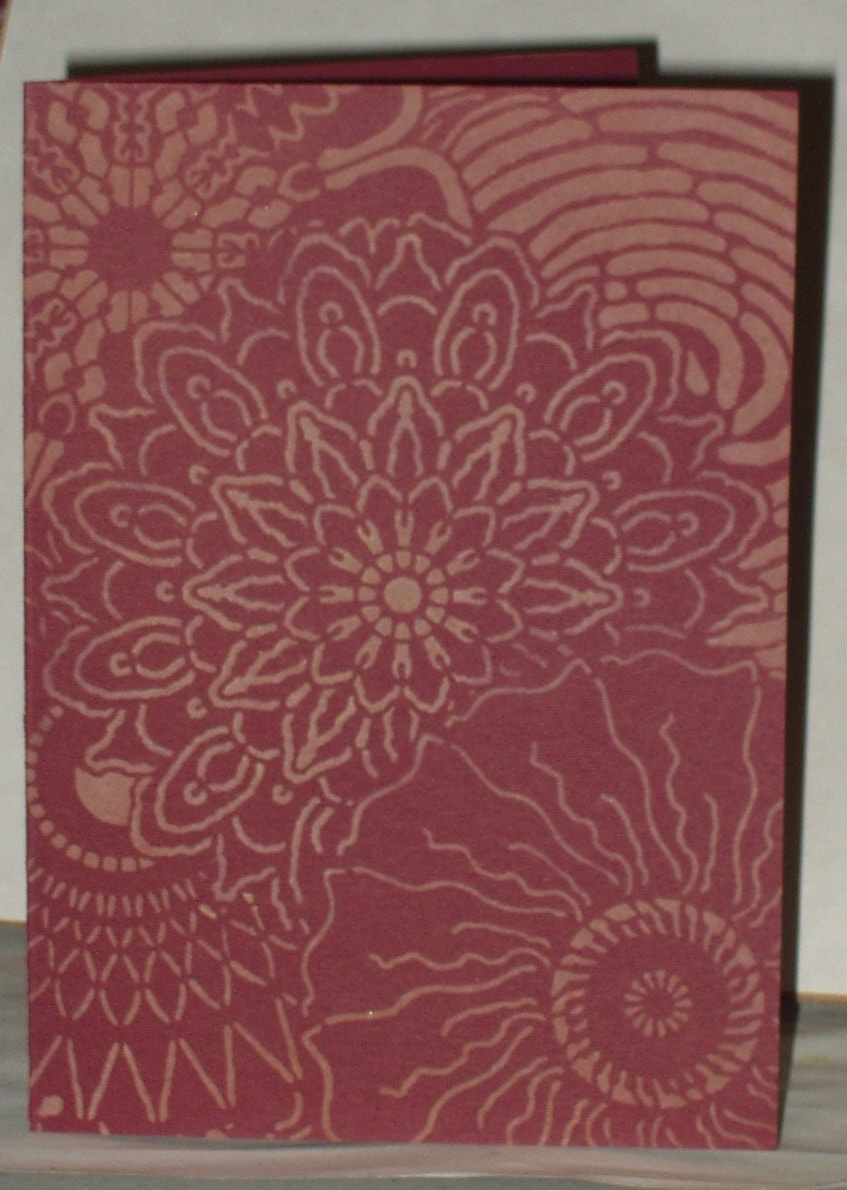
Card base #4 used burgundy card, Distress Oxides "Wild Honey" and "Spiced Marmalade" and a large mandala stencil "Floral Mandala Lace" by Krista Taylor:
Picture
Can't make out the difference in the two inks here...an experiment that didn't live up to expectations! But the background is muted enough to make a good card, given the right design...

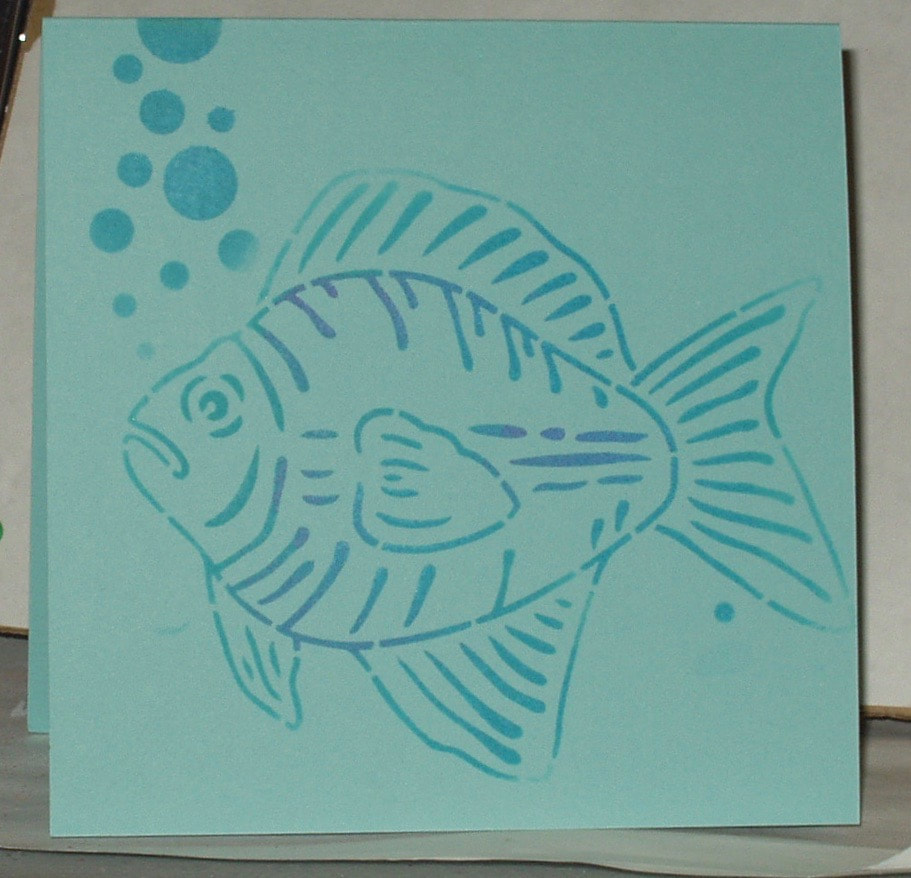
The last background used a square blue card and a large Boho Fish stencil designed by LeFeur. The inks were "Broken China”, “Mermaid Lagoon”, “Salty Ocean” and “Wilted Violet":
Picture
Again, the difference in the colors wasn't enough to show up. And this fish really doesn't stand up well "on his own" for a card but he wouldn't make a good background either. Maybe randomly stamped in a mixed media piece? Or layered in some way... or embossed?

​Things I would do differently in future?
  • ​1. Use blending brushes and, in some cases, mini blenders for the finer details and crisper edges.
  • 2. Select bolder colors that are different enough from each other to show up on the card, especially on darker card stock like the burgundy and the blue.
  • 3. Select different inks - the Distress Oxides blend smoothly but I would like the ability to stencil over them with inks that are more opaque. Try Archival Inks. Try Pigment inks. Try Vesamark or embossing pens and heat embossing....

Products used in the making of these backgrounds were:
  • Stencils: Stencil Girl Stencil Club stencils large and small “Rosie ‘O” by Desiree Habicht (SC-06-2018), “Spiral Petals” (S631 by Krista Taylor), “Floral Mandala Lace” (L646 by Krista Taylor), and "Boho Fish" (L630 by Gwen LaFleur)  
  • Inks: Distress Osixes “Lucky Clover”, “Candied Apple”, “Fossilized Amber”, “Fired Brick”, “Wild Honey”, “Spiced Marmalade”, “Broken China”, “Mermaid Lagoon”, “Salty Ocean” and “Wilted Violet”
  • Papers: Coral, Neena Solar White, Burgundy and Blue  card bases


0 Comments

Challenge: The Great Outdoors

6/27/2018

0 Comments

 
The great outdoors is the subject of the Work It Wednesday Challenge for June 2018 over on the Simon says Stamp blog. 

Now the "great outdoors" isn't necessarily my favorite thing. I enjoy the scenery at some of our best parks and gardens but I prefer to sit and look;  I am not an outdoors woman by any means. I don't hike, camp or garden; I don't hunt or fish. SO this was a challenge that had to have little to do with my life!

Well, it just so happens that the latest issue of Cardmaking & Paoercraft Magazine (June ,2018, Issue 193) had this cute little 3-D camper designed by Sue Hughes on pages 78-79 (with a downloadable template on line) and I had been thinking of trying to make one and this challenge seemed to fit!

I printed out the template, scribbled soft pencil on teh back and traced it to the back of a 12 x 12 sheet of silver cardstock. 

I cut out he basic camper shaper, created some decorative siding, and added tires, tissue windows and a free-handed bright blue arched door to decorate it. (the example in the magazine was bit more flowery and brightly colored but I was going for the classic "airstream" look on my camper):
It's not road-ready yet (needs tail light and a license plate on the back, for example) and it is a little rough due to my method of transferring the template to the card stock (my printer won't take card stock, let alone such a large piece of card stock) and having to cut it from card sock and paper using a craft knife and scissors (I am NOT a good fussy cutter when things have to be PRECISE!). 
Picture
a little rough around the seams...
Products used in the making of this mini camper were:
  • Papers: Accent Design Glossy Silver Cardstock (ADP 1212-25-808); Authentique 6x6 "Abroad" paper pack (ABR014), scraps of blue and white card and white tissue paper
  • Adhesives: Wendy Vecchi "Perfect Card Adhesive" (WVA62134); RedLine 1/8" Embossing Tape

P.S. Edited to add: I just couldn't' leave this little camper in violation of rules of the road so I made it road-worthy. I added a license plate and two taillights... so additional product used were Hero Arts clear gems, colored with a comic marker "Strong red"

Picture
0 Comments

Challenge: Anything Goes with W + 9

6/27/2018

1 Comment

 
The challenge for June 27, 2018 over at Simon Says Stamp Wednesday is "Anything Goes" and they are featuring W Plus 9 products.

I started with a cream card, a W Plus 9 stamp set ("Autumn Leaves"), and Archival "Vivid Chartreuse" ink:
Picture
I smooshed Vivid Chartreuse ink on my craft surface and used a water brush to add some dimension to the leaves:
Picture
I die-cut some chartreuse and olive card stock scraps (run through my Xyton 500 sticker maker)  with Sizzix "Shadow Script" dies to finish this card:
Picture
Since today is our 54th wedding anniversary, I gave this card to my husband...
Products used in the making of this card were:
  • Stamps: W Plus 9 "Autumn Leaves" set
  • Dies: Sizix Thinlits "Shadow Script #1) (662684)
  • Inks: Archival "Vivid Chartreuse"
  • Papers: JoAnn CraftEssentials Textural Solid Cards "cream" (22606)
  • Adhesives: Xyron 500 sticker maker
1 Comment

Mini-Challenge: "World"

6/26/2018

0 Comments

 
The "mini" challenge for June, 2018 at More than Words is to create a card, post card, tag or ATC that prominently displays the word "World". 

I started with a layering stamp set of the Earth from Altenew, using three shades of blue for the oceans, one yellow shade for the desert areas, four shades of green for the vegetation, and white embossing powder for the Northern climes and snowcapped mountains.

Next, I heat embossed a globe stand in silver

Then I heat embossed a sentiment in black and stamped an ombre word "World" in blue and green.

Finally, I mounted the panel on a pre-folded notecard in a color matching the yellow ink used on the globe:
Picture
The products used in making this one-layered card were:
  • Stamps: Altenew "Big World" set
  • Inks: Distress Oxide "Salty Ocean", "Peacock Feathers", "Faded Jeans", "Peeled Paint", "Cracked Pistachio", "Bundled Sale", "Lucky Clover", and "Fossilized Amber; Versamark; Ranger Emboss-It pen "clear"
  • Embossing Powders: To Boss "white" and "Silver; JoAnn CraftEssentials "black"
  • Papers: Neena Solar White; JoAnn CraftEssentials Textured Solid Cards "cream" (27606)
  • Adhesives: RedLine 1/8" Embossing Tape

0 Comments

Challenge: Food and/or Drink

6/25/2018

1 Comment

 
Simon Says Stamp Monday Challenge Blog has food and drink on their minds for June 24, 2018!

While so many of the design team focused on the drink aspect of tehe challenge, I decided to try to do a food piece instead. I found an old wood-mounted PSX stamp in my collection and decided to go with pears!

I stamped the image in Archival "Jet Black" and trimmed the image to fit a notecard front. I colored in the image using Zig  Clean Color Brush Pens and a water bush to blend:

Picture
I mounted the image on a pre-folded earth-toned card base and added a die cut word and an Idea-ology ChitChat sticker to complete my card:
Picture
Products used in making this card were:

  • Stamps: PSX “Pyrus communis” (K-3133)
  • Dies: Sizzix Thinlits “Vacation Words - script) (661288)
  • Inks: Archival “Jet Black”; Zig Clean Color Brush Pens “Pink” (025),  “Green” (040), “May Green” (047), “Green Shadow” (049), “Yellow” (050), “Ochre” (063); “Oatmeal” (064, and “Platinum Brown” (903)
  • Papers: Neena Solar White; Die Cut With A View Card Stack “Earth” (CM-012-00005); scrap of dark brown card
  • Embellishments: Idea-ology “Chit Chat - Seasonal” (TH93050)
  • Adhesives: RedLine 1/8” Embossing Tape; Xyron 500 sticker maker
1 Comment

Challenge: By Air Mail

6/24/2018

4 Comments

 
One of the design team members for Frilly and Funkie Challenge Blog "just loves sending and receiving letters in the mail. And especially love[s] the stamps, airmail stickers and postmarks that these letters pick up along the way." So for the challenge issued on June 20, 2018, we are to "create a vintage or shabby chic postal themed project. Think old fashioned aircraft, airmail stamps, post marks, postage stamps." 

I had an idea so I searched my paper and ephemera stashes for air-mail-related items. I was partially successful but there wasn't an air mail envelope to be found in craft space or office. So I had to make one...

I started with a small white envelope and, using a stencil and Distress Markers, created the classic red-and-blue chevron pattern on the edges of the envelope. I didn't do the entire envelope as I knew it was too large for a tag or card front and so would be cut down anyway...
Picture
Using a Graphic 45 sticker, a Stampers Anonymous stamp and Archival "Watering Can" ink, I "stamped" and "post-marked" the envelope. I added an Idea-ology "snippet" air-mail sticker (we were also out of postal service issued "Par Avion" stickers as well - Note to self, ask for more at the post office!)
Picture
Now for the tag background for the envelope. 

I never throw away those envelopes you get in solicitations, reusing them as needed. Some have patterned inserts so I stripped them open to create potential background collage papers:
Picture
I cut slices of these envelopes, trimmed them and glued them to a tag face. I also cut a section of Idea-ology 8x8 "Etcetera" papers to complete the background:
Picture
My next step was to "age" both tag and envelope by blending "Vintage Photo" Distress Ink around the edges. I "addressed" the envelope, again using a Distress Marker, attached it to the tag, and trimmed it to fit:
Picture
totally fictitious address!
Time to finish the tag. I die cut a sentiment, added a "Chit Chat" sticker to complete the sentiment (do YOU remember when air mail cost 5 cents?), and attached a "Muse Token" to a strip of crinkle ribbon that was dyed in the appropriate air mail colors:
Picture
Products used in the creation of this tag were:

  • Stamps: Stampers Anonymous “Paris to London” (CMS160)
  • Stencils: Stampers Anonymous Layering Stencil “Chevron” (THS024)
  • Dies: Sizzix Thinlits “Friendship Words - Script” (660225)
  • Inks: Distress Markers “Festive Berries”, “Blueprint Sketch”, “Faded Jeans” and “Black Soot”; Distress Ink “Vintage Photo”; Archival Ink “Watering Can”
  • Papers: six business envelopes and one small white envelope; black cardstock; Grahic45 “Large Black Tag Album” (4500982); Idea-ology 8 x 8 Paper Stash “Etcetera” (TH93551)
  • Embellishments: Idea-ology Ephemera Pack “Snippets” (TH93564), ChitChat” stickers (TH92998), and “Muse Tokens” (TH92679);  Graphic 45 sticker sheet “French Country” collection; Crinkle Ribbon freebie from Funkie Junkie
  • Adhesives: Wendy Vecchi “Perfect Card Adhesive” (WVA62134); RedLine 1/8” Embossing Tape; Xyron 250 sticker maker
4 Comments

Challenge: Bright and Cheerful

6/24/2018

1 Comment

 
Last week, I experimented with using sprays and stencils for a card and I liked the result so much that, when Simon says Stamp Wednesday came up with a "Bright and Cheerful" challenge on June 20, 2018, I decided to try it again.

Sadly, I didn't have the same success so this card took several attempts and several discards before I came up with a background I could work with. Still not perfect (the stencils I used clearly needed some sort of reposition adhesive on the back to prevent bleed through - note to  self, see if you can locate some!) but the worst blobs were such that strategic placement of embellishments would hide them.

I started with a card base made from Neena Solar White and a layered mandala stencil set from Birch Press. Each stencil layers was used with a different Lindy's Gang spray and the card was dried between sprayings:
Picture
The sentiment was made by stacking three each of the layers from a shadow die set. A strategic placement of green sequins finished the card. I layered the card base on a cheddar-yellow top-folding card::
Picture
Products used in the making of this card were:

  • Stencils: Birch Press “Mandala” set
  • Dies: Sizzix Thinlits “Shadow Script #2” (662685)
  • Inks: Lindy’s Gang Starburst Sprays “Bells of Ireland Green”, “Yellow Rose of Texas” and “Shabby Turbine Teal”; Lindy’s Gang Flat Fabio Spay “Raspberry Lemonade"
  • Papers: Neena Solar White; cheddar yellow card base; scraps of white shimmer and black cardstock
  • Embellishments: Idea-ology “Chit Chat” stickers (TH92998); Neat & Tangled green sequins
  • Adhesives: Xyron 500 sticker maker; Wendy Vecchi’s “Perfect Card Adhesive” (WVA62134); redLine 1/8” Embossing Tape
1 Comment

Challenge: Transport It

6/18/2018

1 Comment

 
Planes, trains, automobiles, boats, bicycles, hot air balloons,... All of these and more (like containers, pouches, envelopes and other items used to transport things) were on the minds of the design team at Simon Says Stamp Monday for their challenge for June 18, 2018!

​And it just so happened that my Cardmaking & Papercraft magazine (Issue 183, June 2018) arrived this weekend with a cover stamp/embossing folder set that included...a bicycle!

Perfect!


This set consisted of several stamps including bicycle parts to layer and various items to accessorize   I decided to get out my MISTI and play and came up with a one-layer card that fits a transportation vehicle version of the challenge.

​I started by stamping the bicycle frame in red and then added necessities (like gears, wheels, handlebars, pedals   seat and more) in black and silver. I attached a brown basket to the handlebars and filled this basket with a bouquet of flowers. A balloon attached to the rear fender completed my method of transportation. A little scribble to ground my bicycle and a sentiment completed my card:
Picture
Products used in the making of this card were:

  • Stamps: Jennifer Ellory cover set for Cardmaking & Papercraft
  • Inks: Archival: “Carnation Red”, “Watering Can”, “Jet Black”, “Coffee”, “Pink Peony”, “Chrome Yellow”, and “Vivid Chartreuse”; Distress Markers “Festive Berries”, “Candied Apple”, “Fired Brick”, “Pumice Stone”, “Twisted Citron”, “Mustard Seed”, “Picked Raspberry”, and “Black Soot”; Signo Uniball 1.0 “silver” gel pen
  • Papers: JoAnn Textured Cards “cream”
1 Comment

Challenge: Color Inspiration for June

6/17/2018

1 Comment

 
The LIndy's Stamp Gang challenge for the month os June 2018 uses the following color palette:
Picture
For once, I had most of the colors recommended but I decided to go easy on the entry, by limiting my palette to pink,  green and yellow-gold.

I started by spraying a Starburst Spray through a stencil - the first time I have ever tried it and it worked! So I pulled a second stencil and tried a different Starburst Spray over the first:
To add some texture, I used a paint brush and dripped a third Starburst Spray over the card face
Picture
Next, I took some white paper layering flowers and painted them with Lindy's Flat Fabio "Raspberry Lemonade" and let them dry. Once dry, I assembled the flowers using brads:
Picture
I picked one of the flowers with a green center and added some "Raspberry Lemonade" embossing powder to the petals...
Picture
I heat embossed a sentiment and adhered the flower to the center of the stenciled images:
Picture
Products used in the making of this card were:
  • Stamps: Ranger stamps RA-ACCES-8144 from the  LetterIt "Embossing Technique" Kit (LEK 59387)
  • Stencils: ALtenew "Leaf Burst" (ALT 2192) and "Warp Speed" (ALT 2195)
  • Inks: Lindy's Gang Starburst Sprays "Bells of Ireland Green", "Yellow Rose of Texas" and "Peony Scarlet Red"; Lindy's Flat Fabio Spray "Raspberry Lemonade"; Lindy's Gang Embossing Powders "Raspberry Lemonade" and "Ghouly Goblin Green"; Versamarker Watermark Pen; Versamark
  • Papers: cream-colored cardstock
  • Embellishments: Petaloo "Color Me Crazy" Medium Layers (1546-000); Hot Off The Press "Citrus" brads (7257)
1 Comment
<<Previous

    Author

    Born in New Jersey, I grew up in Southeastern Ohio. Attended university at Bowling Green State University (B.Sci  in biological science, 1964), University of Southern California (M. Sci in biological science, 1967) and University of Florida (Ph. D in zoology, 1971).
    Worked in environmental consulting for a little more than a decade and then seven years as an instructor in biological science at various community colleges in California and Texas. Moved to London in 1992, then Beijing (1996) and Saudi Arabia (1998), before returning to NW Ohio in 2002. I am currently living in NW Ohio with my husband and three Bombay cats.  I love to read (mystery, science fiction, history) and stitch (have done crewel, currently experimenting with free embroidery and needlepoint but blackwork and cross stitch are my main genres); have been known to knit; and now I'm heavily into papercrafting!
    Retired upon the return to the US so lots of time for our hobbies...

    Archives

    June 2023
    January 2022
    October 2021
    December 2020
    November 2020
    October 2020
    September 2020
    August 2020
    July 2020
    June 2020
    May 2020
    April 2020
    March 2020
    February 2020
    January 2020
    December 2019
    November 2019
    October 2019
    September 2019
    August 2019
    July 2019
    June 2019
    May 2019
    April 2019
    March 2019
    February 2019
    January 2019
    December 2018
    November 2018
    October 2018
    September 2018
    August 2018
    July 2018
    June 2018
    May 2018
    April 2018
    March 2018
    February 2018
    January 2018
    December 2017
    November 2017
    October 2017
    September 2017
    August 2017
    July 2017
    June 2017
    May 2017
    April 2017
    March 2017
    February 2017
    January 2017
    December 2016
    November 2016
    October 2016
    September 2016
    August 2016
    July 2016
    June 2016
    May 2016
    April 2016
    March 2016
    February 2016
    January 2016
    December 2015
    November 2015
    October 2015
    September 2015
    August 2015
    July 2015
    June 2015
    May 2015
    April 2015
    March 2015
    February 2015
    January 2015
    December 2014
    November 2014
    October 2014
    September 2014
    August 2014
    July 2014
    June 2014
    May 2014
    April 2014

    Categories

    All
    12 Tags Of 2015
    12 Tags Of 2016
    2018 Craft Space Clean-up
    All About ATCs
    Altenew
    Altenew Academy
    Art Swap
    Christmas Project
    Club Posh
    Compendium Of Curiosities
    Create 2014
    Create 2017
    Creative Carte Blacnhe
    Creative Chemistry 101
    Creative Chemistry 102
    Creative Chemistry 103
    Dina Wakely
    Dyan Reaveley
    Ellen Hutson
    Frilly & Funky
    Funkie Junkie Style
    Graphic 45
    Guest Designer
    Hero Arts
    #hipforsummer
    #holtzforhalloween
    #holtzfortheholidays
    Honey Bee
    InkRoad
    #Jennifer Mcguire
    Just Playing Around
    Lindy's Stamp Gang
    More Than Words
    OnLIne Card Class
    Seven Hills
    #sharewithsizzix
    Simon Says Stamp
    Stamptember
    Summer Of Creative Chemistry 2016
    Sunday Stamper
    Tim Holtz Kits
    WOW!

    RSS Feed
    Picture
    Picture
    Picture
    PAST PARTICIPATION

    Picture
    Picture
    Picture
    Picture
    Picture
    CHALLENGE BLOGS
    Simon Says Stamp Monday Challenge Blog
    Picture
    Picture
    Picture

    So proud!

    Picture
    for my August 2015 tag!
    for my entry into "Author, Author". October 5, 2016
 honored to be asked to be guest designer for Simon Says Stamp Monday Challenge, September 2017

for my entry in the Frilly and Funkie November 22, 2017 Challenge: Give Thanks
for my entry in the Frilly and Funkie December 9, 2017 Challenge: Most Memorable Gift
for my entry in the Funkie Junkie Boutique Blog Challenge, August 14, 2019 "Let’s Do It Again"

Online Card Classes

Picture
Picture
Proudly powered by Weebly