Carol Stamps
  • Carol Stamps
  • Compendium of Curiosisties 3 Challenge - Gallery
  • Tim Holtz
    • 12 Tags of ...
    • Creative Chemistry 101
    • Creative Chemistry 102
    • Creative Chemistry 103
    • Summer of Creative Chemistry 2016
    • #hipforsummer 2017
    • #sharewithsizzix
    • #holtzforhalloween
    • #holtzfortheholidays
    • Share-a-Scare
    • Tim Holtz Christmas photo holder
  • Simon Says Stamp Challenges
    • Simon Says Create
  • Frilly and Funkie Challenges
  • Sunday Stamper
  • More Than Words
  • Creative Carte Blanche
  • Altenew
  • Seven Hills
  • Hero Arts
  • WOW! Embossing Powder
  • Graphic 45
  • Dyan Reaveley classes, 2015
  • Marjie Kemper Classes
  • OnLine Card Class
  • Just playing around
    • Art Swaps
    • Club Posh
    • Stencil Girl
    • Ranger Kits
    • Stamptember
  • Lindy's Stamp Gang
  • WOW! Challenges
  • Ellen Huston
  • Virginia's View Challenge
  • Marjie Kemper classes

Holtz For Halloween no. 11, #holtzforhalloween

10/5/2017

0 Comments

 
Sizzix has issued a challenge for the weeks through October 22, 2017 called "Holtz for Halloween". All one has to do is use Tim Holtz's Falloween Collection products in our make and post on a social media site using the hashtag #holtzforhalloween! Winners will be chosen weekly... 

The "Cobweb" die arrived yesterday in the mail and I decided to try it out. I had delayed for weeks on ordering it, even though I know it is a die I could use in many ways, but my hesitation was due to the fiddly details i the die which I have found in the past means I spend more time picking out the little cut pieces (and scraping them off my desk top and my hands and arms) because, no matter how many shims I use, they will NOT cut all the way through a piece of carstock that has already been run through my sticker machine... and there is no way something this detailed would survive being run through that machine AFTER being cut. And I was right abut  this one too! Took me ages to pick out the web from the surrounding paper...

Anyway, I die-cut it, and inked it, and applied it to a card, added a heat-embossed "resident" and a caption that reflects most people's reaction to that kind of "resident" (not me so much since I am am married to a person who did his PhD dissertation on two species of spider... and we had a "pet" Mexican red-legged tarantula for nearly five years!).

Picture
Products used in the making of this card were:
  • Stamps: ZumGaliGali item No. 01262
  • Inks: Versamark
  • Embossing Powders: Comotion Clear Top "Glowing S[ring Green" (161164)
  • Papers: Scraps of dark red, black and orange card
  • Adhesives: Xyron 500 Sticker Maker
0 Comments

Challenge: A Walk on the Dark Side

10/3/2017

1 Comment

 
Simon Says Stamp Monday has a new challenge for October 2, 2017: A Walk on the Dark Side.  We are to use either a all-things-Halloween theme or dark colors in this make, and they are showcasing Tim Holtz products.

I started with the base card, using a pre-folded white card and cuts of metallic and gloss black card:
Picture
It looked a little blank so I framed the gloss black rectangle and added corners to the “merlot” metallic, using Industrious Stickers:
Picture
I didn't take photos for the following stamps:

  • I die-cut an oval from matte black card and adhered part of a “paper doll” which had been tinted with Distress Crayons. I edged the oval with white pen and “Brushed Pewter” Distress Crayon.
  • I die-cut a raven and branch from gloss black card and words from silver card (which I had run through my sticker maker prior to die-cuttig).
  • I edged the “steel” metallic rectangle with “Hickory Smoke” Distress Crayon.

After all this, I attached the oval (using foam squares), the words and the raven to complete my card: 

Picture
Products used in the making of this card were:

  • Dies: Sizzix Thinilts “Stitched Ovals” (661188), “Stitched Rectangles” (661189), “Feather & Ravens” (662376), and “Halloween Words - Script” (660957)
  • Inks: Distress Crayons “Brushed Pewter”, “Hickory Smoke”, “Twisted Citron” and “Aged Mahogany”; Signo Uniball broad “white” pen
  • Papers: Paper Reflections Greeting Cards “white” (GRC02116); Wausar Paper Metallic Cardstock Collection (46321 - “Excalibur Steel”, “Sparkling Merolt” and “Chalice Silver”); scraps of gloss black card
  • Embellishments: Idea-ology “Paper Dolls” (TH93555) and “Industrious Stickers - Gallery” (TH93199)
  • Adhesives: Redline 1/8” embossing tape; Ranger Collage Glue Stick; black adhesive foam squares; Xyron 500 sticker maker
I’m also entering this in the Sizzix Promotion “Holtz for Halloween”, #holtzforhalloween  
1 Comment

Holtz For Halloween No. 9 - #holtzforhalloween

9/30/2017

0 Comments

 
Sizzix has issued a challenge for the weeks through October 22, 2017 called "Holtz for Halloween". All one has to do is use Tim Holtz's Falloween Collection products in our make and post on a social media site using the hashtag #holtzforhalloween! Winners will be chosen weekly... 

​I also purchased the "scarecrow" set of dies but was wanting to do something OTHER than a sillhouette! I saw a post and project on Instagram made by Lucy Foxwworth where she "paper-pieced" skirts on her two crones in a piece she called "Two Crones Sharing Recipes" and I had an epiphany! Who said that the sillhouette dies HAVE to be black silhouettes? So I paper-pieced the scarecrow! I die cut him five times from five different papers and card stocks, cut them apart and layered them, shading up here and there with Distress Markers and adding a face and shirt buttons witha black pen!
Picture
I used another scrap of card for a background and glued the scarecrow, some blackbirds and a word on it and then the entire piece onto a small pre-folded notecard:
Picture
Products used in the making of this card were:
  • Dies: Sizzix Thinlits "Scarecrow" (662383) and "Vintage Spirits" (662385)
  • Inks: Distress Markers Old Paper", "Fossilized Amber", "Brushed Corduroy", "Vintage Photo", and "Crushed Olive"; Pigma Micron 05 #1 Archival "black" pen
  • Papers: Golden Oaks Paper card "sparkles-silver" (P1043); Stamping' Up! "Bliss Blue"; "Bazzill Basics "Yellow" (two shades); and scraps of patterned scrapbook paper and black and dark blue cardstock
  • Adhesives: RedLine 1/8" embossing tape; Ranger Collage Glue Stick
0 Comments

STAMPtember® - Just Playin'

9/29/2017

1 Comment

 
The month of STAMPtember® is winding down and I thought I'd play a bit with the special releases from Simon Says Stamp and participating brands that I purchased along the way.

 I was intrigued by Laura Bassen's trio of Inspiration cards on the second day of the
STAMPtember® blog hop, and just HAD to buy that stamp set and coordinating stencil ("Grid Play").

I used the set in response to the fourth Simon Says Stamp Monday Challenge for
STAMPtember®: Heavy Metal. But I decided to try various metallic embossing powders instead of color and the stencil instead of stamps to CASE Laura's blue card. 

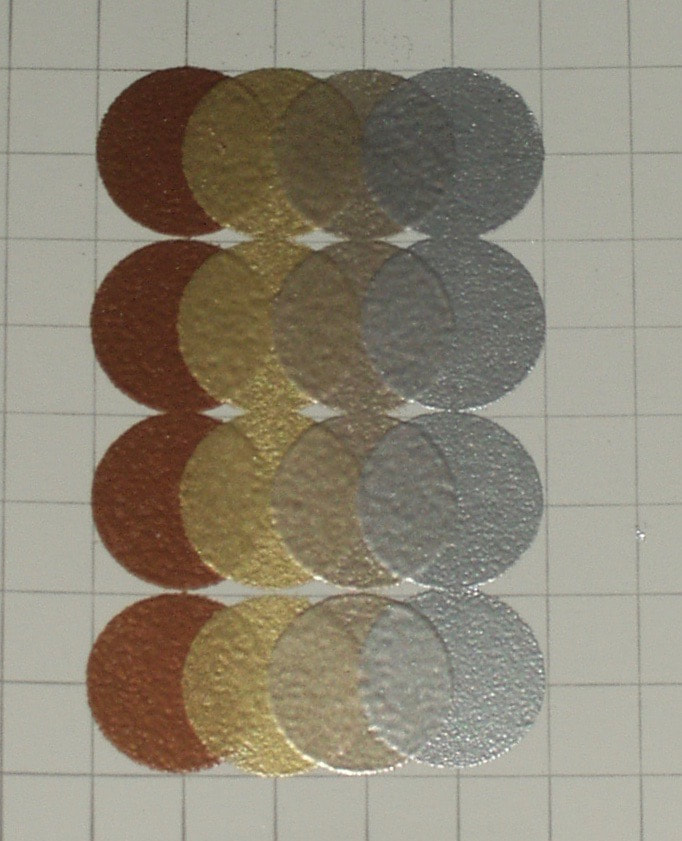
I started with a scrap of Neena “Solar white” card and stamped a grid using Archival Shadow Grey and the Simon Says Stamp new release “Grid Play”. On that grid, I used the “Grid Play” stencil and Versamark to stamp vertical rows of overlapping circles. Each row was heat-embossed with a metallic embossing powder before the next row was stenciled, resulting in a pattern of “Metal” on the grid:
Picture
the metals are, from left to right, copper, gold, platinum and silver
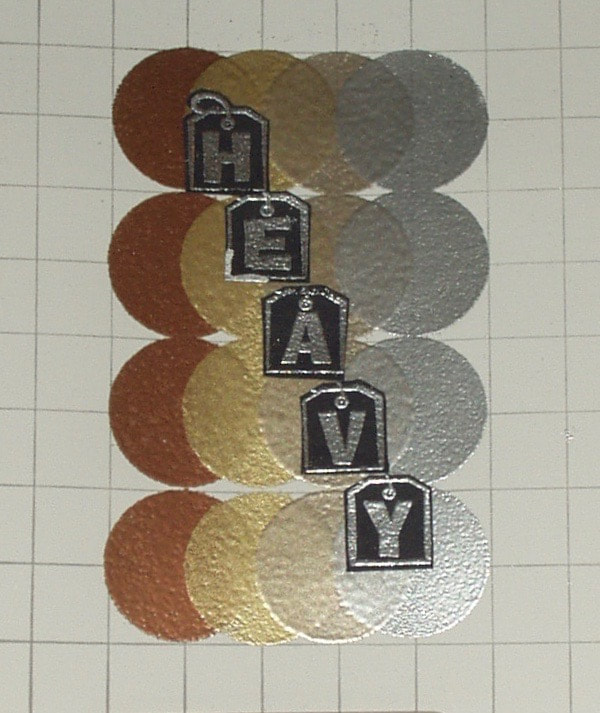
I used a very old wood-mounted set of alphabet stamps to create tags that spelled out the word “HEAVY” and attached each to the grid
Picture
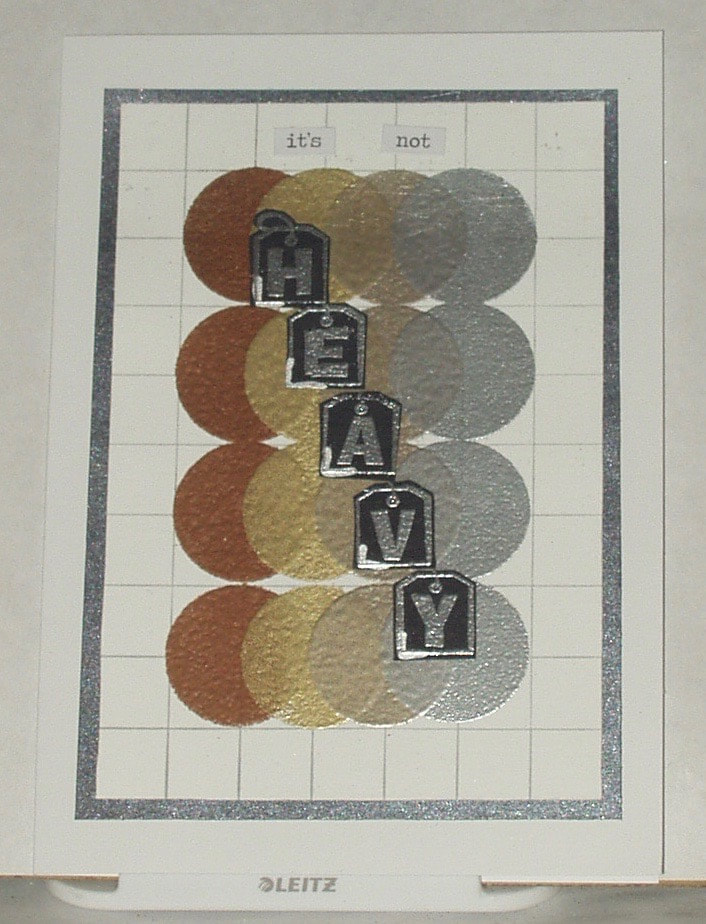
I trimmed the card, added some CHitChat stickers, and then matted it on Excalibur  Steel” paper and on a white pre-cut card:
Picture
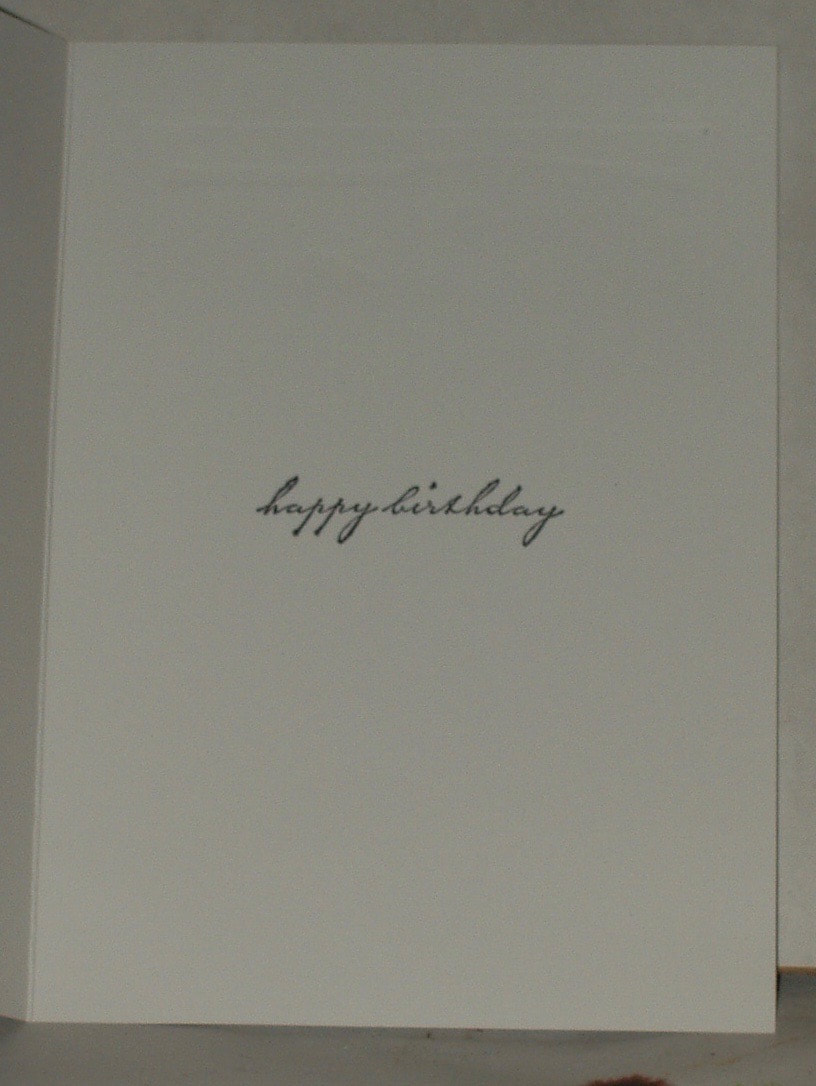
I finished the inside with a simple greeting:
Picture
So I thought I'd try agWhat resulted was a clean-and-simple metallic birthday card, one metal of which (gold) can be considered heavy!

Products used in the making of this card were: 

  • Stamps: Simon Says Stamp “Grid Play” (SSS101797); Hampton Art “Tag Alphabet” (0045); and Memory Box "Happy Birthday" (B1054)
  • Stencils: Simon Says Stamp “Grid Play” (SSST121498)
  • Ink: Archival “Shadow Grey”; Versamark; Liquid Silver pen; Archival "Jet Black"
  • Embossing Powders: WOW! “Metallic Silver Super Fine” (WC08SF); “Metallic Platinum Regular” (WC06R) and "Metallic Gold Rich Regular” (WC04R); Anita’s Embossing Powder “Copper” (23106)
  • Papers: Neena “Solar white”; Scraps of matte black card; Wasau Paper Metallic Collection “Excalibur Steel on Black Knight” (46321); Paper reflections Create Your Own  cards “white” (GRC02116)
  • ​Embellishments: Idea-ology "Chitchat" stickers (TH92998) 
  • Adhesives: ScorTape
  • Tools: MISTI stamp postioner

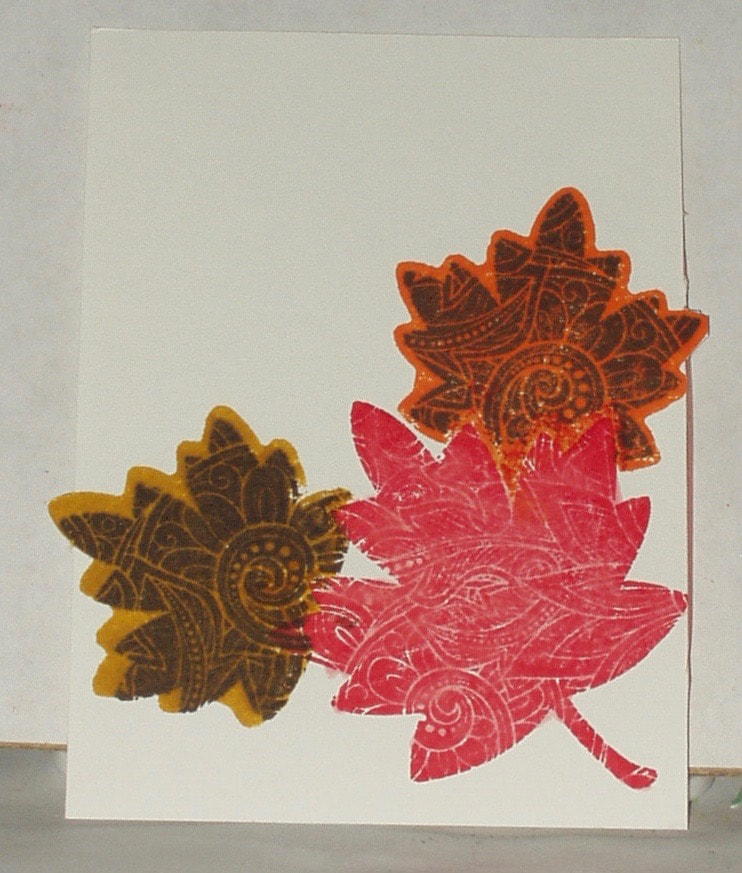
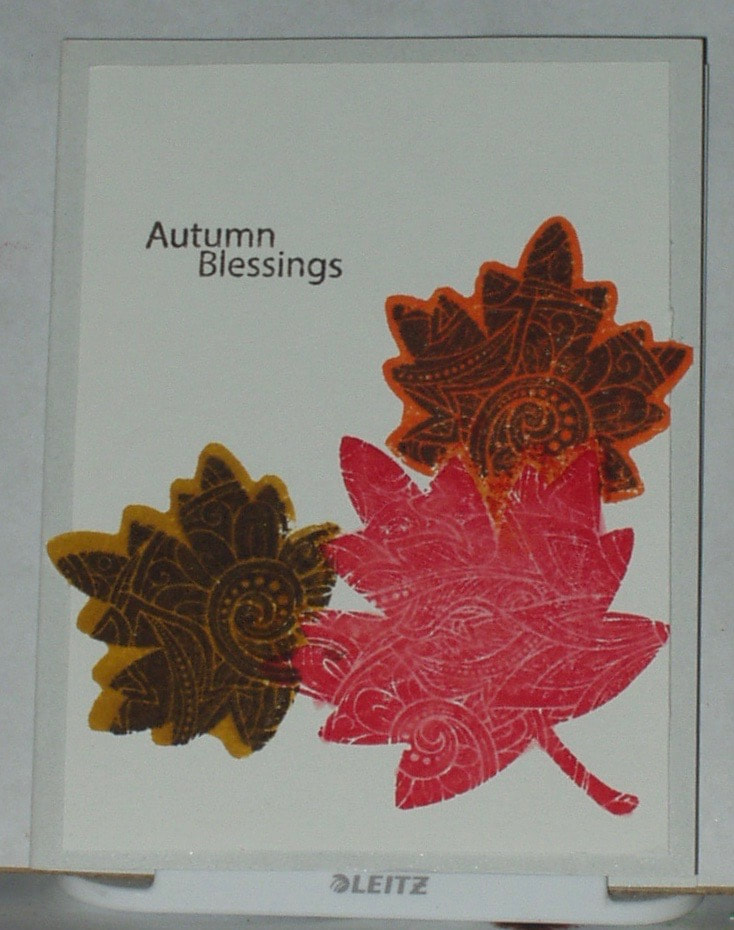
​The second stamp set I played with was the Simon Says Stamp release "Ornate Leaves". I had used it before, twice --- once embossing the leaves for a resist and once as a popped-up pumpkin on a fall card. Neither worked exactly how I wanted them to, however. So I thought I'd try again!

​I have to make a confession through --- I find it darned hard to distinguish the etched side of these stamps from the backs and way too often have ended up stamping with the solid backs instead or the patterned side. This time, when I did it, I decided to make that the technique... hey, mistakes open doors, right? So, when I mis-stamped my second leaf on this card, I overstamped in a darker color with the patterned side.

I stamped the leaves on white card using Distress Inks and Markers, masking the first leaf when stamping the second two. I used Distress markers to fill in the areas that missed around the edges of the red leaf and filled the pattern on the red leaf with a lighter-colored Distress Marker as well...
Picture
I have to say that stamping with dark ink over a slid background really really works for me! And luckily, that leaf stamp was symmetrical (unlike the larger leaf) so it was possible to overtime more accurately.

​Note that when I trimmed the scrap of white card to fit my notecard, I had to cut around some leaf tips...It gives the card a bit more dimension than jay a simple rectangular base card.

I stamped a sentiment from the same stamp set in Ground Espresso and mounted the trimmed white card on a notecard:
Picture
Products used in the making of this card were:

  • Stamps: Simon Says Stamp “Ornate Leaves” (SSS101765)
  • Inks: Distress Inks “Candied Apple”, “Carved Pumpkin”, “Fossilized Amber” and “Ground Espresso”; Distress Markers “Fossilized Amber”, “Spun Sugar” and “Candied Apple”
  • Papers: Golden Oaks Papers “Sparkle-silver” (P1043) and scrap of white
  • Adhesives: 1/8* Red Line Embossing Tape

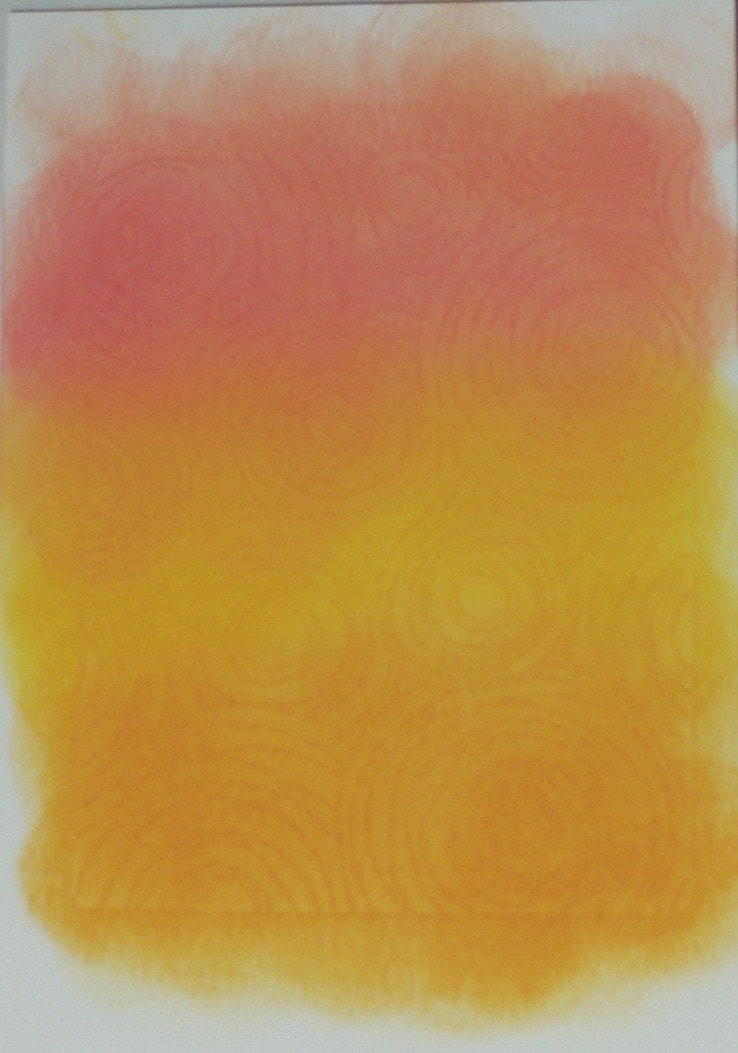
​My third purchase was one of the new Simon Says Stamp metal embossing plates and an "Intricate Die Metal Adaptor Plate. I followed the technique demonstrated by Vicky Papaioannou on her blog  and which was featured on the STAMPtember® blog hop. I uses a different embossing plate and a different combination of inks (wish I could find the brushes she uses but they appear to be out of stock EVERYWHERE!) on Ranger Watercolor  Paper:
Picture
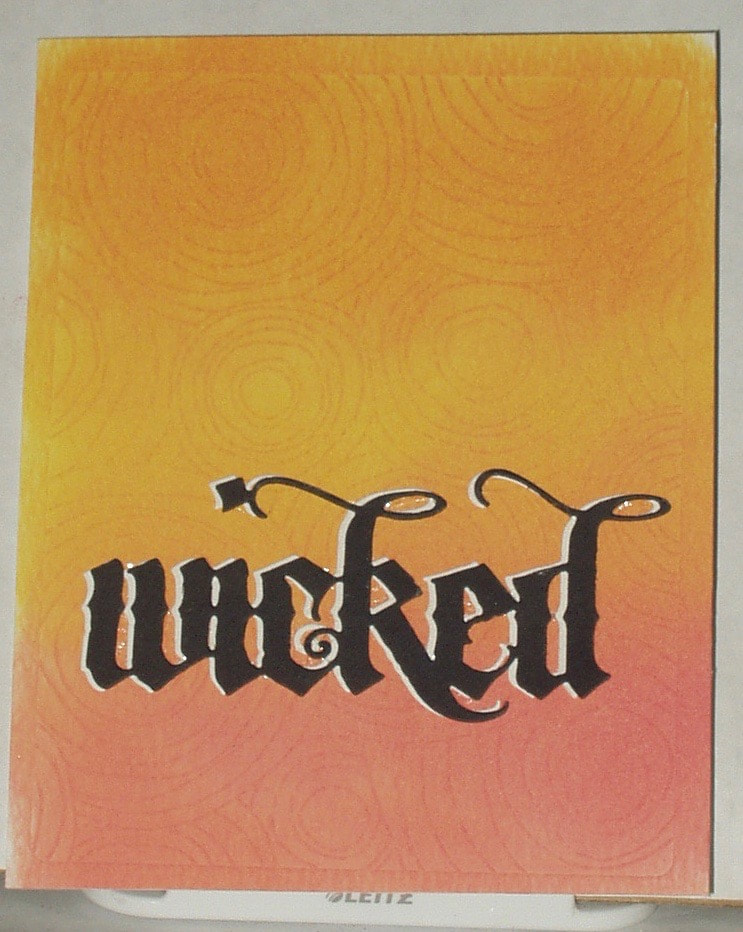
This technique does in deed result in a subtle, but visible, embossing on the paper.

I mounted this on a pre-folded card after trimming to fit.

I die cut a word twice, once from whit and once from black, stacked them, and added them to the background.
Picture
I'm entering this card in the Sizzix Promotion "Holtz for Halloween"  #holtzforalloween.

Products used in the making of this card were:


  • Embossing Plates: Simon Says Stamp “Circle Doodles” (SSSE301103)
  • Dies: Sizzix Thinlits “Vintage Spirits” 662385)
  • Inks: Distress Oxide “Spiced Marmalade”, “Wild Honey”, “Abandoned Coral”
  • Papers: Paper reflections whit card (GRC02116); Ranger Watercolor Paper (ISW39532); scraps white and black card
  • Adhesives :RedLine 1/8” embossing tape; Xyron 250 sticker maker
  • Tools: Intricate Die Metal Adapter Plate

My fourth, and last purchase during STAMPtember® (I'm not counting the September Monthly kit or the Crafters for a Cause box or what I hope to do tomorrow - purchase the STAMPtember® Card kit!) was he tim Holtz special release of a stamp set and a stencil. I really don't see how to use the stencil with the stamps in that set - yet - but I did have an idea from the August 2017 issue of Cardmaking & Papercraft Magazine (Issue #172, "Quick Makes" on pap 35 - 40; specifically "Dream of Me" on pp 37 and 38). My card looks NOYHING like that one but I used that card as a model for a layout...

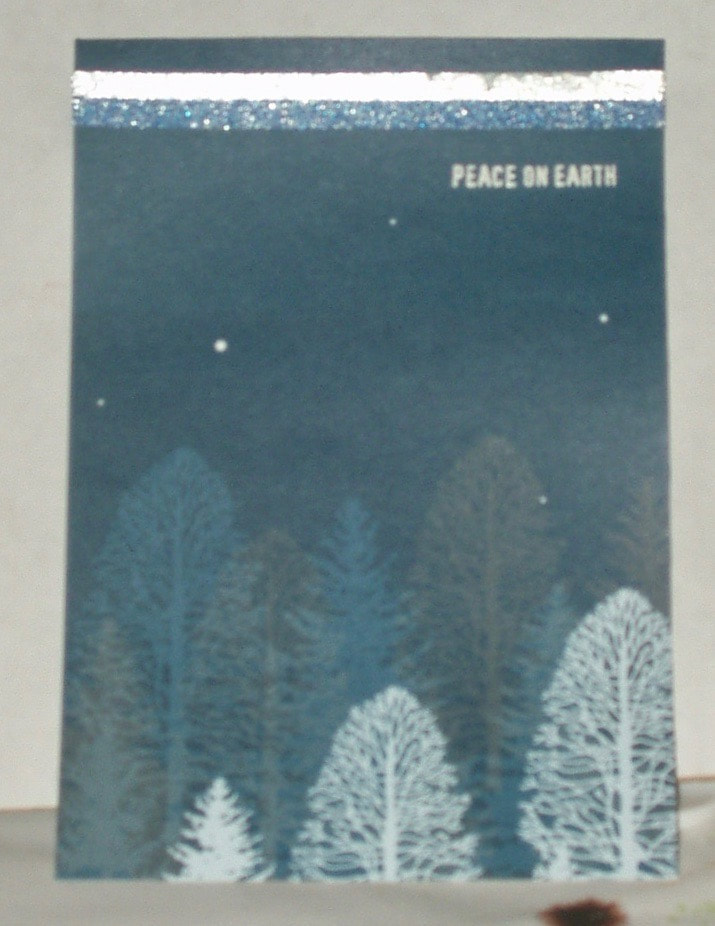
I started with a background, using a cut of a 12x12 patterned paper, a couple of strips of Design Tape, and a sentiment from the stamp set, stamped in Versamark and heat-embossed in white:


Picture
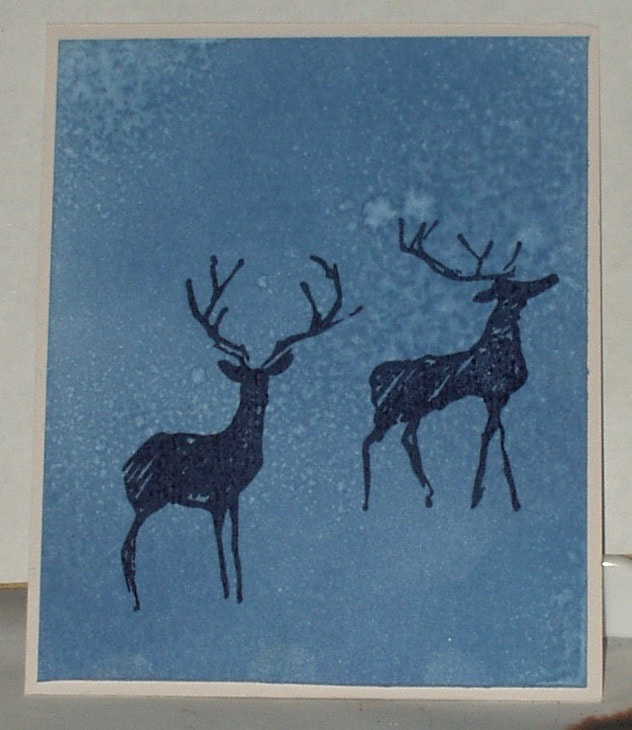
I took a section of watercolor paper, blended Distress Oxide "Faded Jeans" onto it and then spritzed with water. I mounted that on a scrap of heavy white card and stamped the two reindeer from the stamp set in Archival Ink:
Picture
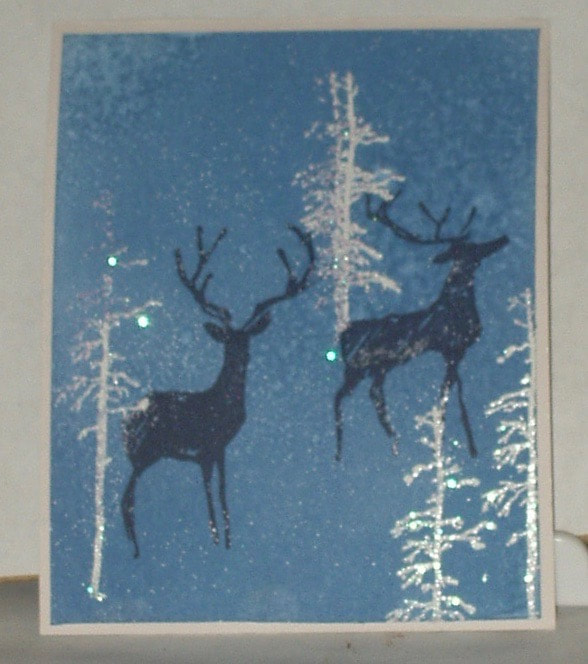
Using my MISTI, I positioned one of the trees on the image (four times), adding WOW! Vanilla Sparkle Embossing Powder each time,  brushing the powder off of the deer when I wanted the trees to be behind them, and heat embossing:
Picture
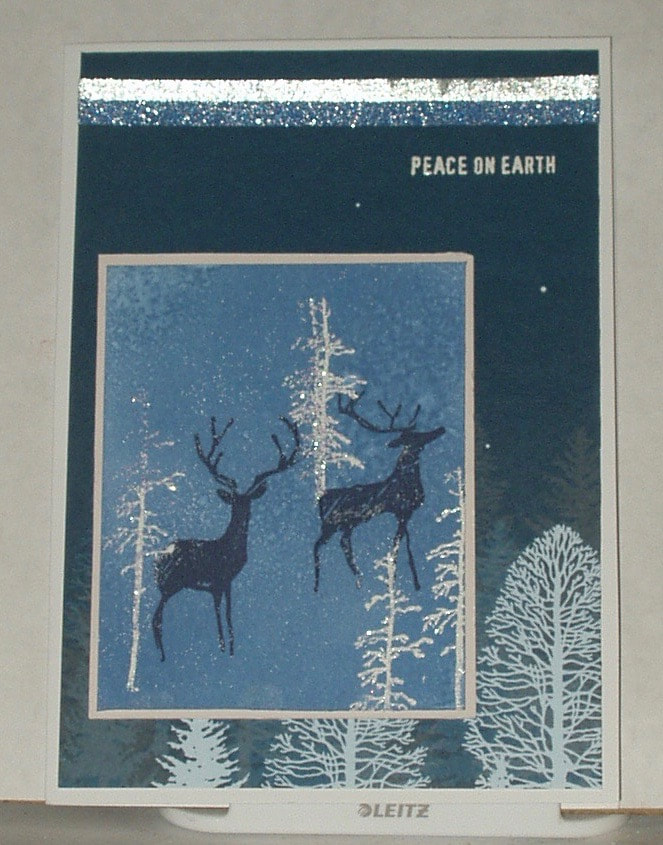
I mounted background on a pr-folded white card and the the deer scene on this base card:
Picture
Products used in the making of this card were:
  • Stamps: Stampers Anonymous "Stamptember 2017" 
  • Inks: Distress Oxide "Faded Jeans"; Archival "Jet Black"; Versamark
  • Embossing Powders: WOW! Vanilla Sparkle" (WS58R); Top Boss "white"
  • Papers: Paper Reflections Greeting Card "white" (GRC02116); Ranger Watercolor Paper; scraps of  white card  and patterned paper
  • Embellishments: Idea-ology Design Tape "French" (TH93355) and "Journey" (TH93358)
  • Adhesives: RedLine 1/8" Embossing Tape
​I'm also entering this in the Simon Says Stamp Wednesday Challenge for September 27, 2017: Anything Goes
1 Comment

Holtz For Halloween No. 8 - #holtzforhalloween

9/27/2017

1 Comment

 
Sizzix has issued a challenge for the weeks through October 22, 2017 called "Holtz for Halloween". All one has to do is use Tim Holtz's Falloween Collection products in our make and post on a social media site using the hashtag #holtzforhalloween! Winners will be chosen weekly... 

I was trying to come up with a way to use the "Feather and Ravens" die set that wasn't simply a repeat of my earlier "clean and simple" cards and wasn't succeeding. I decided to just sit down with inks and play and see what happened. What happened was another "galaxy" background using smoothed Distress Inks and blended Distress Oxide "Black Soot", spritzed with water:
Picture
Night sky? Northern Lights" The Horsehead Nebula? who knows, but it felt VERY "Halloweeny" so...

I die cut the branch and the two birds from the matte black card, inked the two birds with Versamark and double-heat-embossed with black embossing powder to get a really glossy black, mounted the birds and branch on the card front and added a clipping sticker:

Picture
That clipping sticker seems to fit the mood...

Products used in the making of this card were:
  • Dies: Sizzix "Feather & Ravens" (662376)
  • Inks: Distress Inks "Fossilized Amber", "Mermaid Lagoon", "Abandoned Coral", and "Twisted Citron"; Distress Oxide "Black Soot"; Versamark
  • Papers: Paper Reflections Greeting Card "white" (GRC02116); Ranger Watercolor Paper; scrap of black card
  • Embellishments: Idea-ology "Clippings Stickers - Halloween" (TH93619)
  • Adhesives: RedLie 1/8" Embossing Tape; Distress Collage Medium
I'm also entering this in the Simon Says Stamp Wednesday Challenge for September 27, 2017: Anything Goes
1 Comment

Holtz For Halloween #7  #holtzforhalloween

9/27/2017

1 Comment

 
Sizzix has issued a challenge for the weeks through October 22, 2017 called "Holtz for Halloween". All one has to do is use Tim Holtz's Falloween Collection products in our make and post on a social media site using the hashtag #holtzforhalloween! Winners will be chosen weekly... 

Time to try out the "Layered Jack-O-Lantern"! I pulled a selection of orange cardstock scraps and auditioned them for the pumpkin. I settled on five different colors
(including a sparkly gold for the main shape) and this is the end result:
Picture
It felt a little "flat" so I added some Walnut Stain Distress Oxides to the edges using a blending tool. 

I made a background using the lightest shade of orange in the pumpkin, a word die-cut using the "Halloween Words: BlocK" die set, and mounted it on the darker orange card:

Picture
I layered the background on a pre-folded notecard and popped the Jack-o-Lanteren up with foam dots
Picture
I'm also entering this in the Simon Says Stamp Wednesday Challenge for September 27, 2017: Anything Goes

Products used in the making of this card were:
  • Dies: Sizzix "Layered Jack-O-Lantern" (662373) and "Halloween Words: Block" (660956)
  • Inks: Distress Oxide "Walnut Stain"
  • Papers: four shades of orange and one of gold card; Golden Oaks Papers "sparkles-silver) (P1043)
  • Adhesives: RedLine 1/8" Embossing Tape; Ranger Collage Glue Stick; EK Tools 3-D Foam Dots
1 Comment

Holtz For Halloween #5  #holtzforhalloween

9/26/2017

0 Comments

 
Sizzix has issued a challenge for the weeks through October 22, 2017 called "Holtz for Halloween". All one has to do is use Tim Holtz's Falloween Collection products in our make and post on a social media site using the hashtag #holtzforhalloween! Winners will be chosen weekly... 

I decided to play with layering sentiments, using my Xyron Sticker Maker and the Sizzix Thinlit die set "Vintage Spirits" (Note to self: make sure that you insert the sentiment into the sticker maker right-side up--- otherwise, you have to change which layer goes on top! Ask me how I know!). I stamped parts of a Stampers Anonymous sentiment on a scrap of black card with Versamark ink and heat embossed with white embossing powder. I die cut some bats from gloss black card using a die from the Sizzix "Haunted House" die set. I adhered all of these items to a trimmed piece of Idea-ology "Subtrate Sheets" and then attached that to a pre-folded notecard:
Picture
Products used in the making of this card were:

  • Stamps: Stampers Anonymous “Regions Beyond” (CMS274)
  • Dies: Sizzix Thinlits “Haunted House” (662378) and “Vintage Spirits” (662385)
  • Its: versamark
  • Embossing Powders: Top Boss ‘white regular”
  • Papers: Paper Oaks Papers sparkler-silver (P1043); Idea-ology Substrate Sheets (TH93291); scraps of white, purple, black, and gloss black
  • Adhesives: redLine 1/8” Embossing Tape; Xyron 250 sticker maker; Ranger Collage Glue Stick
0 Comments

Holtz For Halloween #4  #holtzforhalloween

9/24/2017

0 Comments

 
Sizzix has issued a challenge for the weeks through October 22, 2017 called "Holtz for Halloween". All one has to do is use Tim Holtz's Falloween Collection products in our make and post on a social media site using the hashtag #holtzforhalloween! Winners will be chosen weekly...

​I just got a few more of Tim's Halloween collection yesterday so I'm back at it, experimenting with them

​I started with a background, done in the fashion of that demonstrated by Jennifer McGuire in her blog post about silhouette stamping.

Picture
I ran a scrap of black cardstock through my Xyron 500 Sticker maker and then through my Big Shot, using the "Ornate Owl" die.

(I confess, I didn't order this die on my first pass because I always have issues with such detailed dies --- getting all the bits and pieces to actually cut and release! And I have to say that this die was no different. Even with a copy-paper shim, getting all the little pieces to release ALONG with their sticker backing paper took longer than the rest of the card making in total!)

I attached the owl, matted with a scrap of orange paper, and stamped a sentiment from the Stampers Anonymous "Regins Beyond" stamp set before attaching the card front to a pre-folded white card:

Picture
Products used in the making of this card were:

  • Stamps: Stampers Anonymous “Regions Beyond” (CMS274)
  • Dies: Sizzix Thinlits “Ornate Owl” (662380)
  • Inks: Distress Oxides “Wild Honey”, “Spiced Marmalade” and “Abandoned Coral”; Archival “Jet Black”
  • Papers: Paper reflections “white” card (GRC01004)
  • Adhesives: 1/8” Red Line Embossing Tape; Xyron 500 sticker maker
0 Comments

Challenge: Pop It Up, pt 2

9/22/2017

1 Comment

 
Simon Says Stamp’s Wednesday Challenge for September 20, 2017 was “Pop It Up”. I realized late last night that I had bookmarked a tutorial in QuickCards magazine  (Issue 168, August 2017) entitled “Step Into Summer” by Becky James (pp 25 - 29) which included a “How To Make Step Panel Cards” tutorial.  I decided to try this technique using scrap papers and card stock and a Sizzix Halloween die set to create a Halloween party invitation!

I started with cutting and scoring two colors of purple cardstock (after converting the magazine's metric measurements to English! LOL):
I then added patterned Halloween-themed paper from my paper stash (maker unknown):
Picture
Finally, I die cut the “Haunted House” from a scrap of Gina K “Black Onyx” cardstock, added the word party cut from the same scrap patterned paper and assembled my “invitation”:
Picture
If I really were going to have a party, I would insert the details into the opening behind the house...
​

Products used in the making of this card were:

  • Dies: Sizzix Thinlits “Haunted House” (662378)
  • Papers: Gina K “Black Onyx” (18015); Bazzill Basics Monochrome “Violet-8”; scraps of reddish purple cardstock and patterned papers
  • Adhesives: Red Line 1/8” Embossing Tape; Ranger Collage Glue Stick
  • Tools: Scor-It small scoring board
I’m also entering this in the Sizzix Challenge #holtzforhalloween 

1 Comment

Challenge: Pop It Up

9/21/2017

2 Comments

 
Simon Says Stamp Wednesday says to “Pop It Up” for the week of September 20, 2017.  We can pop something using a classic pop-up card or a foam dot or… our choice!

It’s been a while since I have made a pop-up card but I had an idea for one if I could just find a tutorial to remind me how it’s done. I did find some tutorials, many with a twist, at Splitcoaststampers.com  and chose a “Triple Step-Up’ version to go with.  I had to adjust for my card size, but I think it worked out fine.

I started with the card front, using Authentique papers, Stampers Anonymous stamps and Archival and Color Box inks to get a Halloween-ish scene :
Picture
I added a gate and fence  from the Sizzix die set "Village Graveyard" and mounted the image on a silver, sparkly notecard  to complete my card base:
Picture
Then I got two work on the card innards!

First I cut the “platforms” for the pop ups and then I trimmed some more Authentique paper to back the top panel of the card (yes, I should have done that BEFORE I cut… but I was winging it here!)
Picture
I die cut fence parts, tombstones and ghosts from scrap card using the Sizzix "Village Graveyard" die set. I added shadows to the tombstone with a blending tool and Hickory Smoke Distress Ink. I adhered tombstones to the platforms, a ghost to the back of one tombstone and parts of fence to the background:
Picture
I used the Stampers Anonymous stamp set to add stars in the sky and a sentiment:
Picture
and some doodling with Signo Uniball white pen (stars), Dude Ball 1.5 black pen (words on tombstones) and Wink of Stella clear brush (ghost):
Picture
and adhered the graveyard inset inside the card base. Here, again are the front (left) and the inside (right) of my Halloween pop-up:
Products used in the making of this card:

  • Stamps: Stampers Anonymous “Haunted House” (CMS308)
  • Dies: Sizzix Thinlits “Village Graveyard” (662377)
  • Inks: Color Box “Frost White” (15080); Archival “Jet Black” and “Monarch Orange”; Signo Uniball Broad “white” pen; Distress Ink “Hickory Smoke”; Fude Ball 1.5 “black” pen; Wink of Stella Brush “Clear” (GL 999)
  • Papers: Golden Oaks Cards “Sparkle-silver” (P1043); Neena “Solar White” heavy stock; scraps of glossy black, medium and light grey cardstock; Authentique “Moonlit” 6x6 paper stack (MNL015)
  • Adhesives: Red Line 1/8”  Embossing Tape; Xyron 250 Sticker Maker

I'm also submitting this to the Sizzix Challenge #holtzforhalloween

2 Comments
<<Previous

    Author

    Born in New Jersey, I grew up in Southeastern Ohio. Attended university at Bowling Green State University (B.Sci  in biological science, 1964), University of Southern California (M. Sci in biological science, 1967) and University of Florida (Ph. D in zoology, 1971).
    Worked in environmental consulting for a little more than a decade and then seven years as an instructor in biological science at various community colleges in California and Texas. Moved to London in 1992, then Beijing (1996) and Saudi Arabia (1998), before returning to NW Ohio in 2002. I am currently living in NW Ohio with my husband and three Bombay cats.  I love to read (mystery, science fiction, history) and stitch (have done crewel, currently experimenting with free embroidery and needlepoint but blackwork and cross stitch are my main genres); have been known to knit; and now I'm heavily into papercrafting!
    Retired upon the return to the US so lots of time for our hobbies...

    Archives

    June 2023
    January 2022
    October 2021
    December 2020
    November 2020
    October 2020
    September 2020
    August 2020
    July 2020
    June 2020
    May 2020
    April 2020
    March 2020
    February 2020
    January 2020
    December 2019
    November 2019
    October 2019
    September 2019
    August 2019
    July 2019
    June 2019
    May 2019
    April 2019
    March 2019
    February 2019
    January 2019
    December 2018
    November 2018
    October 2018
    September 2018
    August 2018
    July 2018
    June 2018
    May 2018
    April 2018
    March 2018
    February 2018
    January 2018
    December 2017
    November 2017
    October 2017
    September 2017
    August 2017
    July 2017
    June 2017
    May 2017
    April 2017
    March 2017
    February 2017
    January 2017
    December 2016
    November 2016
    October 2016
    September 2016
    August 2016
    July 2016
    June 2016
    May 2016
    April 2016
    March 2016
    February 2016
    January 2016
    December 2015
    November 2015
    October 2015
    September 2015
    August 2015
    July 2015
    June 2015
    May 2015
    April 2015
    March 2015
    February 2015
    January 2015
    December 2014
    November 2014
    October 2014
    September 2014
    August 2014
    July 2014
    June 2014
    May 2014
    April 2014

    Categories

    All
    12 Tags Of 2015
    12 Tags Of 2016
    2018 Craft Space Clean-up
    All About ATCs
    Altenew
    Altenew Academy
    Art Swap
    Christmas Project
    Club Posh
    Compendium Of Curiosities
    Create 2014
    Create 2017
    Creative Carte Blacnhe
    Creative Chemistry 101
    Creative Chemistry 102
    Creative Chemistry 103
    Dina Wakely
    Dyan Reaveley
    Ellen Hutson
    Frilly & Funky
    Funkie Junkie Style
    Graphic 45
    Guest Designer
    Hero Arts
    #hipforsummer
    #holtzforhalloween
    #holtzfortheholidays
    Honey Bee
    InkRoad
    #Jennifer Mcguire
    Just Playing Around
    Lindy's Stamp Gang
    More Than Words
    OnLIne Card Class
    Seven Hills
    #sharewithsizzix
    Simon Says Stamp
    Stamptember
    Summer Of Creative Chemistry 2016
    Sunday Stamper
    Tim Holtz Kits
    WOW!

    RSS Feed
    Picture
    Picture
    Picture
    PAST PARTICIPATION

    Picture
    Picture
    Picture
    Picture
    Picture
    CHALLENGE BLOGS
    Simon Says Stamp Monday Challenge Blog
    Picture
    Picture
    Picture

    So proud!

    Picture
    for my August 2015 tag!
    for my entry into "Author, Author". October 5, 2016
 honored to be asked to be guest designer for Simon Says Stamp Monday Challenge, September 2017

for my entry in the Frilly and Funkie November 22, 2017 Challenge: Give Thanks
for my entry in the Frilly and Funkie December 9, 2017 Challenge: Most Memorable Gift
for my entry in the Funkie Junkie Boutique Blog Challenge, August 14, 2019 "Let’s Do It Again"

Online Card Classes

Picture
Picture
Proudly powered by Weebly