Carol Stamps
  • Carol Stamps
  • Compendium of Curiosisties 3 Challenge - Gallery
  • Tim Holtz
    • 12 Tags of ...
    • Creative Chemistry 101
    • Creative Chemistry 102
    • Creative Chemistry 103
    • Summer of Creative Chemistry 2016
    • #hipforsummer 2017
    • #sharewithsizzix
    • #holtzforhalloween
    • #holtzfortheholidays
    • Share-a-Scare
    • Tim Holtz Christmas photo holder
  • Simon Says Stamp Challenges
    • Simon Says Create
  • Frilly and Funkie Challenges
  • Sunday Stamper
  • More Than Words
  • Creative Carte Blanche
  • Altenew
  • Seven Hills
  • Hero Arts
  • WOW! Embossing Powder
  • Graphic 45
  • Dyan Reaveley classes, 2015
  • Marjie Kemper Classes
  • OnLine Card Class
  • Just playing around
    • Art Swaps
    • Club Posh
    • Stencil Girl
    • Ranger Kits
    • Stamptember
  • Lindy's Stamp Gang
  • WOW! Challenges
  • Ellen Huston
  • Virginia's View Challenge
  • Marjie Kemper classes

Challenge: No Rules

2/26/2015

1 Comment

 
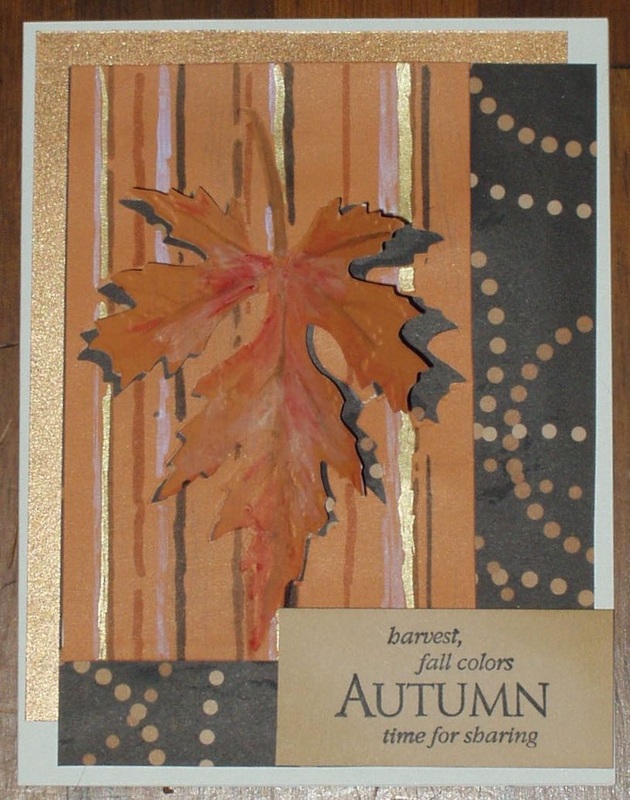
For the Simon Says Stamp Monday Challenge, February 23, 2015 , "No Rules" (the first "Anything Goes" challenge for 2015, I decided to go the scrap route. I had pieces of papers and card stock as well as a die-cut and embossed leaf left over from my challenge entry for Compendium of Curiosities 3 Challenge #22  http://538194912998600598.weebly.com/carol-stamps/compendium-of-curiosities-3-challenge-22-the-third. So I decided to put into practice some of what I learned by working with Tim Holtz's layered die cuts and dimensional cutting pad in that challenge as well as use up some scraps from my stash.
Picture
I know it is a LONG way from autumn here in NW Ohio (so far, the coldest February on record and the second snowiest!) bu autumn is my favorite season and the scraps I had (the metallic gold and the beige cardstocks, the swirly dot black paper and the layered die-cut of a leaf) lent themselves well to this theme.

I layered gold cardstock and swirly dot black paper on a precut white card. I cut a mask of the leaf and used the background to protect the background on my embossed layered leaf. I then painted the leaf with Distress Paints and water, in a water color technique which I find gives subtle, almost realistic color. I then swapped out the background mask for a butterfly mask and colored select stripes on the background of the leaf with the "Stripes" layered stancil,  Distress Markers and a gold pen. I stamped a message panel on beige cardstock with India Ink Black and antiqued the panel with Distress Ink (Antique Linen). Using Glue & Seal, I attached the finished leaf panel leaf to the layered card background, and using foam dots, I attached the word panel.


Products used were:
  • Layered Stencil THS004 (Stripes)
  • Layered leaf die and embossing folder set
  • Stamp: Hero Arts C3039 "Autumn"
  • Distress Paint: Old Paper, Gathered Twigs, Rusty Hinge, Dried Marigold and Fired Brick
  • Distress Markers: Picket Fence, Black Soot, Antique Linen and Rusty Hinge
  • Distress Ink: Antique Linen
  • India Ink Black
  • Marvy Uchida Liquid Gold Pen


1 Comment

Compendium of Curiosities 3 - Challenge #22 , the third

2/22/2015

5 Comments

 
I said in my entry for the 22nd challenge for the Compendium of Curiosities, Vol. 3, that I had tried out several layered dies for the technique using the dimensional cutting pad (page 62 in Compondium of Curiosities, VOl. 3). The third try was Layered Leaf...

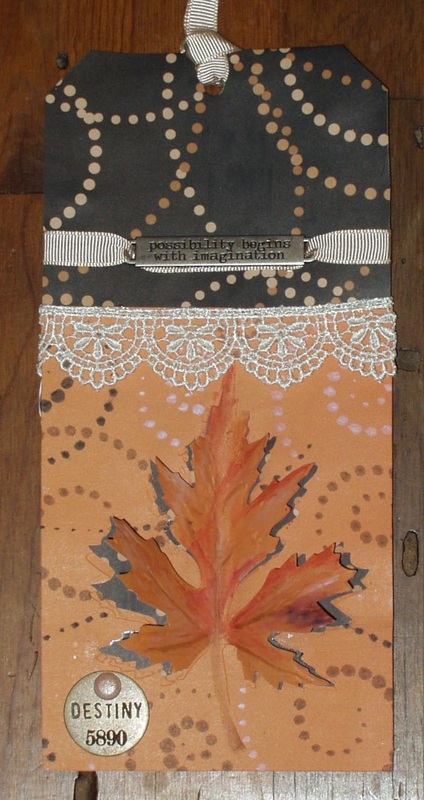
I tried this leaf several times and had three that were almost good, but missed out on how well the leaf was cut. I picked the one on the largest piece of cardstock and played with it, using Distress Paints (Gathered Twigs, Fired Brick, Old Paper and Rusty Hinge - but not in that order) diluted with water water to watercolor over the patterned orangey cardstock. It's subtle but I think the leaf looks a little more realistic and stands out from the background. But not enough, so...

I went scrounging through my paper stash and found a stack of autumn papers; I selected one with black background and the spotted circles in colors very close to my original cardstock. I cut a piece the size of my big tag and glue & sealed it on.

I went on another search, this time through my stencil collection,  and found one from Color Box called Swirl Dots which is very similar to the black dotty-circle paper. Carefully positioning the stencil so I could see the cut lines on my leaf (well, almost all --- I goofed on one at the lower left), I used Distress Markers (Picket Fence, Black Soot and Vintage Photo) to ink in the swirls so they looked like they were going behind the leaf.

I redline-taped the card with the leaf to the tag with the black spotty circles, glued a length of tatted lace (Hobby Lobby Ivory Trim #604439) to hide the line between orange cardstock and black paper, used a brad to attach a philosophy tag ("Destiny") and a beige ribbon to attache a philosophy band ("possibility begins with imagination"  -  hey, it was the first to fall out of the package...).

My third entry in this challenge: "Destiny" (because isn't this always the destiny of maple leaves --- they turn color and fall from the tree?):
Picture
Challenge #22 is a product-specific challenge, as completing it requires the use of Tim’s Dimensional Cutting Pad from Sizzix. Open up your copy of A Compendium of Curiosities, Vol.3, page 62 to learn how to use it. (If you don't have a copy, follow the link to the web site where you can purchase your very own autographed copy!). Linda Ledbetter has been hosting the Compendium of Curiosities 3 Challenge on her blog, Studio L3 and a prize to one lucky winner is a shopping spree at  The Funkie Junkie Boutique. 

5 Comments

Compendium of Curiosities 3 - Challenge #22 , the second

2/21/2015

3 Comments

 
I said in my entry for the 22nd challenge for the Compendium of Curiosities, Vol. 3, that I had tried out several layered dies for the technique using the dimensional cutting pad (page 62 in Cmpeondium of Curiosities, VOl. 3). One of those was the Layered Dragonfly.

Having read through the blogs of the design team, I found that I liked the outcomes when Annette Green, Susan Mostek and Yvonne Blair layered their die cuts. So I thought I'd try that with my dragonfly.

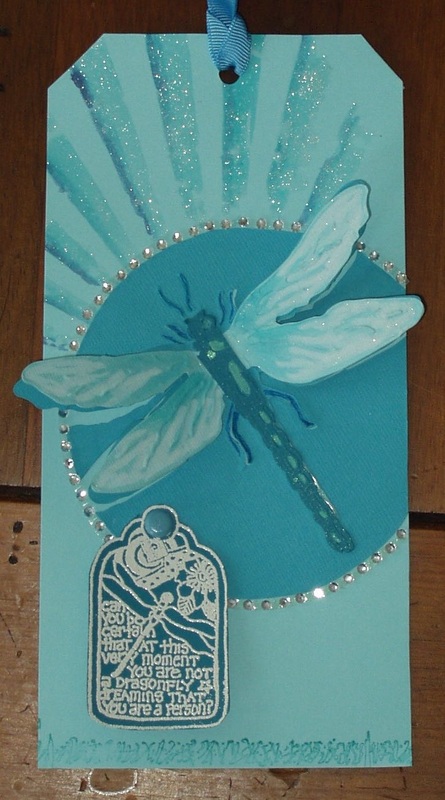
First, I trimmed the medium turquoise card the dragonfly was originally cut from (using the dimensional cutting pad technique) into a circle. Then I cut and embossed two more dragonflies, one on a light turquoise and the other on a dark turquoise. I cut the wings form the light dragonfly and colored them with Broken China and Tumbled Glass Distress Ink and then blended using the Picket Fence Distress Marker. FInally, I sprayed the wings with Sheer Shimmer Spritz (Tsukineko). I cut the body from the dark dragonfly, colored the debossed places with Cracked Pistachio Distress Paint and sprayed the body with Heidi Swapp Tropicana Teal Iridescent Spray. (The shimmer on the wings and body don''t show up well in any of the photos I took... it's there, but the cardstock seemed to have soaked it up and dulled it to less sparkle than I hoped for). The wings were attached to the medium dragonfly and the dark body was attached on top of the wings and the medium dragonfly. I touched up the antennae and legs with a Salty Ocean Distress Marker.

I cut a large tag from the light turquoise cardstock and, using the Rays stencil (THS 00-3), painted the rays using blending brushes (fine and broad) and Distress Inks Broken China, Tumbled Glass, Peacock Feathers and Chipped Sapphire. I then spayed the rays heavily with the Sheer Shimmer Spritz. Using Peacock Feather Distress Ink and a dragonfly stamp from Stamps Happen (#90246), I stamped a border at the bottom of the tag.

On the dark turquoise cardstock, I stamped the small Dragonfly Tag (Paula Best, PB-3016G) in Versamark Ink and embossed using white embossing powder from Top Boss.

I attached the circle with the dragonfly to the tag and used Heidi Swapp Bling (clear borders rhinestones) to border the circle. I attached the small tag with a turquoise brad and attached a simple ribbon tie to complete "Dragonfly Dreams":

Picture
Challenge #22 is a product-specific challenge, as completing it requires the use of Tim’s Dimensional Cutting Pad from Sizzix. Open up your copy of A Compendium of Curiosities, Vol.3 to page 62 to learn how to use it. (If you don't have a copy, follow the link to the web site where you can purchase your very own autographed copy!). Linda Ledbetter has been hosting the Compendium of Curiosities 3 Challenge on her blog, Studio LL3 and a prize to one lucky winner is a shopping spree at  The Funkie Junkie Boutique.
3 Comments

Compendium of Curiosities 3 - Challenge #22

2/19/2015

3 Comments

 
For the past 43 weeks, Linda Ledbetter has been hosting the Compendium of Curiosities 3 Challenge on her blog, Studio LL3. With the assistance of a team of highly talented designers, the brilliant Tim Holtz and his logistics director Mario Rossi II, and the generous support of two stamp stores, inspiration is abundant and prizes are provided (this week's prizes, in addition to a parcel supplied by Tim and Mario, is a gift certificate from
The Funkie Junkie Boutique The primary rule for this cllalenge is to follow the instructions as written in TIm's Compendium of Curiosities, Vol. 3 and to NOT reveal the technique in our posts.

Challenge #22 is a product-specific challenge, as completing it requires the use of Tim’s Dimensional Cutting Pad from Sizzix. Open up your copy of A Compendium of Curiosities, Vol.3 to page 62 to learn how to use it. (If you don't have a copy, follow the link to the web site where you can purchase your very own autographed copy!)

I have owned the DImensional Cutting Pad since I decided to enter this series of challenges and knew that, eventually, it would come into play. However, this is the first time I have attempted it's use... From what I read on the design team blogs, this is NOT an unusual situation as many of them hadn't used it before either! Anyway, no time like the present!

I started out by trying the techique on three different layered die/embossing sets. each has it's own issues, some I had to do several times before I got something even remotely acceptable, but I wasn't one-hundred-precent happy with any of them. I picked the one least "offensive": the layered honey bee (Alterations 659577), for my entry, but I may work with the others over the weekend and post them as well (I do have ideas for both).

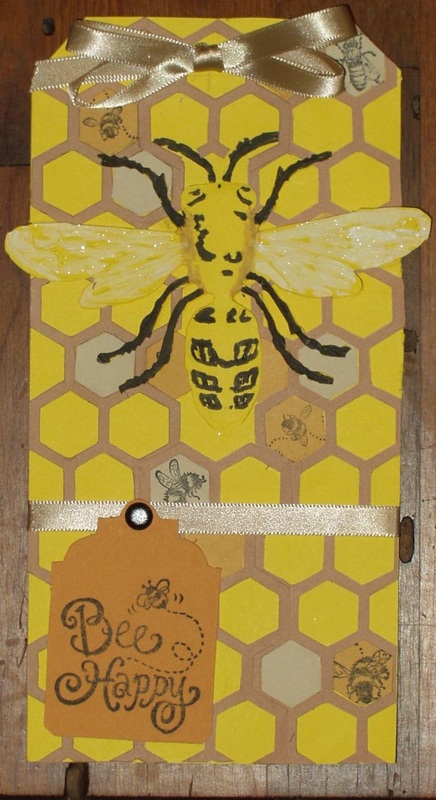
I made a large tag from bright yellow cardstock and layered my bee on it using glue & seal. I then colored the beed using Distress Markers: Black Soot for the legs antennae and body markings, picket fence for the wings and Old paper to shade in the body. I sprayed the wings with Sheer Shimmer Spritz to add a little sparkle.

I then cut six beige honeycomb frameworks using the Alterations die (659430) and placed them on the tag UNDER my bee... I cut several more honeycomb frameworks in beige and mustard colors and save the hexagons to past in selected gaps int eh honeycomb background. On five of the hexagons, I stamped some smaller bees in INdia INk Black (Stamps used were Stampin' Up!'s "Bugs and Slugs" and an Inkadinkado stamp (8791-X).

I then covered a small chipboard tag with the mustard-colored cardstock and stamped a greeting "Bee Happy" (Stampendous, D089). Ofray ribbon in oatmeal (C-834) and a brad were used to attach the small tag and a bow from the same ribbon adorns the opt of the main tag.
Picture
"Bee Happy"
3 Comments

Challenge: Paradise

2/19/2015

1 Comment

 
This is a photo of what greeted us when we arrived at the Intercontinental Resort and Spa Papeete well after midnight on the 12th if January!
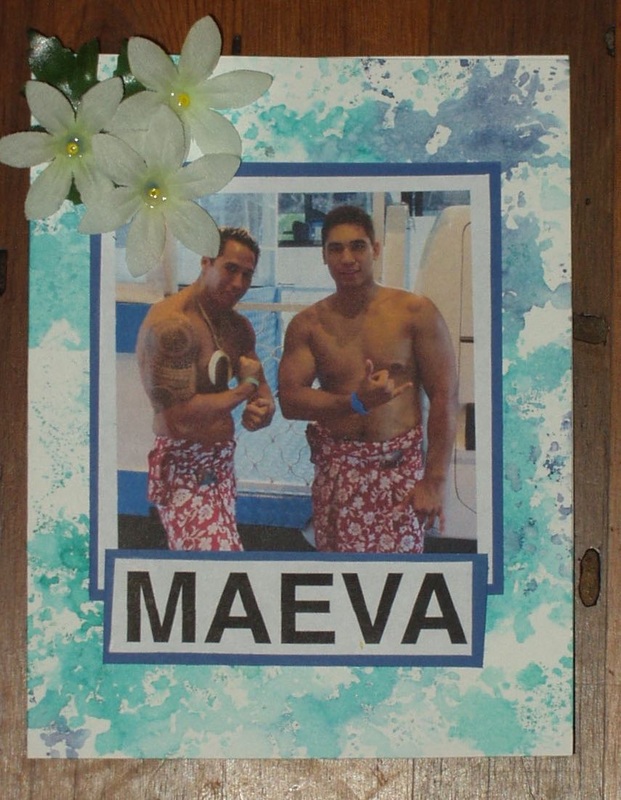
Needless to see, I could hardly believe my tired eyes so I had my husband take a photo the next morning of two of the legion of baggage handler that work that hotel. I printed a slightly cropped version of this photo, mounted it on dark blue cardstock (the color of the Chipped Sapphire). I also printed out the Tahitian word for "Welcome" ("Maeve") and mounted it as well. Finally, I decorated the top of the photo with three silk flowers, a piece of silk leaf and some seed beads which are as close as I can come in my stash to the flowers handed out as greetings wherever we went (Tahitian gardenias, or "tiare").

Here is my entry into  what constitutes my idea of paradise!

Picture
Picture
"Between the cold short days of winter and the long to-do lists the [Simon Says Stamp] Monday Challenge Team is dreaming up their own versions of paradise. From tropical getaways to creative retreats – the idea of paradise is a fun topic and they’re exploring it this week in the Simon Says Stamp Monday Challenge ... "

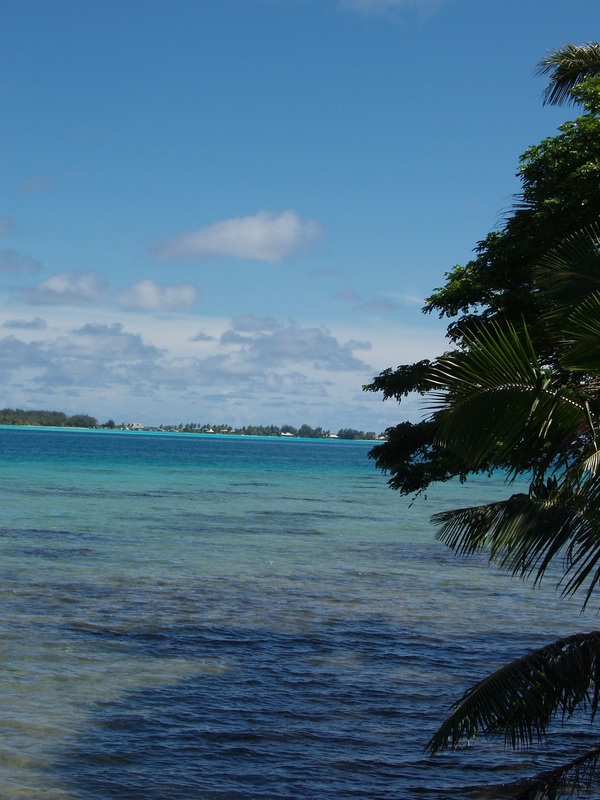
Well, I don't have to dream about it. We have only been back three weeks from a dream cruise to French Polynesia and have photos to prove that it is, indeed, the picture of paradise. So, playing off the tag I did for the Compendium of Curiosities Challenge #21, I created a lagoon-like background on my card using Distress Inks Broken China, Tumbled Glass, Peacock Feathers and Chipped Sapphire. Yes, the water really was that color, as you can see herein the photo of the view from our hotel room on Moorea:

Picture
1 Comment

12 Tags of 2015 - February

2/5/2015

0 Comments

 
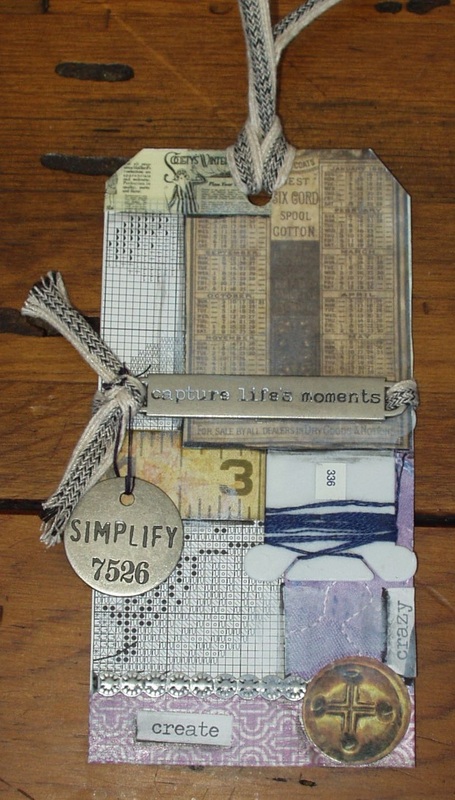
As Tim said, he month of February is all about about the things we love, so what better theme for a tag than my simple love of needlework? I'm not a Valentine kind of gal so I stayed away from the traditional hearts, flowers and colors of red and pink. And as a result of this avoidance PLUS using ephemera form my stash, my tag is a bit dark and gritty looking.

I used cardstock which had quilting lies of stitchery on it, a piece of a cross-stitch chart, a cutting from the Wallflower cardstock, and a bobbin with some #336 DMC floss wond around it as the basis for my collage for this tag. Additional product used were stickers from both the "Lost & Found" and Crowded Attic" Salvage Sticker booklets, chat stickers, some washi tape, a strip of "Indusctrial" foil border, a word band (rather poorly distressed), a philosophy disc and some ideology "trimmings".. Accented with Black Soot Distress marker and touched up with a little Picket Fence Distress Paint, this what what my tag eventually became:

.
Picture
0 Comments

Compendium of Curiosities 3 Challenge - Challenge #21

2/5/2015

5 Comments

 
and the guided tours of the island and the lagoon by real experts in the biology of the islands (the directors of the UC Berkeley Gump Field Station at Cook's Bay and the Director of the Dolphin and Whale research project) were worth the extremely long plane ride in overcrowded coach airplanes, the humidity, mosquitoes (which love me no matter where in the world I am and no matter how much insect repellant I use), rain (which interrupted the cruise on numerous days) and the expense (would you believe $10US for a gallon of gas?).

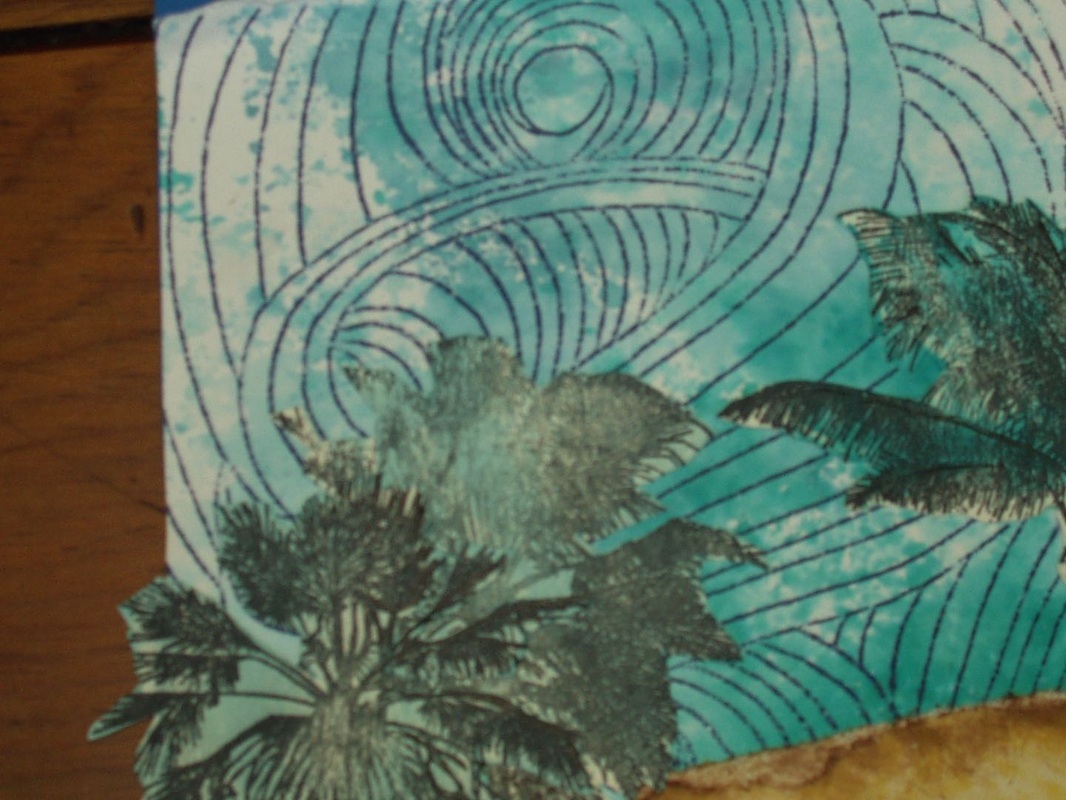
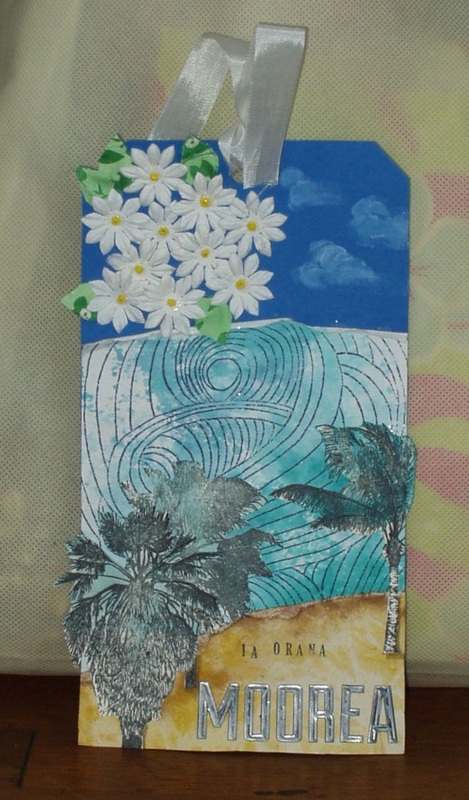
My intent was to try to recreate the color of the lagoons we saw at Moorea and on six islands included on the cruise. I used Broken China, Tumbled Glass and Peacock Feathers (rapidly becoming one of my favorite Distress colors) Distress Inks to create a background over which I stamped a swirly background (Heather's Stamping Heaven stamp 275O) in Faded Jeans. Then I followed Tim's instructions to create the Rock Candy Glitter effect. You can't see it in this photo, but it is there, barely!
Picture
Picture
the hotel bungalow on stilts over the water:
We are up to challenge #21, as hosted by Linda Ledbetter on her blog Studio L3 and sponsored by Inspiration Emporium.  Inspiration Emporium is offering a gift card for one winner of this challenge, and the estimable TIm Holtz and Mario Rossi II have supplied a packet of goodies for another winner. Definitely worth the effort to enter, don't you think?

This challenge includes the very specific method of using Rock Candy Distress Glitter, on page 55  of  A Compendium of Curiosities, Vol.3. If you’re glitter-phobic, as I am, this almost put me off, as I can never seem to a) get the effect called for and b) keep the glitter on the card/tag/whatever instead of all over my desk and myself. But despite this persistent head cold and cough, which is definitely constraining my ability to focus, let alone create, I did at least make an attempt.

As usual, the primary rule for these challenges is to NOT reveal the technique, which is so ably put forth in Tim's book. So it you want a tutorial, get the book and play along for the remaining segments of the challenge.

We have just returned from a bucket list cruise to French Polynesia and definitely the highlight of the cruise was the pre-cruise stay on Moorea! The color of the water:


Picture
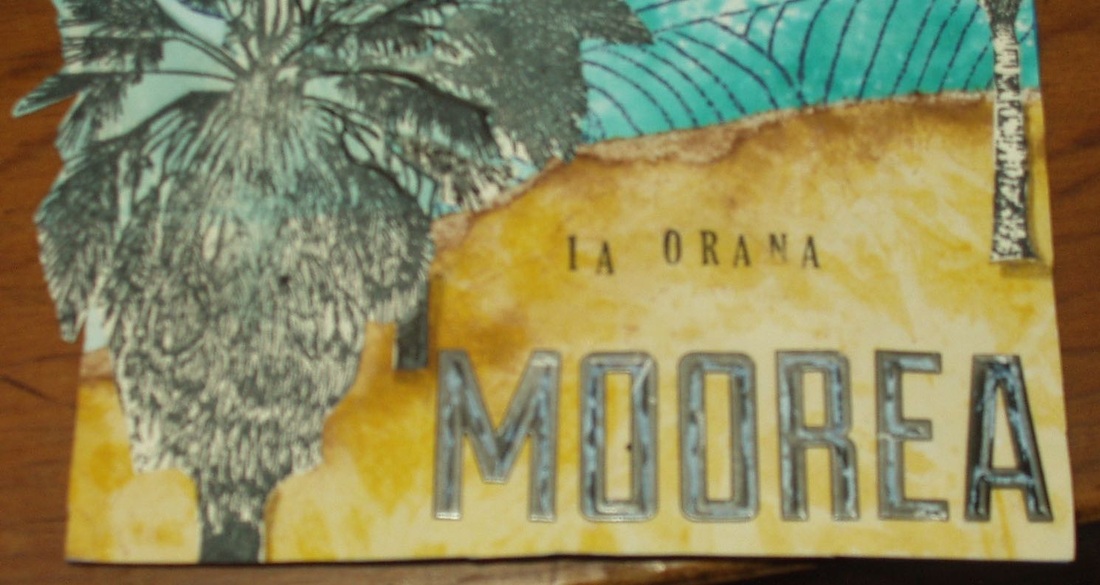
I then tore the background, rolled the torn edge, added lots of glue-and-Seal and more Rock Candy Glitter to simulate waves breaking, and glued it down on a blue tag.. To the bottom of a tag, I added a torn piece of card stock in sandy yellow (with the torn edge colored with Vintage Photo Distress Inks) for the beach. I stamped three palm trees in India Ink Black (Alex Stamping N15, N16 and M303) which I fussy cut and stained with Broken China (so it would look like you could see through the trees to the water) and added them to the beach. A little smudge of Gathered Twigs Distress Marker along each trunk added depth. Industrial Alphabet stickers (distressed with Picket Fence Distress Marker) and the stamped words "Ia Orana" ,which means "Hello" in Tahitian (using India Black Ink and Karen Foster Snap Stamp 00372, which  allows me to create just about any phrase I want!)  to finish off the beach:
Picture
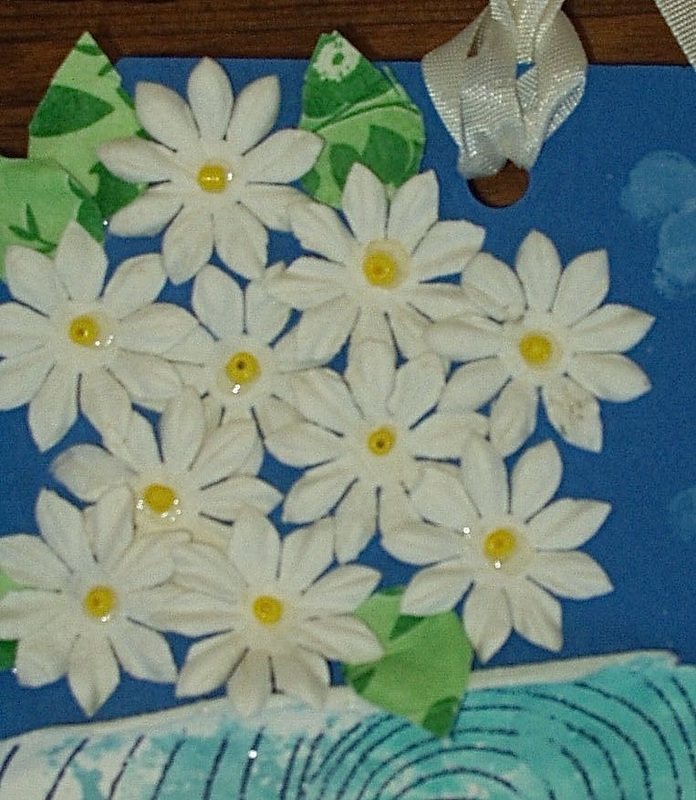
The top of the tag, however was a little stark and needed something. Since the white puffy clouds were regular attendants on the scene every day we were there (it was the rainy season, we found out), I used some Picket fence Distress Paints and created some clouds with my fingers. Then, I added a collection of paper flowers from Color Me Crazy by Petaloo (#1543-000, too many petals by half but the closest I could get to the national flower: a small gardenia, or "tiare"; at every stop, from first service on the plane on Air Tahiti Nui to walking into a shop or cafe, you are greeted with the gift of a small bud of this flower - which is to be put behind your left ear if you are "taken" or right ear if you are "available"), tucked in a few leaves made by cutting up a green Hero Arts Art flower (CH297, Foliage Print), and topped off the flowers with a yellow seed bead in each center (in this photo, you can see some of the Rock Candy glitter, which had, true to my experience with glitter of any kind, had migrated to all parts of the tag by now...)
Picture
So my entry this week, which didn't work out how I wanted, but which will have to do, is "Ia Morana, Moorea"!
Picture
Thank you (or as they say in Tahiti, Mauruuru) for looking at my blog this week!
5 Comments

    Author

    Born in New Jersey, I grew up in Southeastern Ohio. Attended university at Bowling Green State University (B.Sci  in biological science, 1964), University of Southern California (M. Sci in biological science, 1967) and University of Florida (Ph. D in zoology, 1971).
    Worked in environmental consulting for a little more than a decade and then seven years as an instructor in biological science at various community colleges in California and Texas. Moved to London in 1992, then Beijing (1996) and Saudi Arabia (1998), before returning to NW Ohio in 2002. I am currently living in NW Ohio with my husband and three Bombay cats.  I love to read (mystery, science fiction, history) and stitch (have done crewel, currently experimenting with free embroidery and needlepoint but blackwork and cross stitch are my main genres); have been known to knit; and now I'm heavily into papercrafting!
    Retired upon the return to the US so lots of time for our hobbies...

    Archives

    June 2023
    January 2022
    October 2021
    December 2020
    November 2020
    October 2020
    September 2020
    August 2020
    July 2020
    June 2020
    May 2020
    April 2020
    March 2020
    February 2020
    January 2020
    December 2019
    November 2019
    October 2019
    September 2019
    August 2019
    July 2019
    June 2019
    May 2019
    April 2019
    March 2019
    February 2019
    January 2019
    December 2018
    November 2018
    October 2018
    September 2018
    August 2018
    July 2018
    June 2018
    May 2018
    April 2018
    March 2018
    February 2018
    January 2018
    December 2017
    November 2017
    October 2017
    September 2017
    August 2017
    July 2017
    June 2017
    May 2017
    April 2017
    March 2017
    February 2017
    January 2017
    December 2016
    November 2016
    October 2016
    September 2016
    August 2016
    July 2016
    June 2016
    May 2016
    April 2016
    March 2016
    February 2016
    January 2016
    December 2015
    November 2015
    October 2015
    September 2015
    August 2015
    July 2015
    June 2015
    May 2015
    April 2015
    March 2015
    February 2015
    January 2015
    December 2014
    November 2014
    October 2014
    September 2014
    August 2014
    July 2014
    June 2014
    May 2014
    April 2014

    Categories

    All
    12 Tags Of 2015
    12 Tags Of 2016
    2018 Craft Space Clean-up
    All About ATCs
    Altenew
    Altenew Academy
    Art Swap
    Christmas Project
    Club Posh
    Compendium Of Curiosities
    Create 2014
    Create 2017
    Creative Carte Blacnhe
    Creative Chemistry 101
    Creative Chemistry 102
    Creative Chemistry 103
    Dina Wakely
    Dyan Reaveley
    Ellen Hutson
    Frilly & Funky
    Funkie Junkie Style
    Graphic 45
    Guest Designer
    Hero Arts
    #hipforsummer
    #holtzforhalloween
    #holtzfortheholidays
    Honey Bee
    InkRoad
    #Jennifer Mcguire
    Just Playing Around
    Lindy's Stamp Gang
    More Than Words
    OnLIne Card Class
    Seven Hills
    #sharewithsizzix
    Simon Says Stamp
    Stamptember
    Summer Of Creative Chemistry 2016
    Sunday Stamper
    Tim Holtz Kits
    WOW!

    RSS Feed

    Picture
    Picture
    Picture
    PAST PARTICIPATION

    Picture
    Picture
    Picture
    Picture
    Picture
    CHALLENGE BLOGS
    Simon Says Stamp Monday Challenge Blog
    Picture
    Picture
    Picture

    So proud!

    Picture
    for my August 2015 tag!
    for my entry into "Author, Author". October 5, 2016
 honored to be asked to be guest designer for Simon Says Stamp Monday Challenge, September 2017

for my entry in the Frilly and Funkie November 22, 2017 Challenge: Give Thanks
for my entry in the Frilly and Funkie December 9, 2017 Challenge: Most Memorable Gift
for my entry in the Funkie Junkie Boutique Blog Challenge, August 14, 2019 "Let’s Do It Again"

Online Card Classes

Picture
Picture
Proudly powered by Weebly