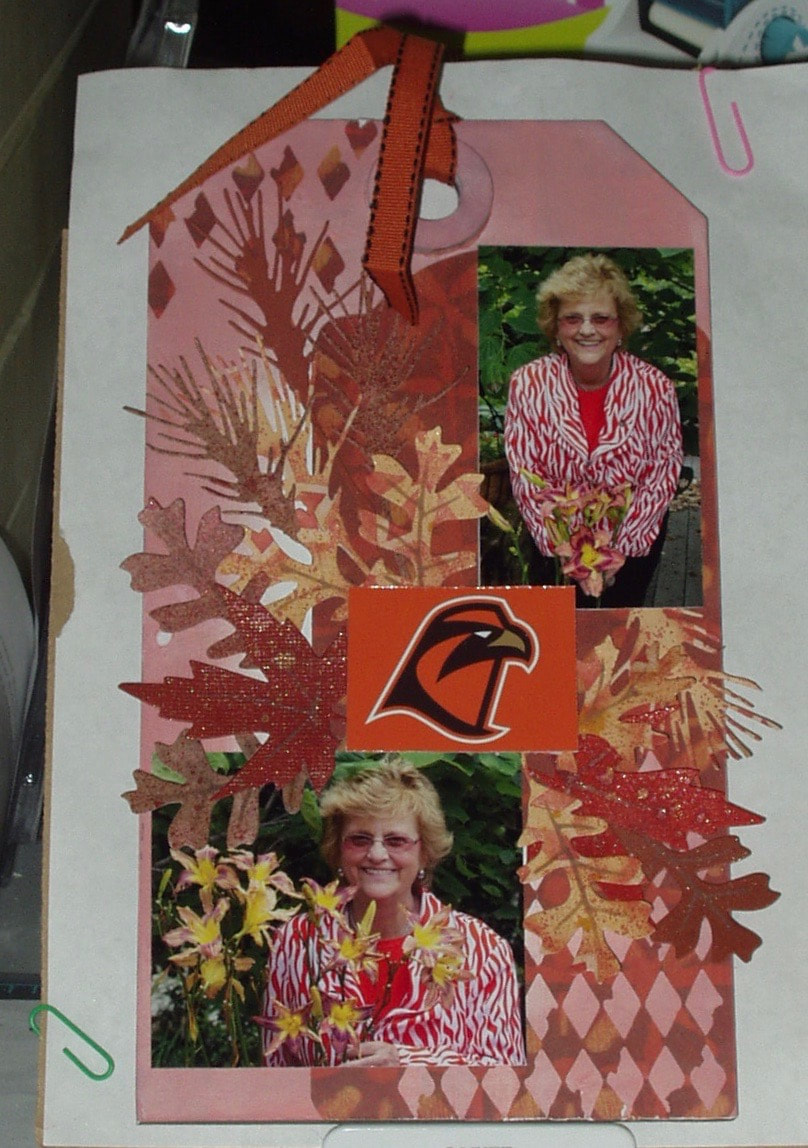
Jennifer McGuire had a tutorial on her blog abut ways to use background stamps and I thought I'd try a couple with the limited number of background stamps I have.
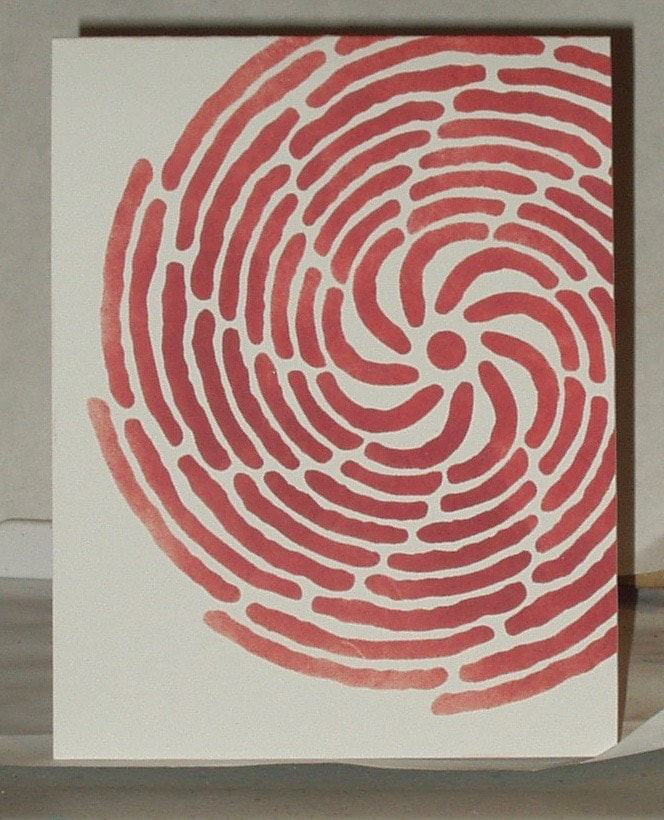
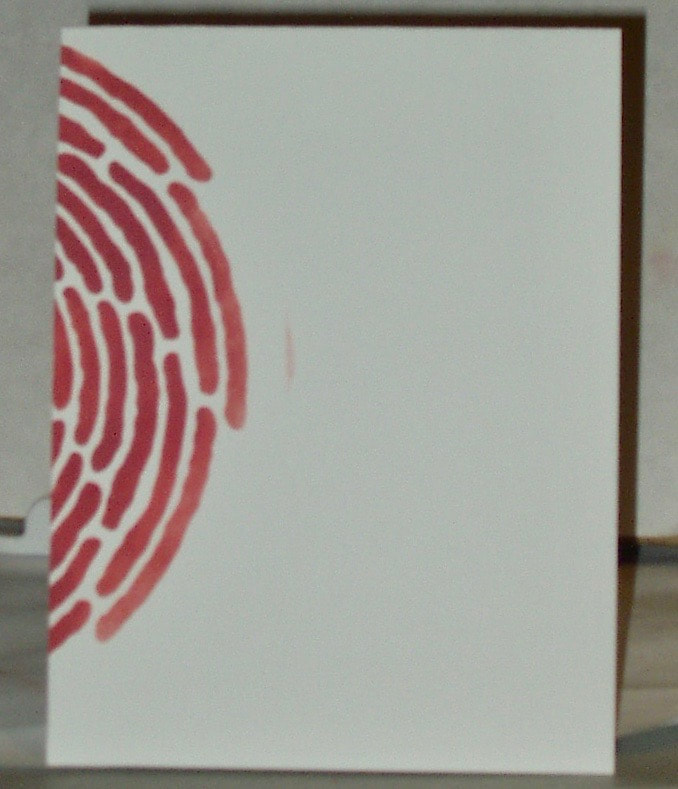
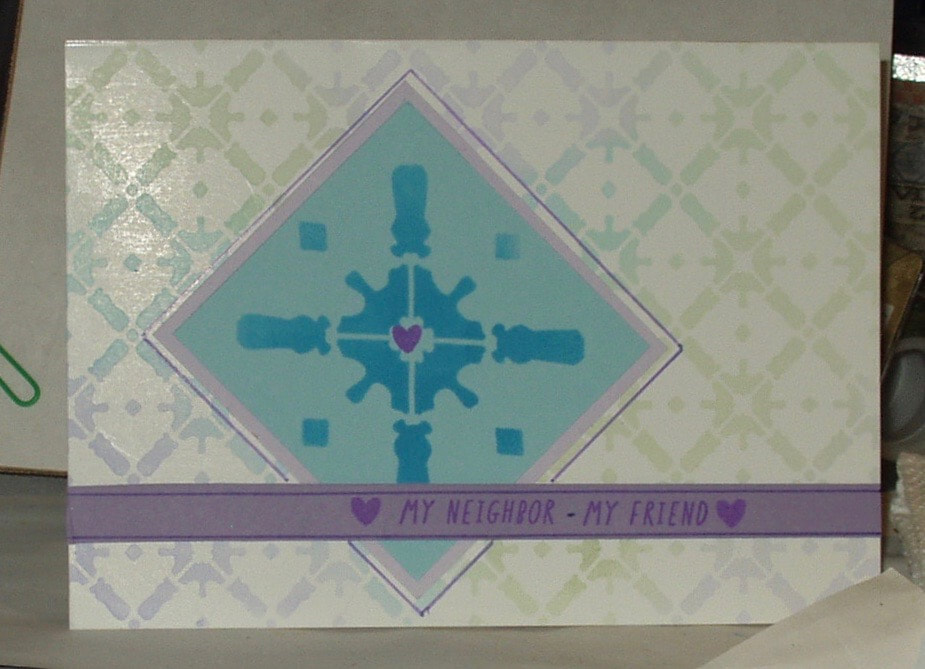
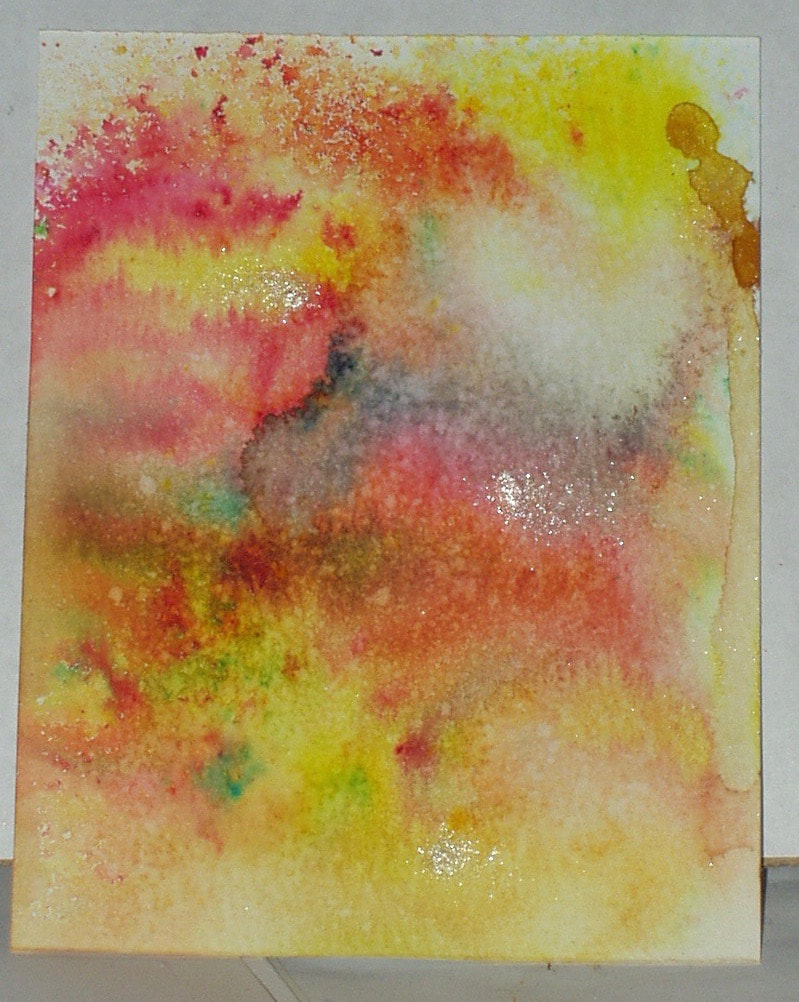
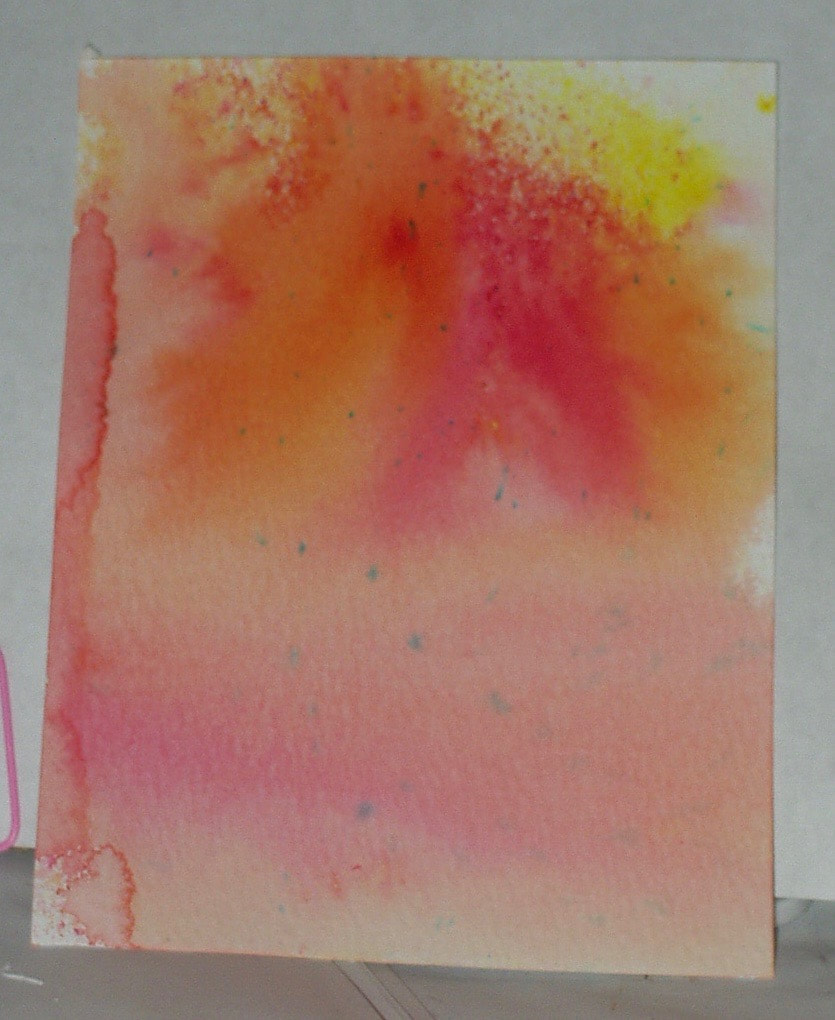
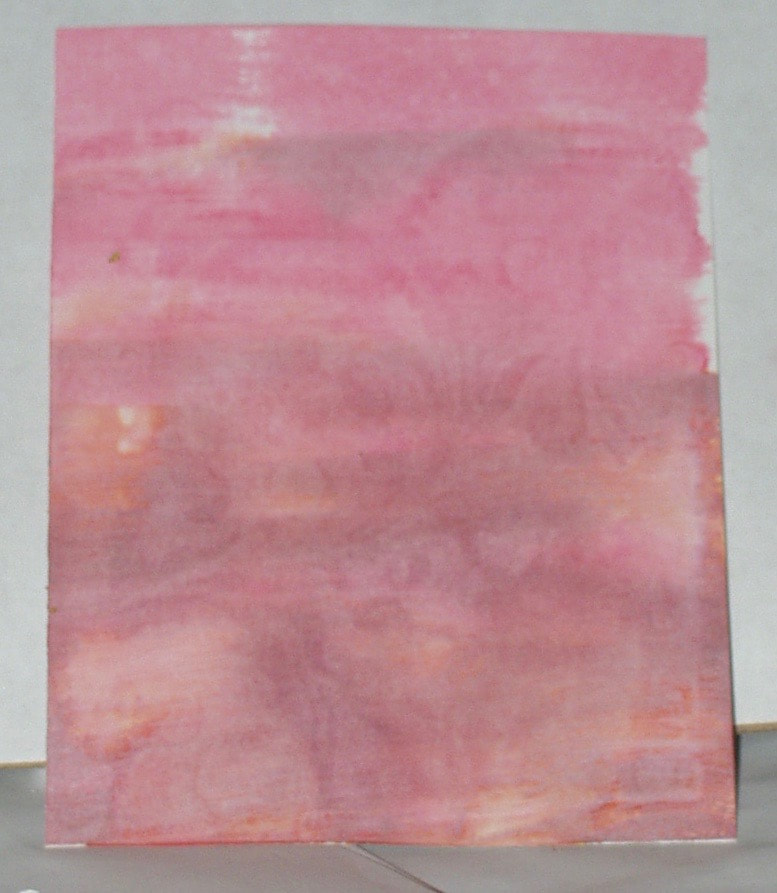
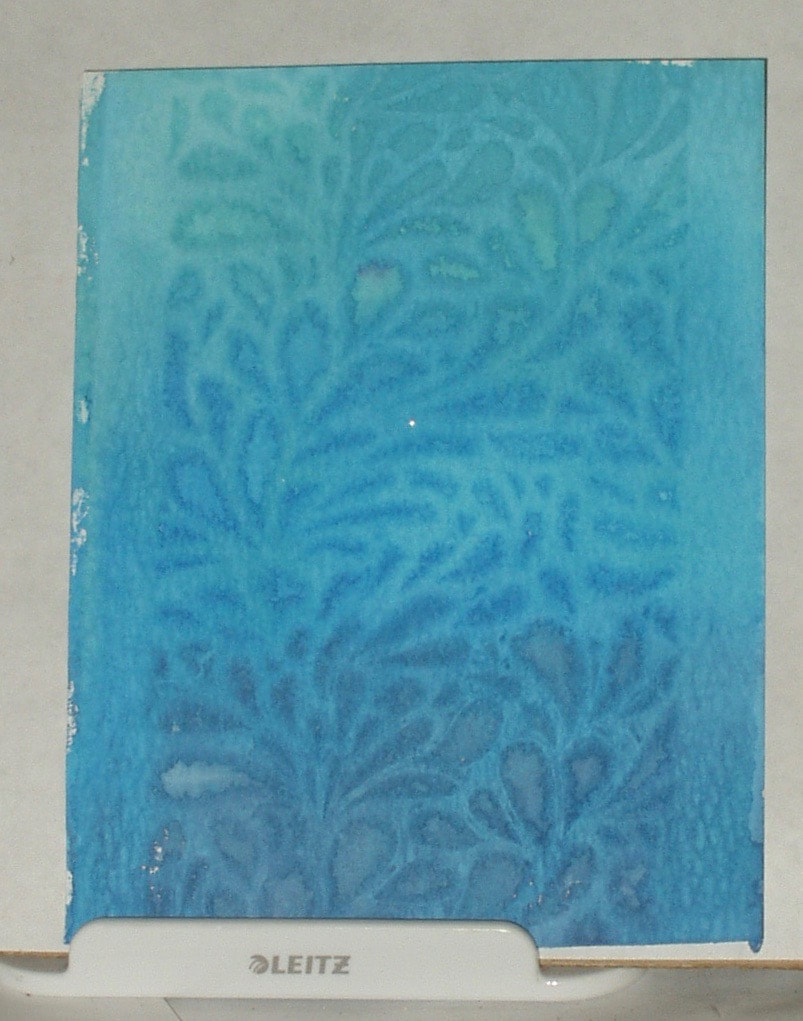
The first technique I tried were using a 4.15 x 5.5" piece of Neena solar white, dividing it into quadrants, and then using background stamps on the reverse side to create a totally different look from that using a single stamp! I made 2 versions, using different inks and different stamps:
The first technique I tried were using a 4.15 x 5.5" piece of Neena solar white, dividing it into quadrants, and then using background stamps on the reverse side to create a totally different look from that using a single stamp! I made 2 versions, using different inks and different stamps:
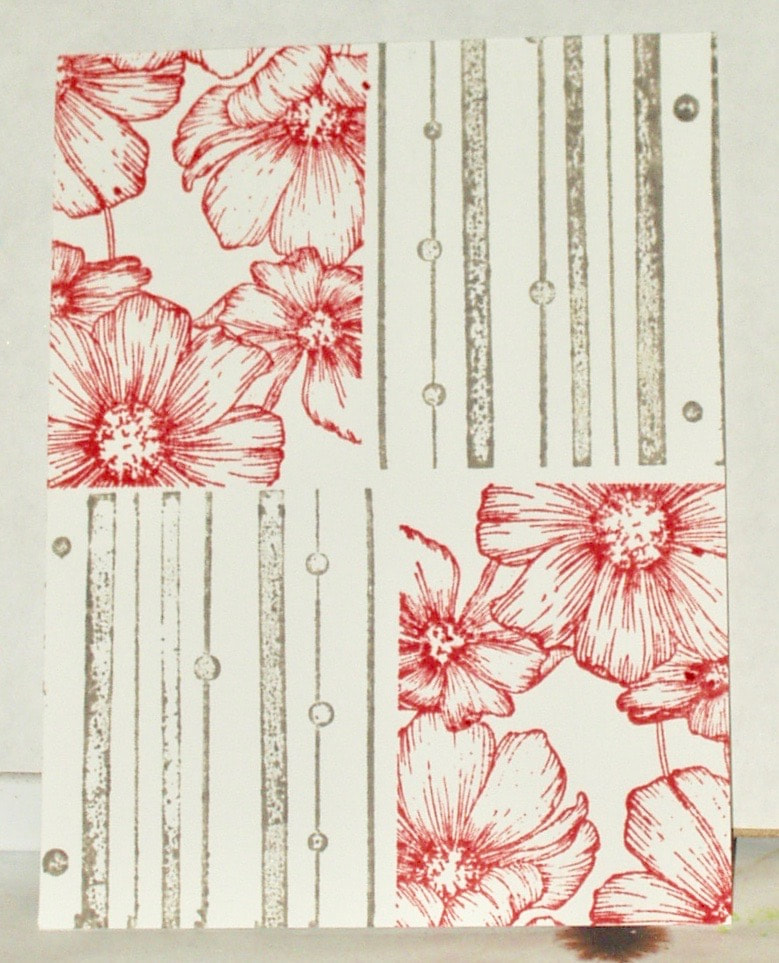
The stamp-ink combination on the left is Distress Ink "Seedless Preserves" with a Hero Arts "Keep Calm" background stamp and Distress Ink "Fossilized Amber" with a Simon Says Stamp "Ornate Background". The stamp-ink combination on the right is Distress Ink "Pumice Stone" with a Hero Arts "Dots and Stripes" background stamp and Distress Ink "Abandoned Coral" with a Simon Says Stamp "Cosmos Background" stamp.
I simply laid the stamps down face up on my desk-top, inked a corner and placed the paper on top and rubbed the paper to get the image. The "Dots and Stripes stamp was new and clearly not "conditioned" as the Pumice Stone ink beaded up and didn't give full coverage. I can see that using a stamping platform might have been beneficial here -
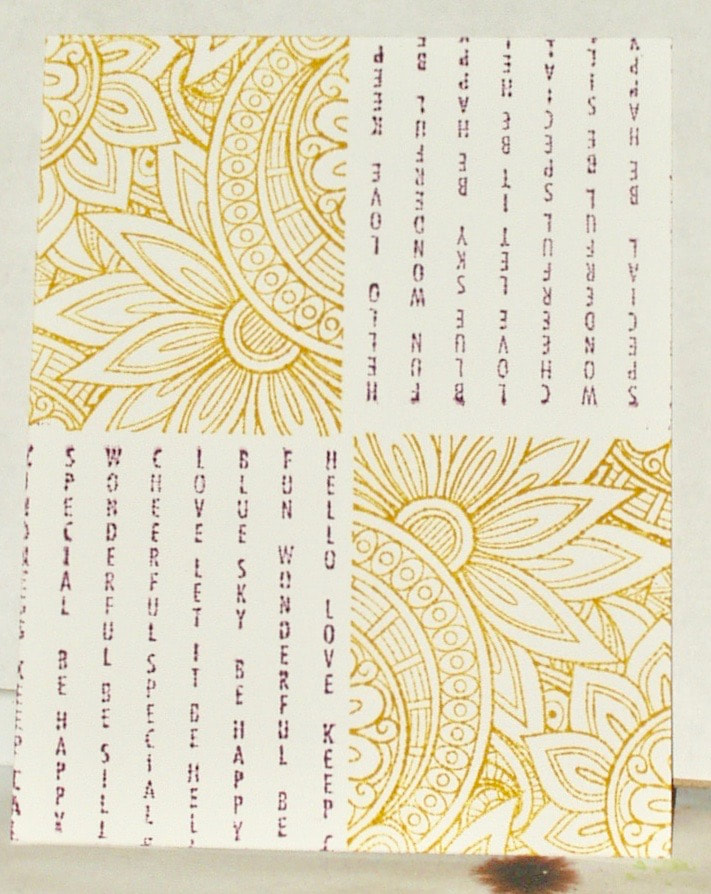
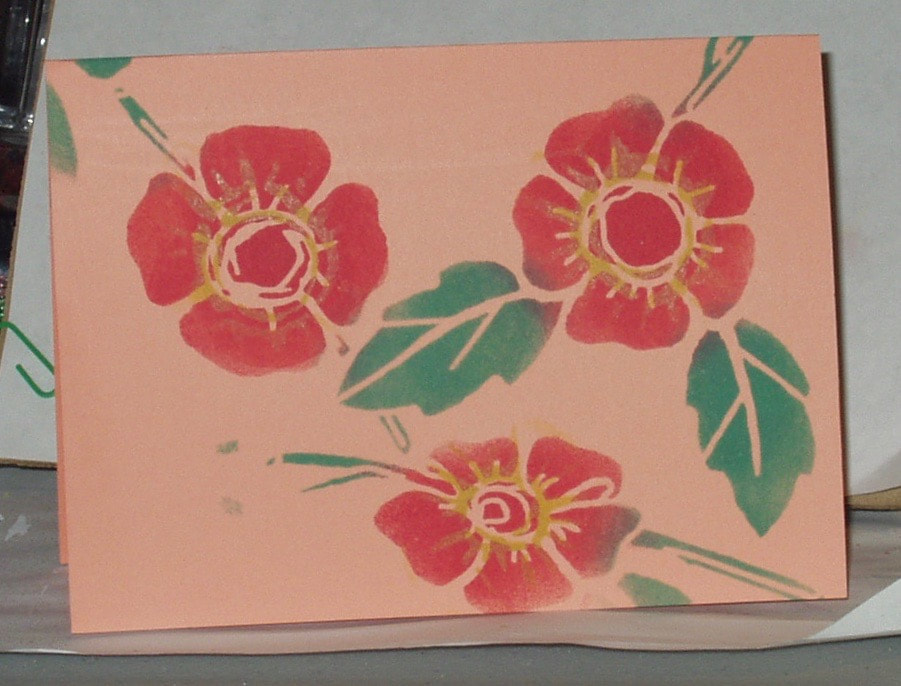
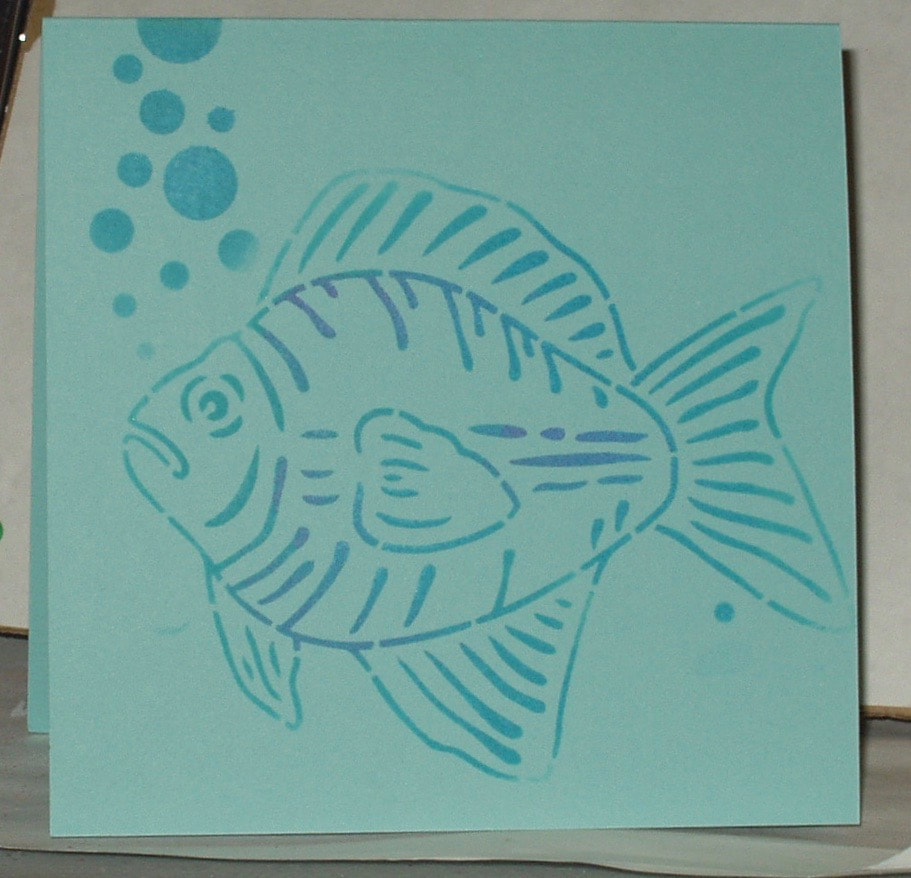
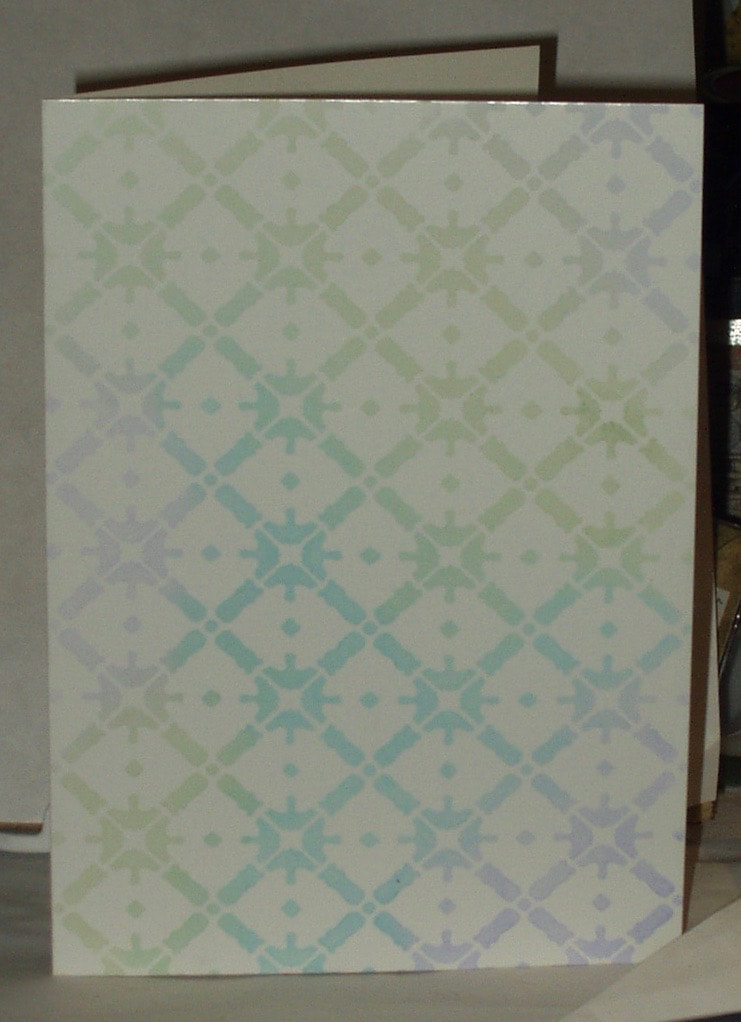
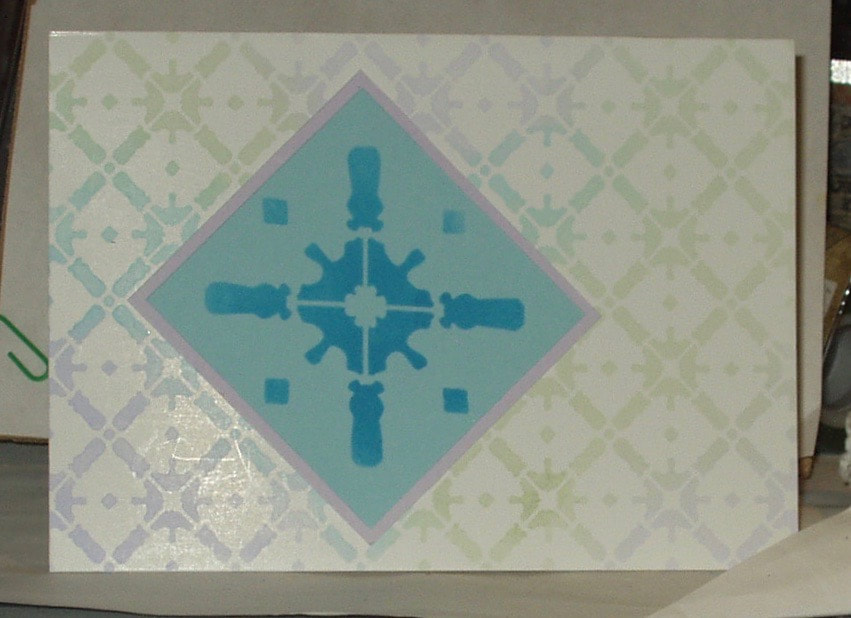
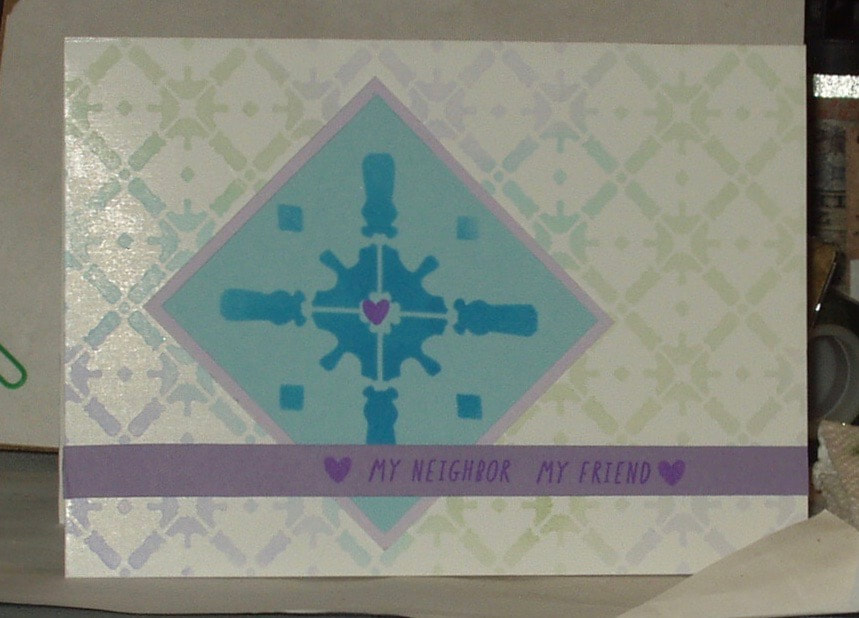
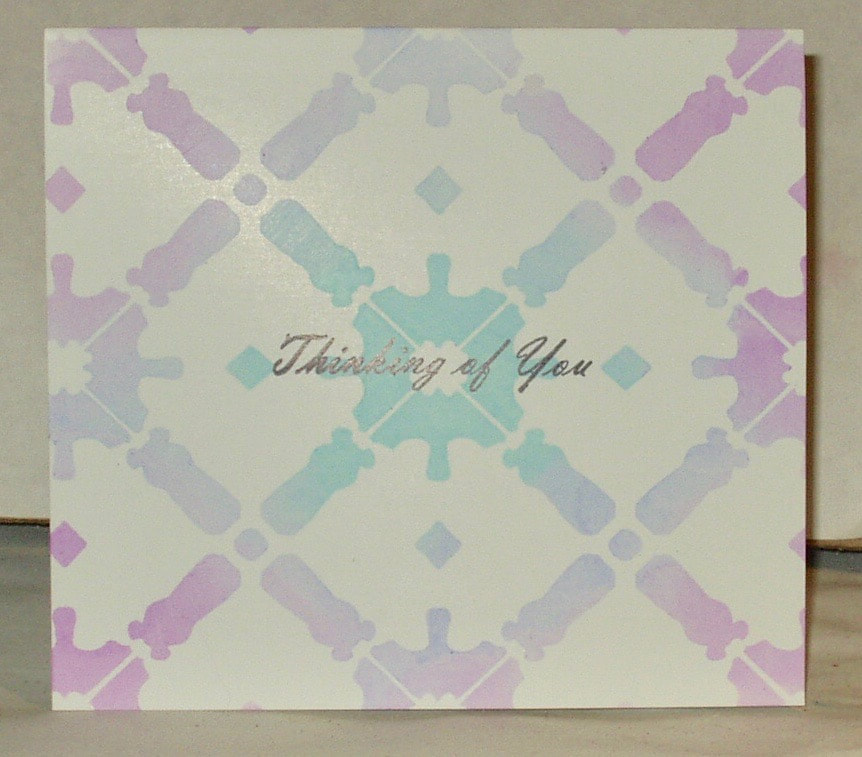
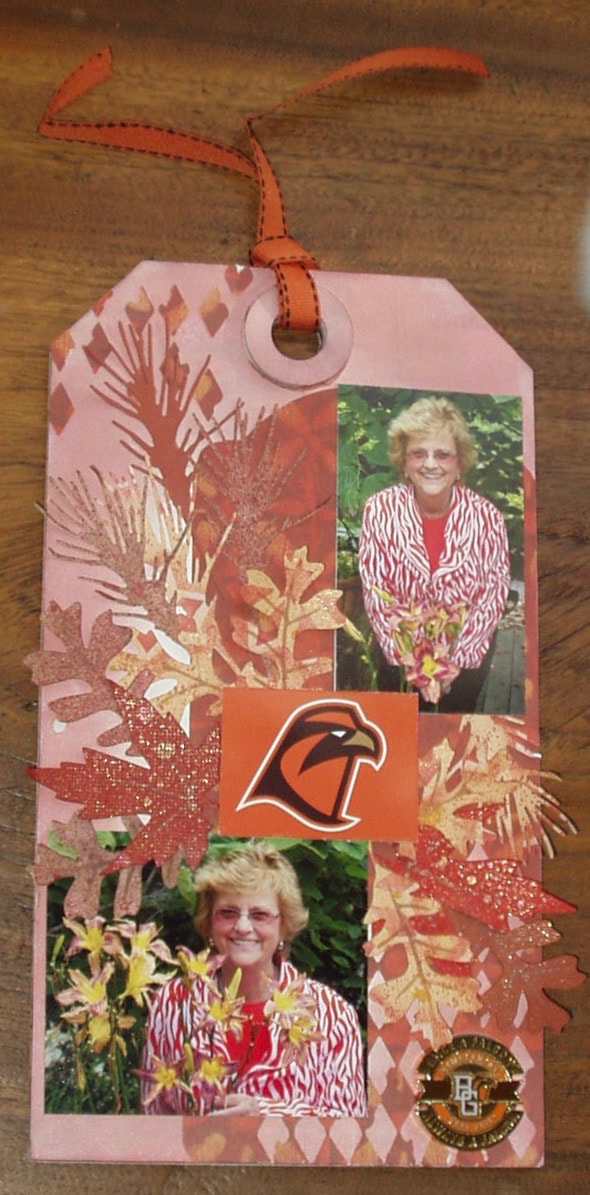
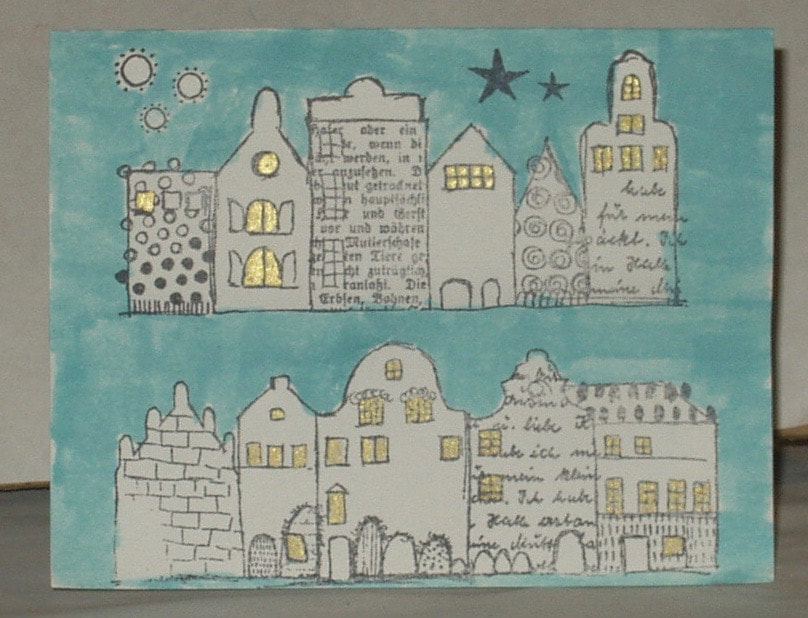
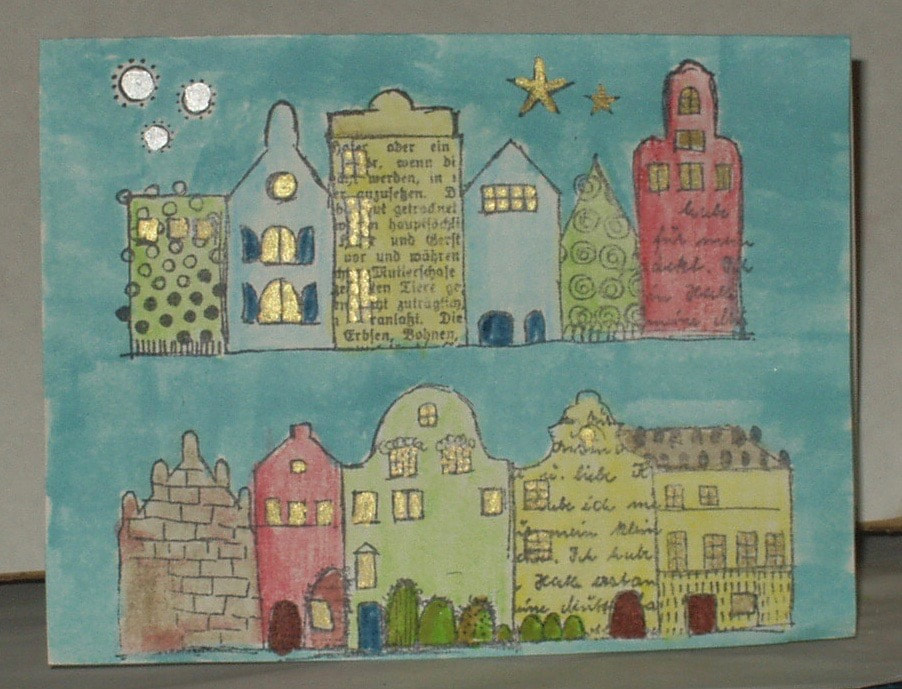
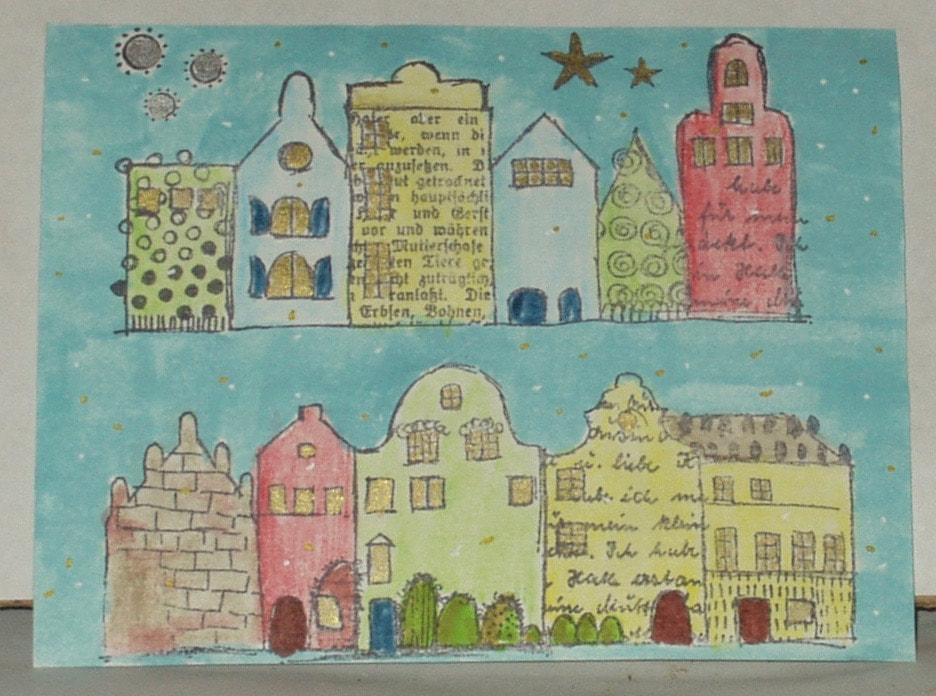
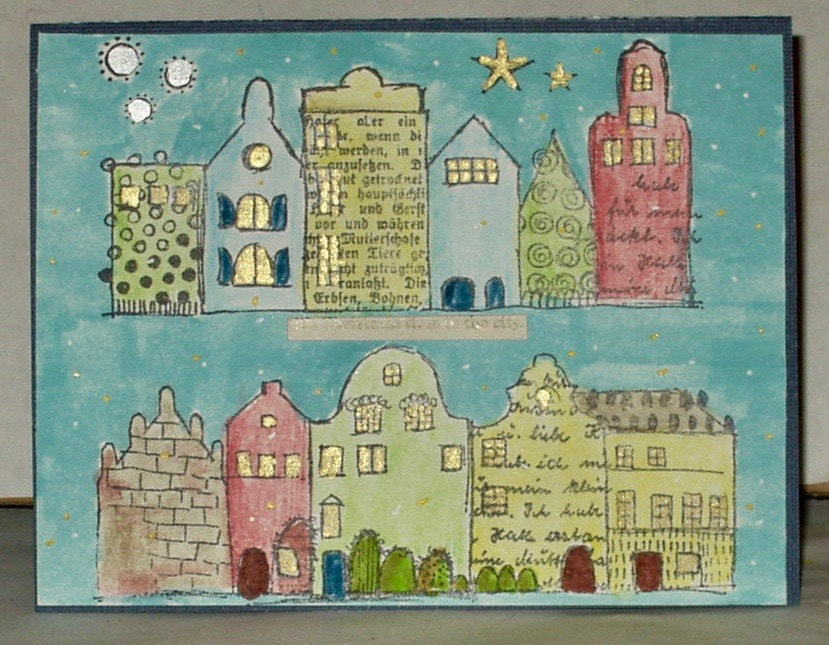
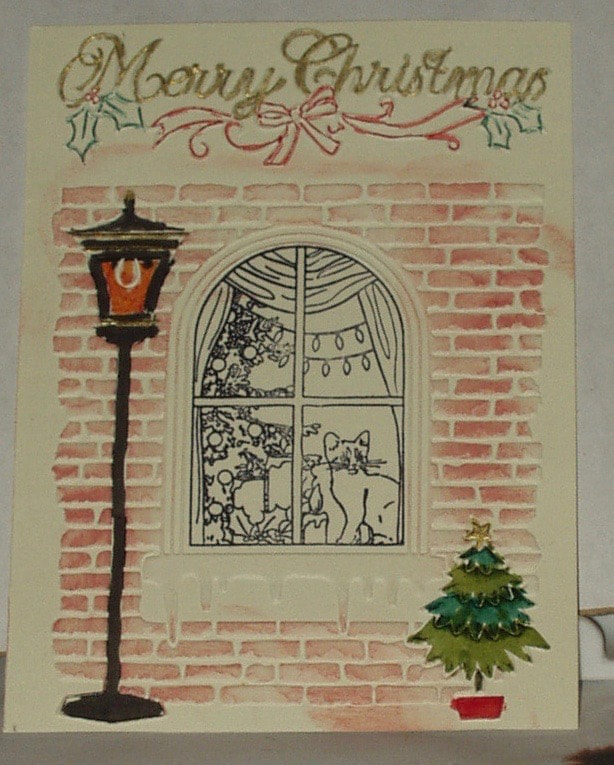
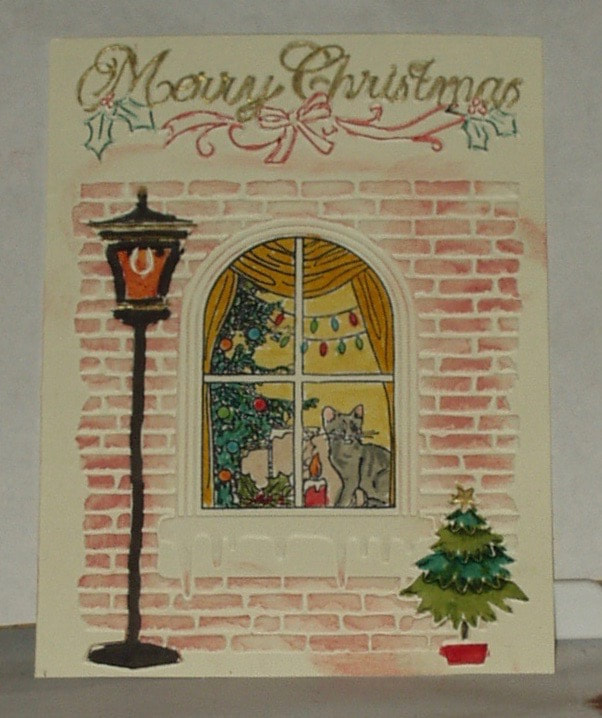
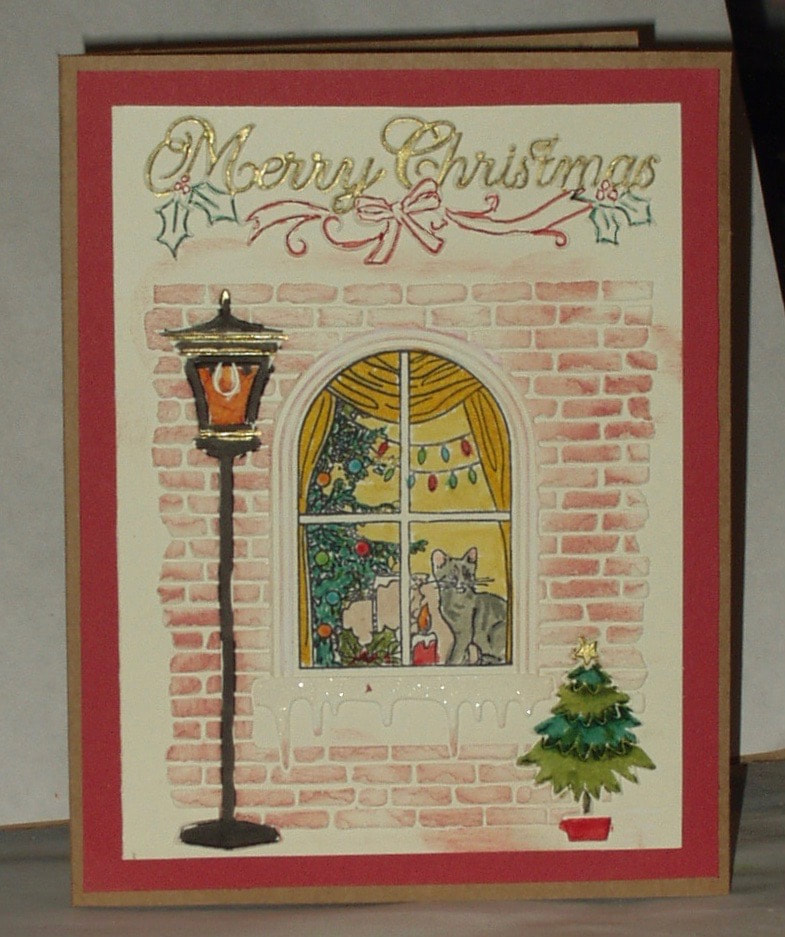
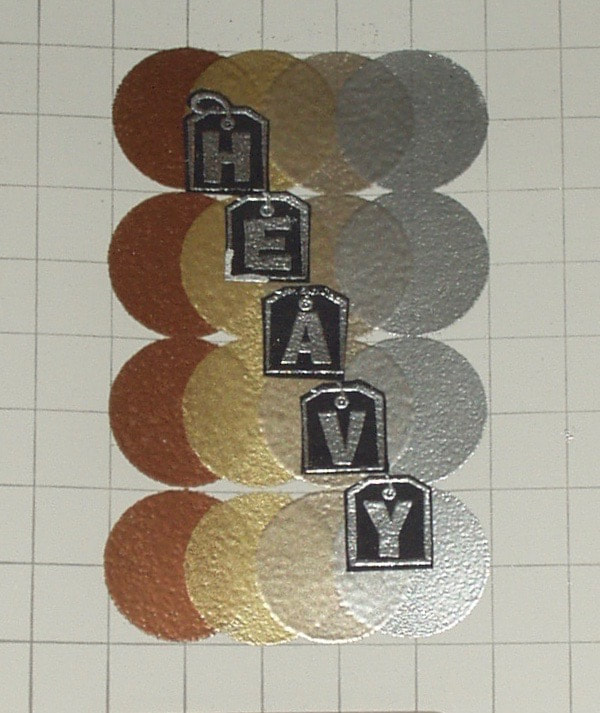
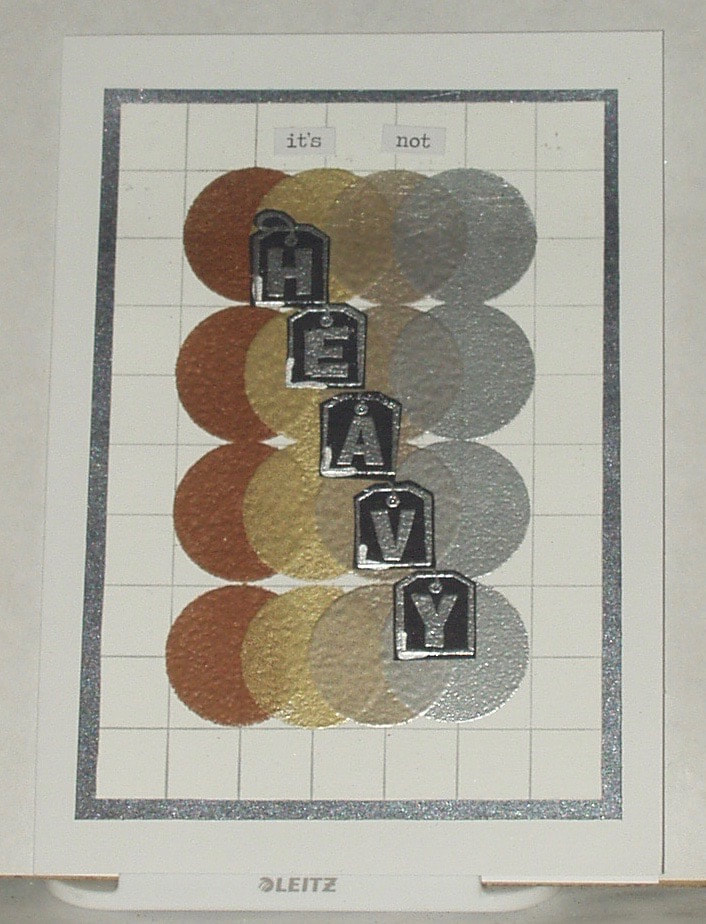
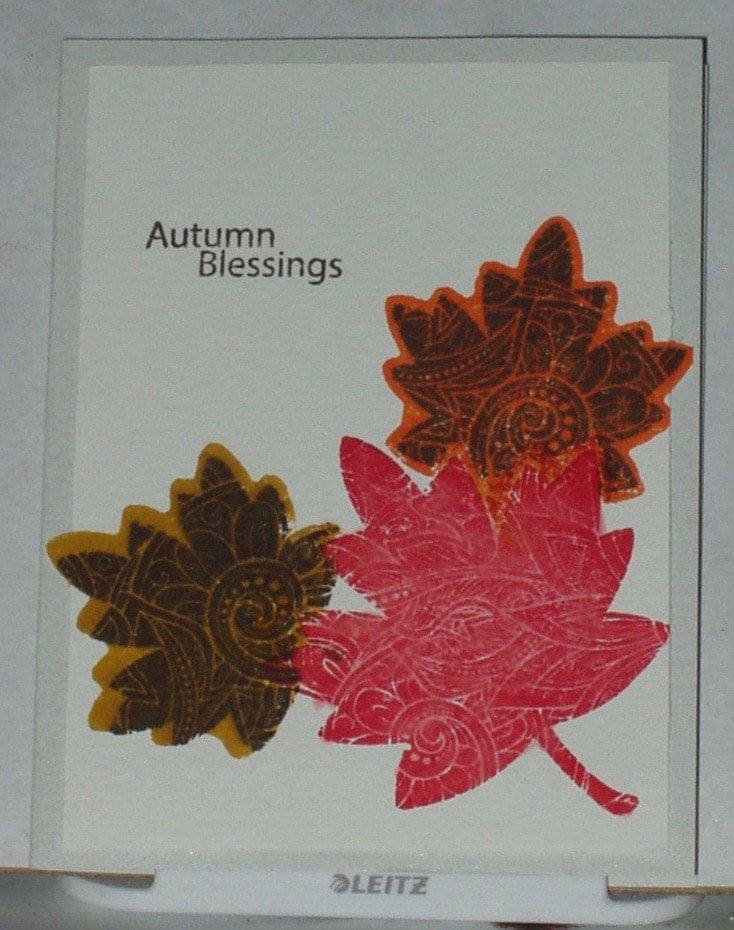
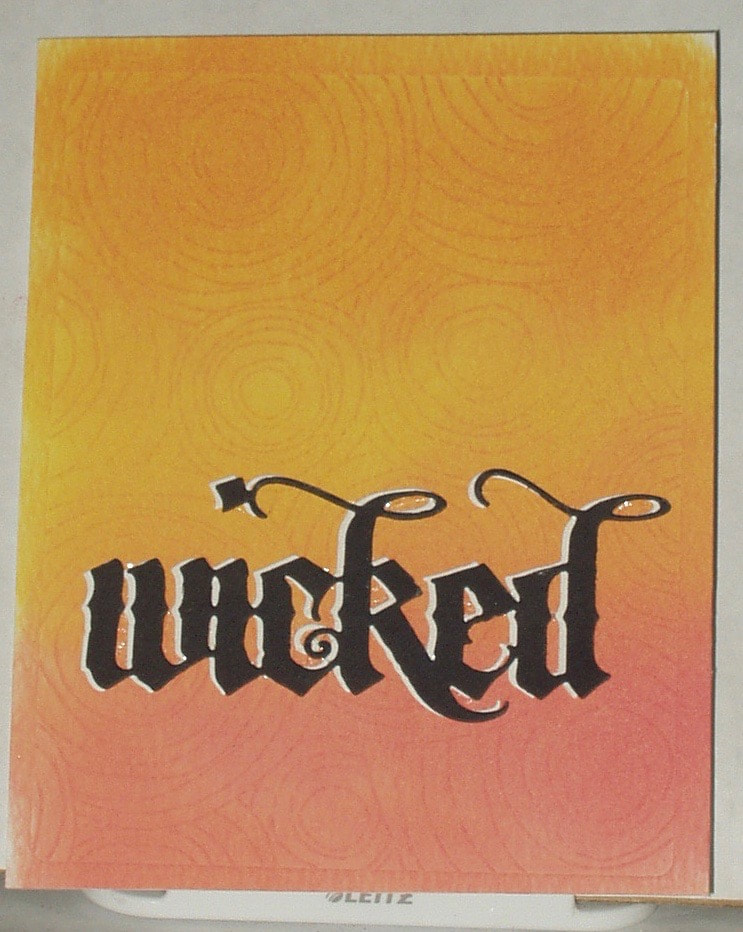
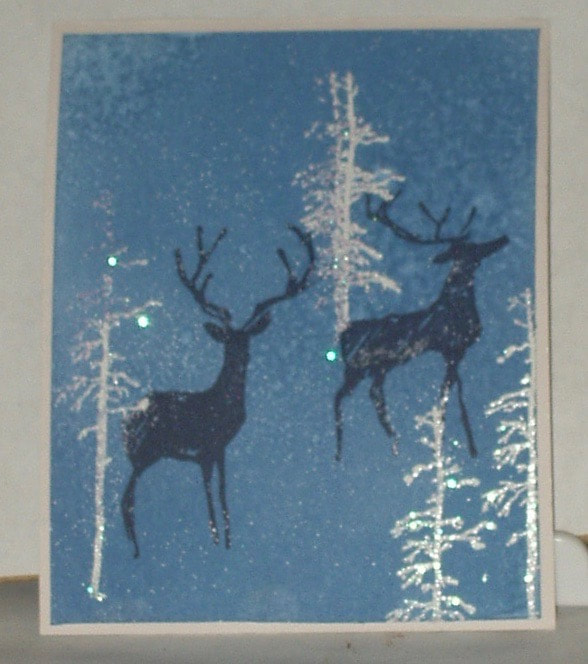
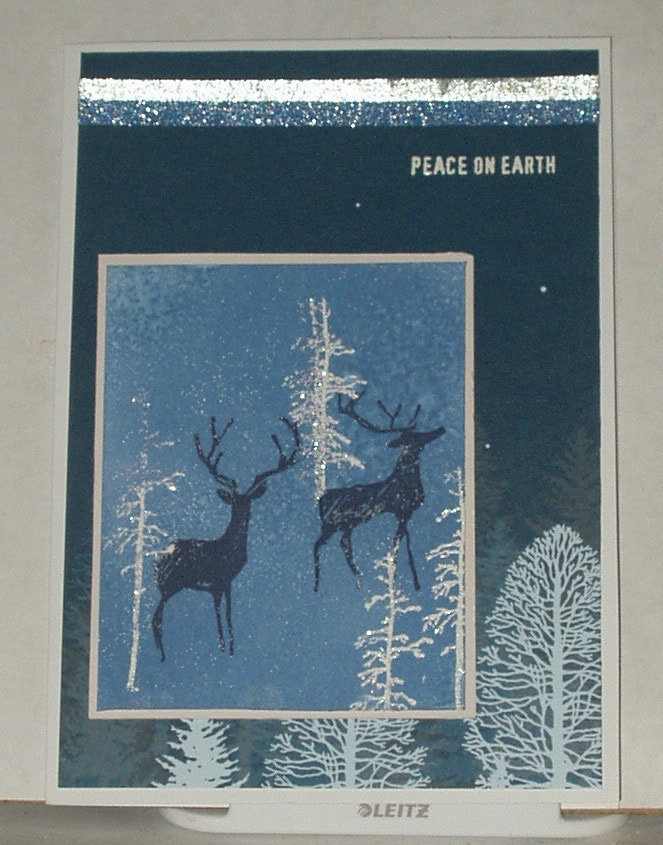
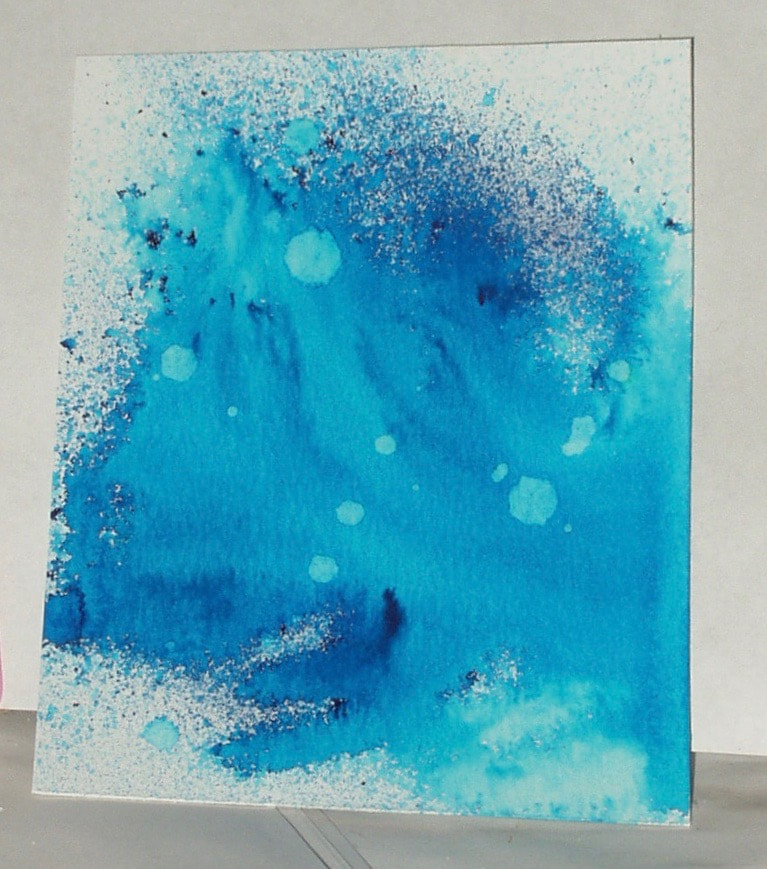
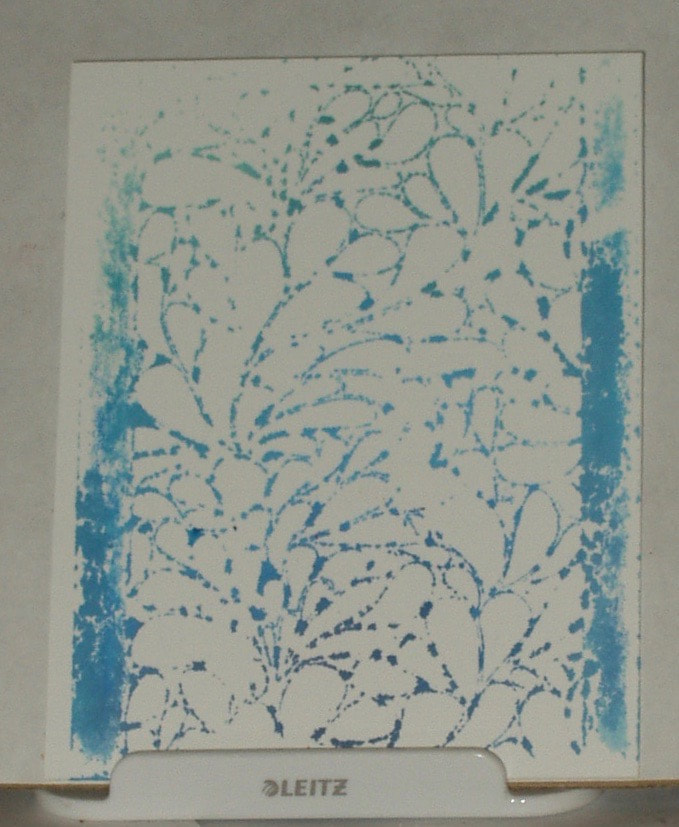
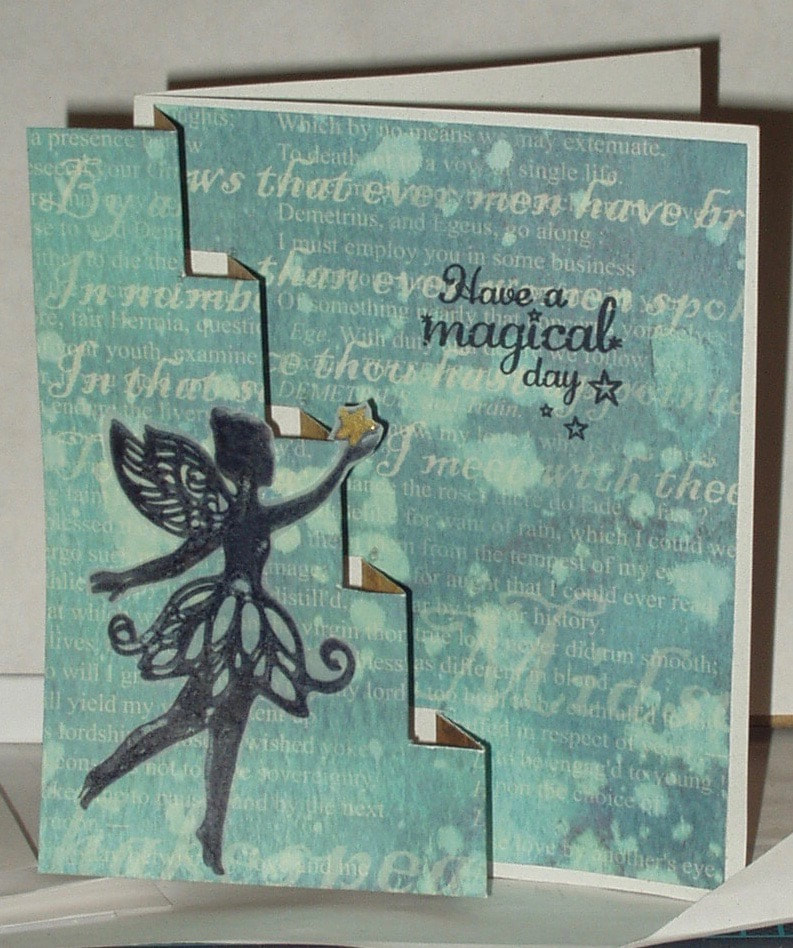
From the same blog post, Jennifer demonstrated how to make a background that allows for insertion of a sentiment on a single layer card:
I simply laid the stamps down face up on my desk-top, inked a corner and placed the paper on top and rubbed the paper to get the image. The "Dots and Stripes stamp was new and clearly not "conditioned" as the Pumice Stone ink beaded up and didn't give full coverage. I can see that using a stamping platform might have been beneficial here -
From the same blog post, Jennifer demonstrated how to make a background that allows for insertion of a sentiment on a single layer card:

The stamp-ink combination was Distress Ink "Lucky Clover" with Hero Arts "Classic Fabric Design" and Distress Ink "Twisted Citron" with Stampendous "Decor Music" stamp. ("Classic Fabric design" was another stamp where the ink beaded up on the surface and gave a blotchy result.)
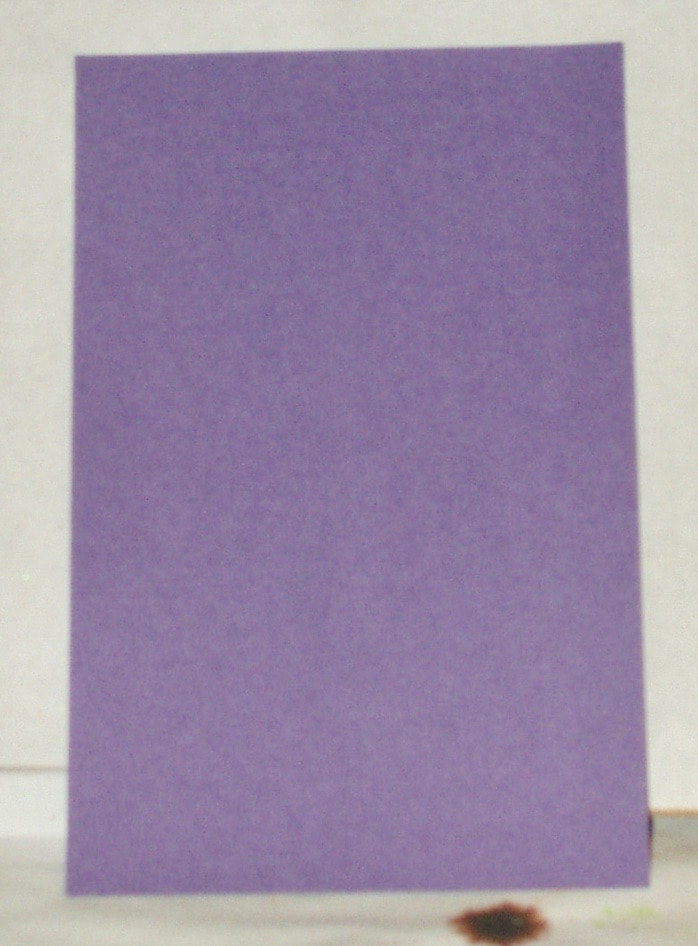
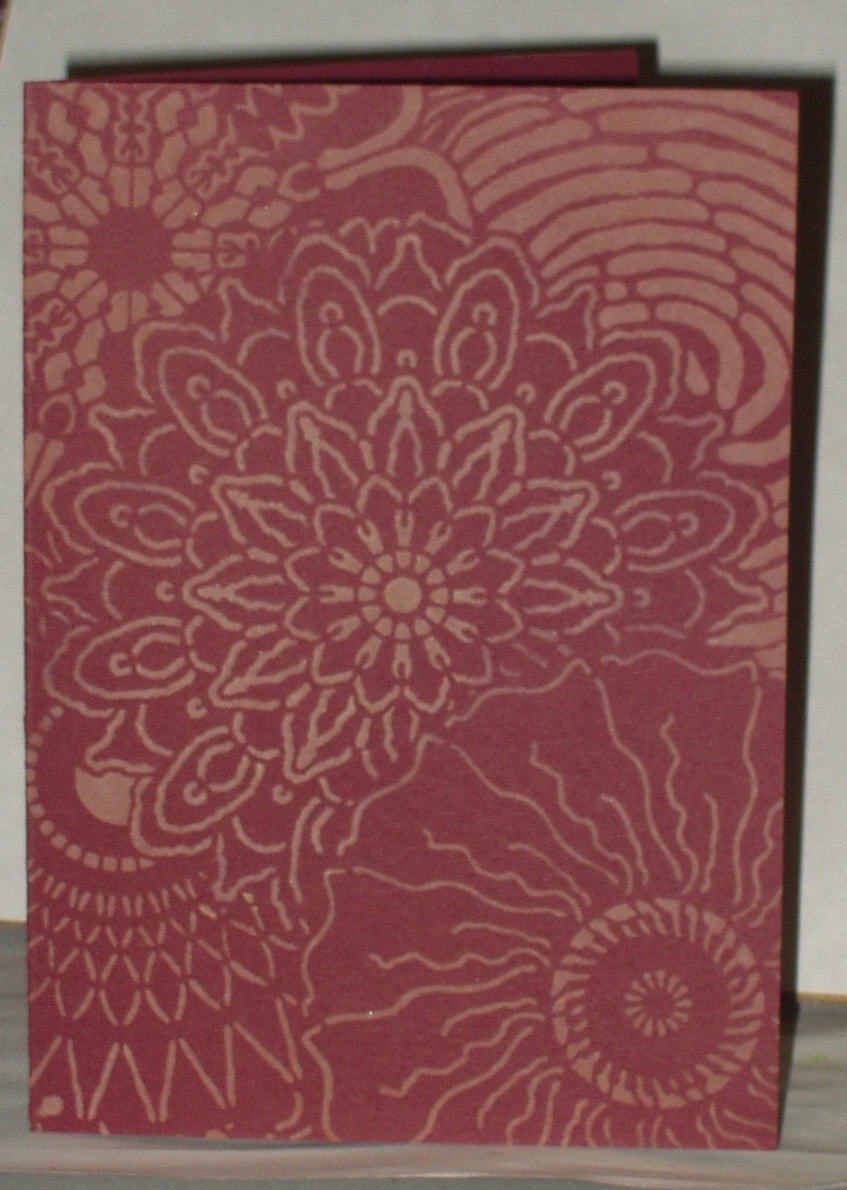
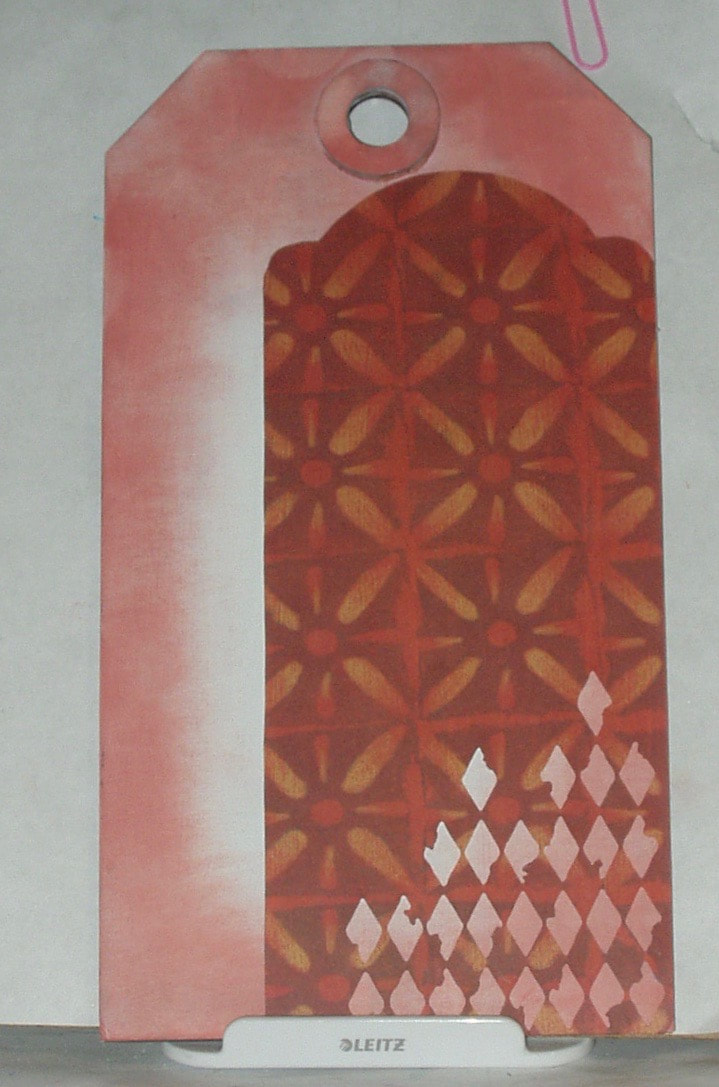
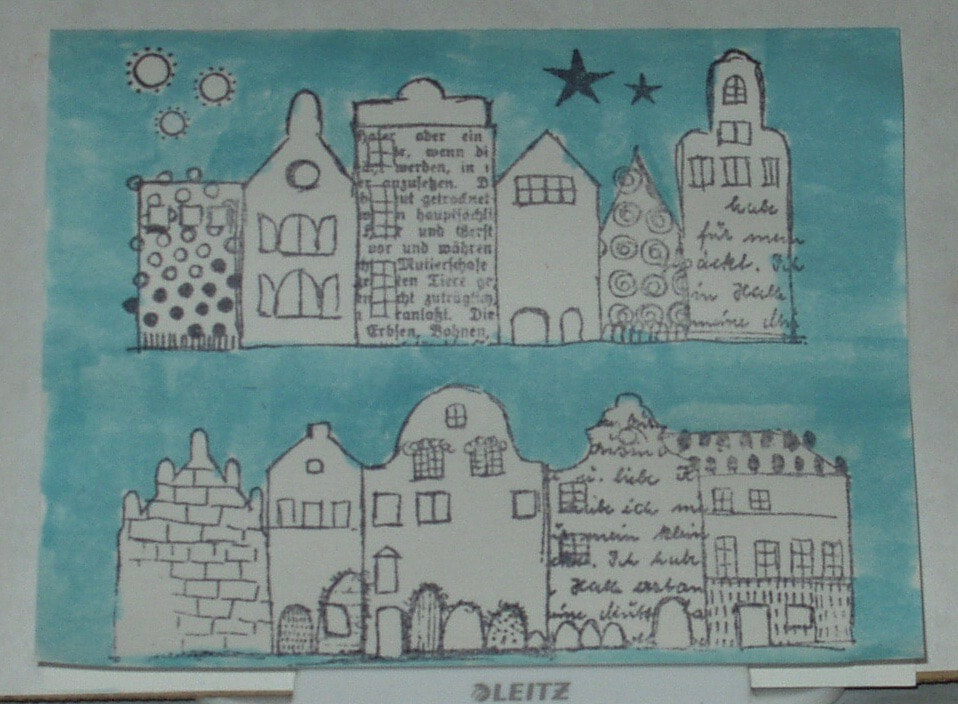
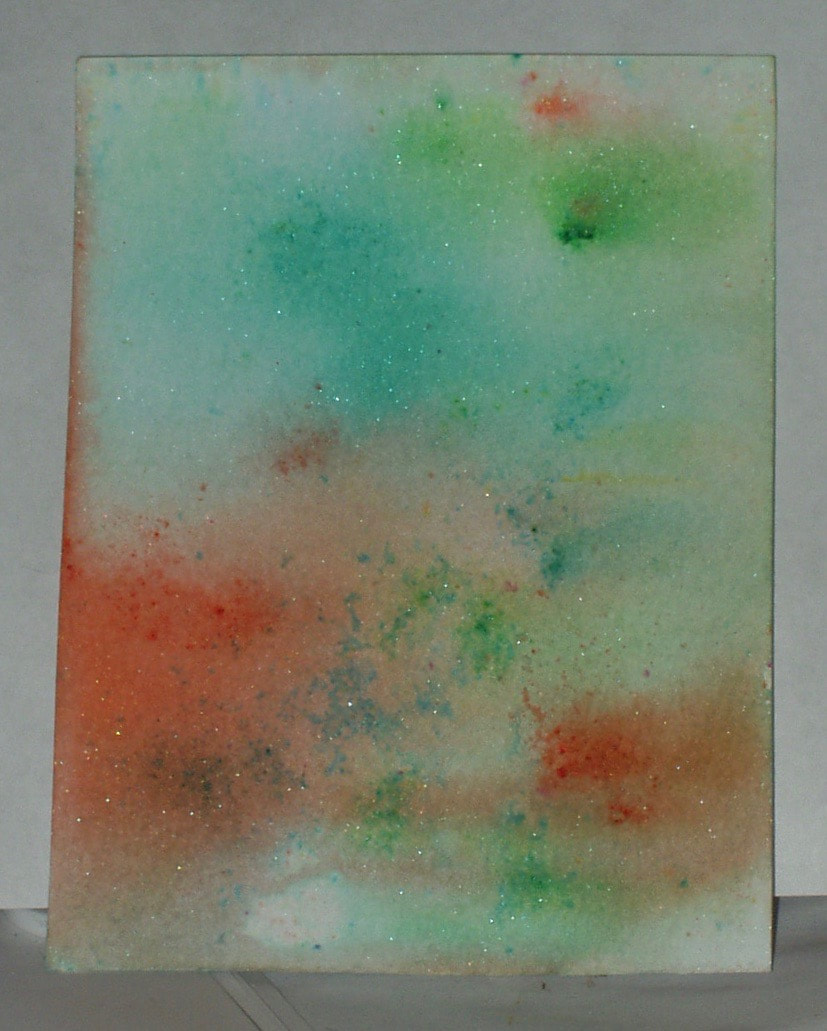
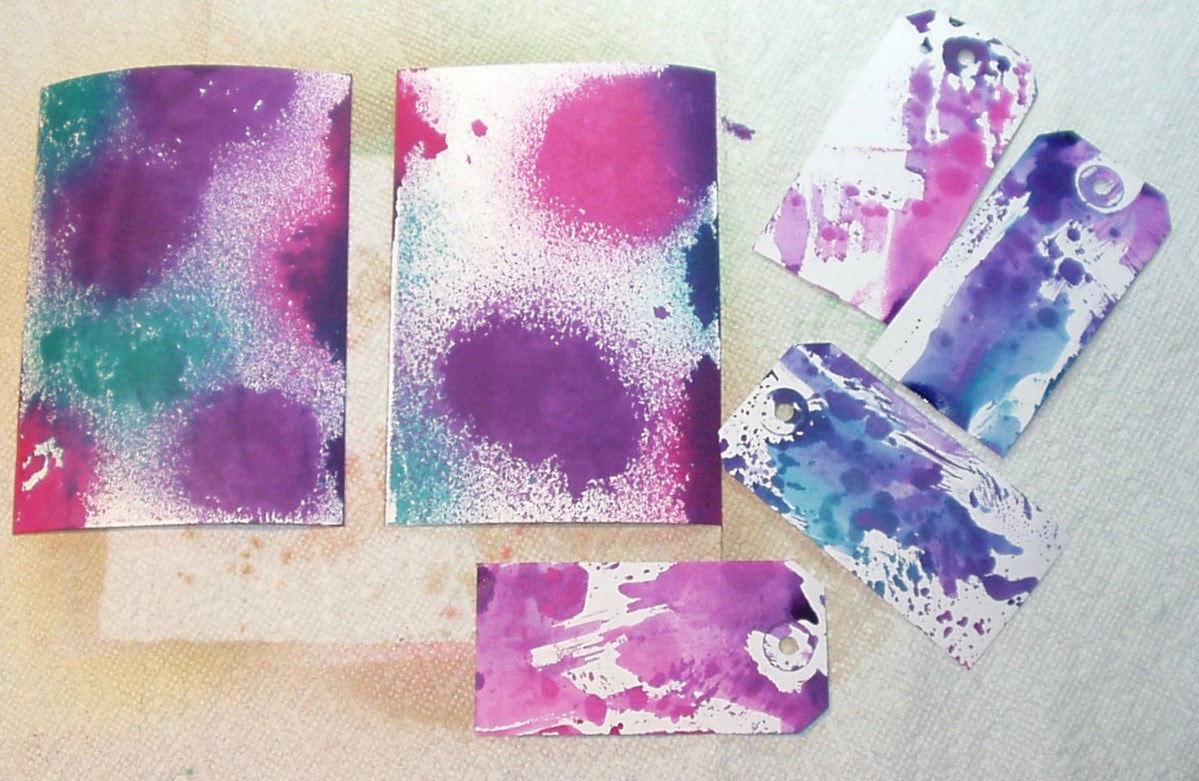
In a completely different post, Jennifer showed several ways how to use the new 3D Embossing folders from Tim Holts to create backgrounds. I only have one of these folders at present so I tried to use a couple of the techniques she described but on one background. I started with a scrap of purple Bazzil cardstock:
In a completely different post, Jennifer showed several ways how to use the new 3D Embossing folders from Tim Holts to create backgrounds. I only have one of these folders at present so I tried to use a couple of the techniques she described but on one background. I started with a scrap of purple Bazzil cardstock:
and, after lightly misting it with water (she didn't say to do this but the folder's instructions recommend it), used the "Botanical" folder which I had previously smeared with Distress Ink "Seedless Preserves. After embossing, I dusted the car with Perfect Pearls "Forever Violet" and the lightly rubbed the embossed features with a Distress Ink "Picket Fence" ink pad:
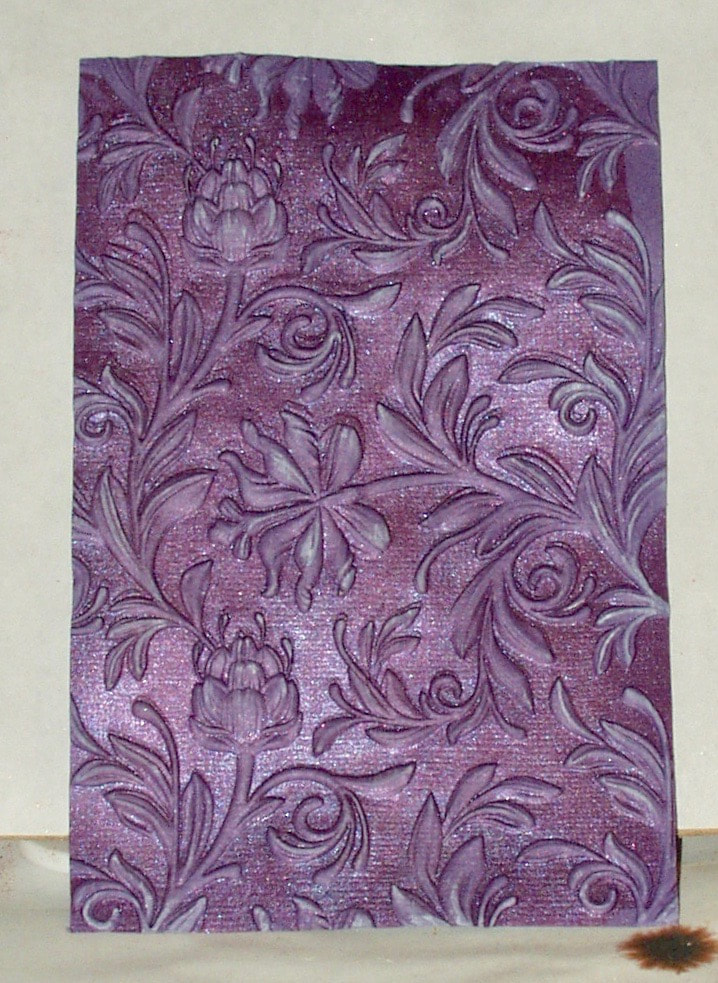
I had to run this through my Big Shot twice because somehow, I had inked the wrong side of the embossing folder the first time. Also, there is one bit of the embossing folder I clearly missed with the ink (upper right corner) and there were some paper "punctures" (for want of a better word) in some of the smaller features of the artichoke-like bloom in the upper left (cardstock not wet enough, or maybe that second time was too much for the paper?) but otherwise, this worked nicely fo me...
I will work on card ideas for these and maybe even try some of the other techniques Jennifer demonstrated at some future date (I do so enjoy her videos!).
Products used in today's experimentation were:
I will work on card ideas for these and maybe even try some of the other techniques Jennifer demonstrated at some future date (I do so enjoy her videos!).
Products used in today's experimentation were:
- Stamps: Hero Arts "Keep Calm" (CG512), "Dots and Stripes (CG150) and "Classic Fabirc Design" (CG245); Simon Says Stamp "Ornate Background" (SSS01763) and "Cosmos Background" (SSS 101802); and Stampendous "Decor Music" (DCR 105)
- Embossing Folders: Sizzix "Botanical 3D" (662716)
- Inks: Distress Inks "Seedless Preserves", "Fossilized Amber", "Abandoned Coral", "Pumice Stone", "Lucky Clover", "Twisted Citron" and "Picket Fence"; Perfect Pearls "Forever Violet"
- Papers: Neena "Solar White"; Bazzill purple


 RSS Feed


