Carol Stamps
  • Carol Stamps
  • Compendium of Curiosisties 3 Challenge - Gallery
  • Tim Holtz
    • 12 Tags of ...
    • Creative Chemistry 101
    • Creative Chemistry 102
    • Creative Chemistry 103
    • Summer of Creative Chemistry 2016
    • #hipforsummer 2017
    • #sharewithsizzix
    • #holtzforhalloween
    • #holtzfortheholidays
    • Share-a-Scare
    • Tim Holtz Christmas photo holder
  • Simon Says Stamp Challenges
    • Simon Says Create
  • Frilly and Funkie Challenges
  • Sunday Stamper
  • More Than Words
  • Creative Carte Blanche
  • Altenew
  • Seven Hills
  • Hero Arts
  • WOW! Embossing Powder
  • Graphic 45
  • Virginia's View Challenge
  • Dyan Reaveley classes, 2015
  • Just playing around
    • Art Swaps
    • Club Posh
    • Stencil Girl
    • Ranger Kits
    • Stamptember
  • Lindy's Stamp Gang
  • WOW! Challenges
  • Ellen Huston
  • OnLine Card Class
  • All About ATCs

Challenge: Pop It Up #G45PopUP

9/16/2018

3 Comments

 
This week, I decided to complete three challenges with one card: The Graphic45 Community September Challenge: "Create a  Pop-Up 3-D Project with Graphic45", the Simon Says Stamp Wednesday Challenge for September 12, 2018:" Pop It Up!" the Frilly and Funkie Challenge for September 12, 2018: "All Creatures Great and Small". The first two were obvious as both call for pop ups in a project and to add in the third, all I needed was to find some Graphic45 papers that featured creatures, be they great or small! Easy Peasy!

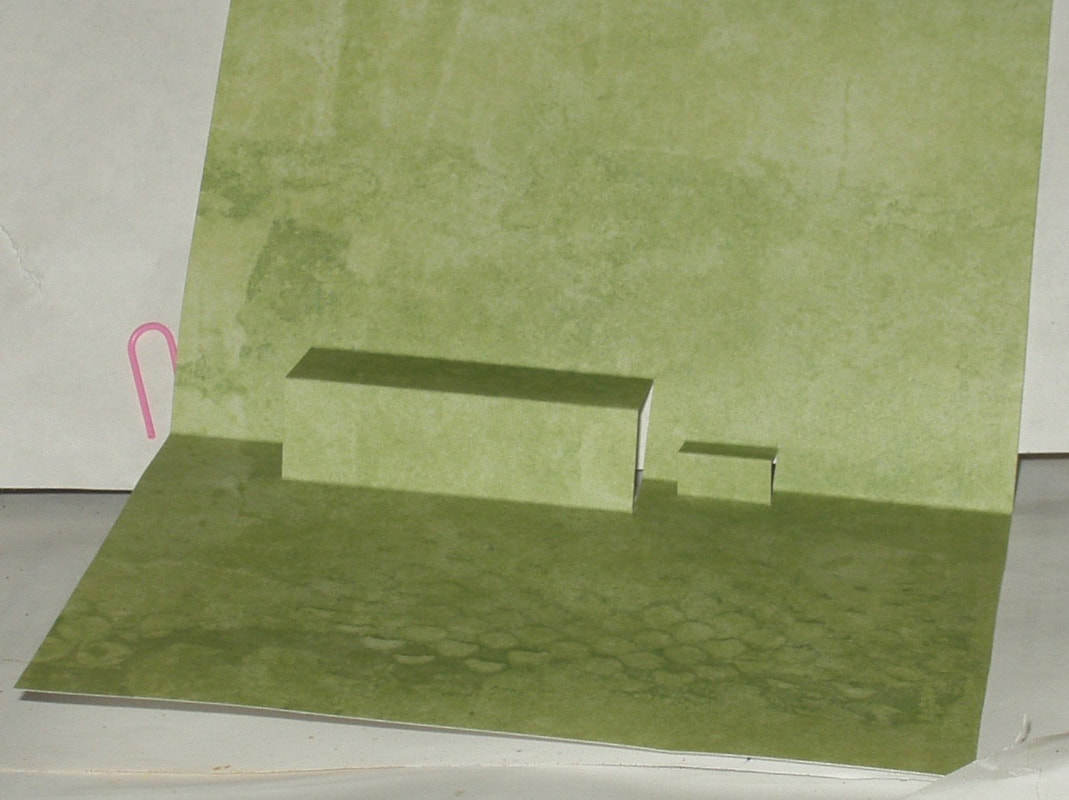
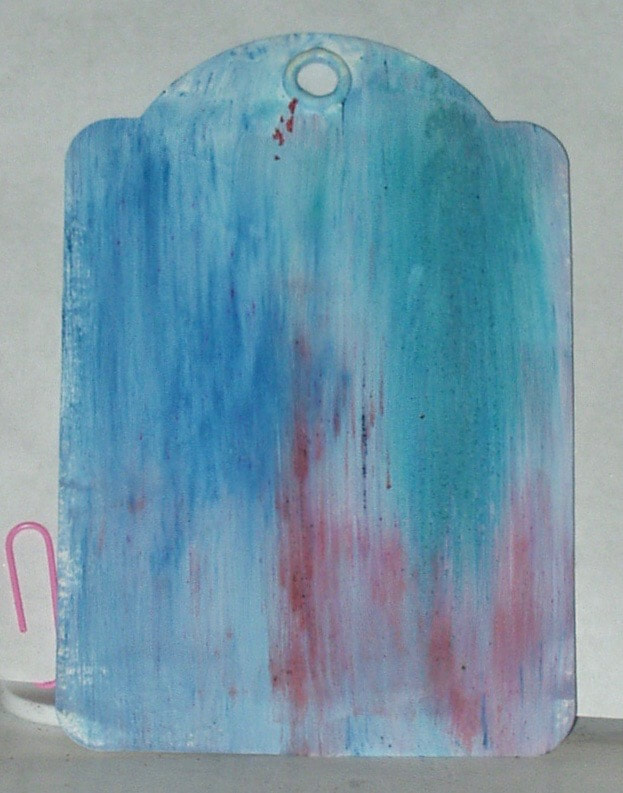
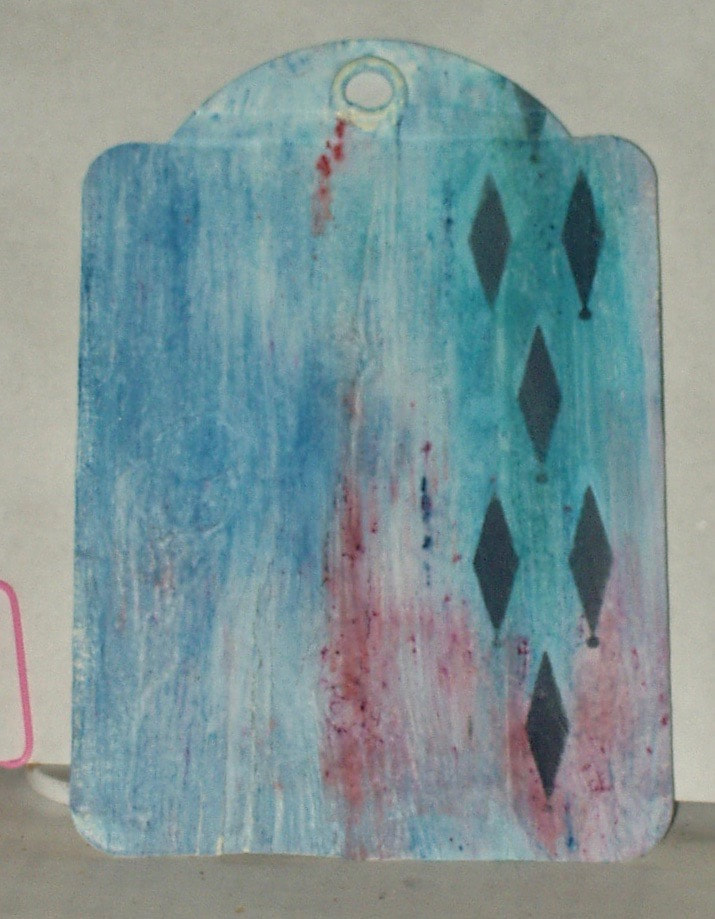
I started with creating my pop-up background paper. To be honest, I was pulling a blank here and had to go searching for templates but I finally worked it out on my own (I have no clue as to why this was such an issue for me. Honestly, I've made dozens of this kind of card...) and came up with this base:
Picture
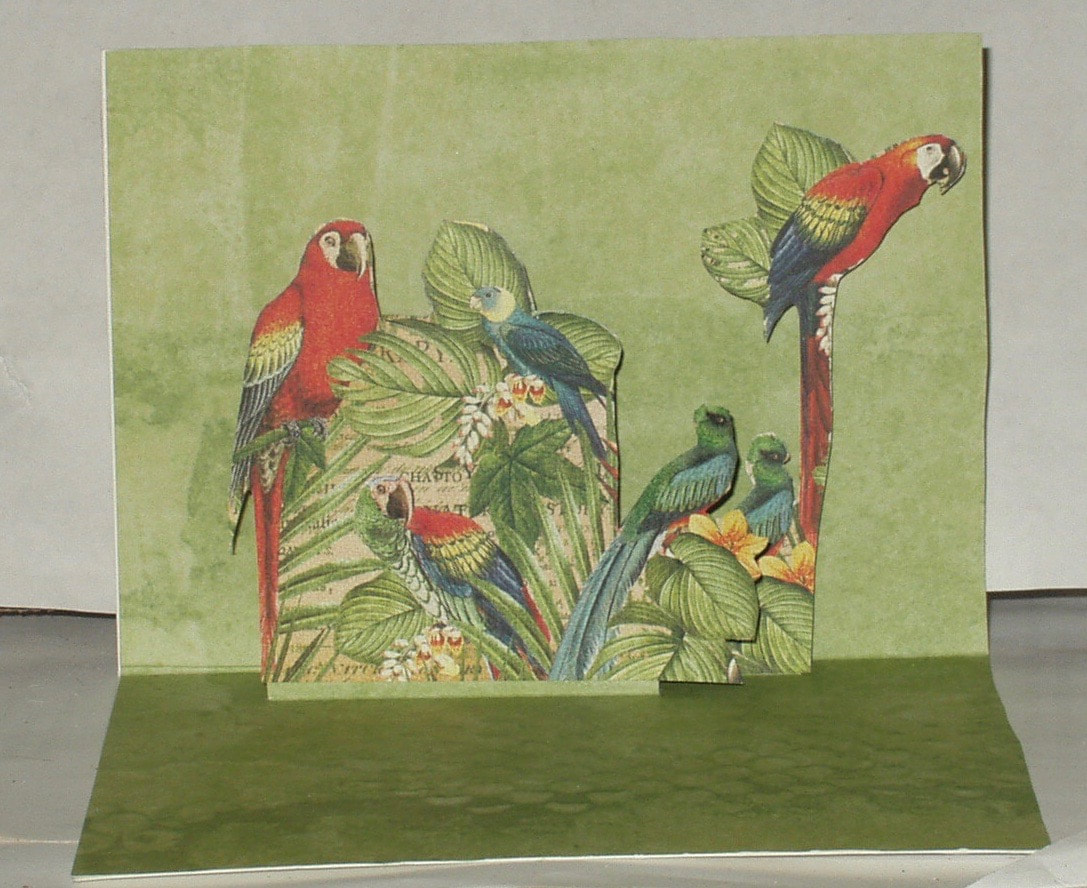
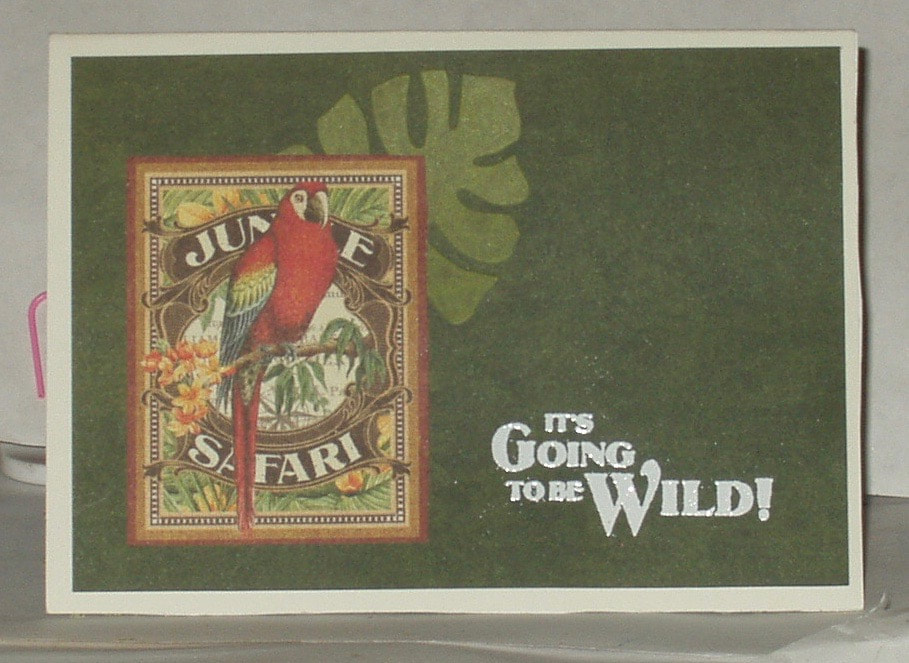
Next, I selected my Graphic45 papers (from the Safari Adventures collection) and fussy cut a few birds...
Picture
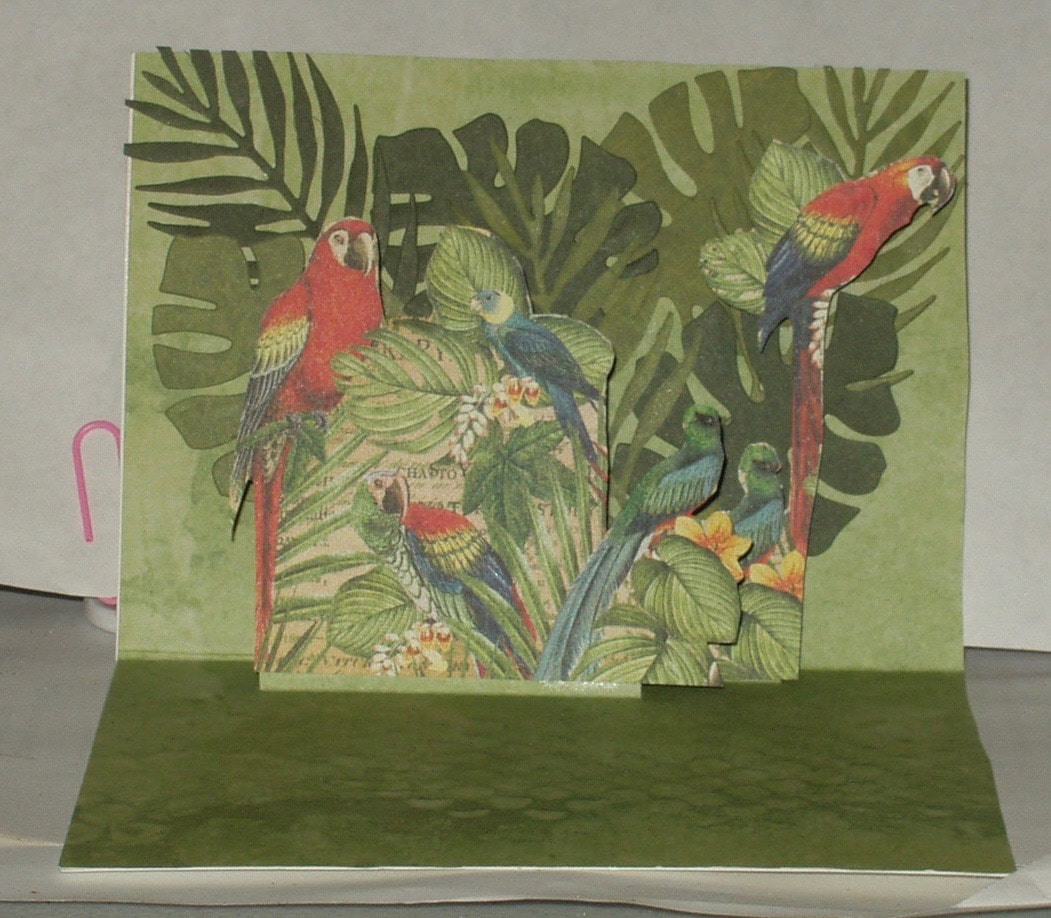
The background needed a little something, something so I searched my stash of 'tover die-cuts and found some leaves that had been cut from the same paper collection. The birds now resided in a proper tropical jungle:
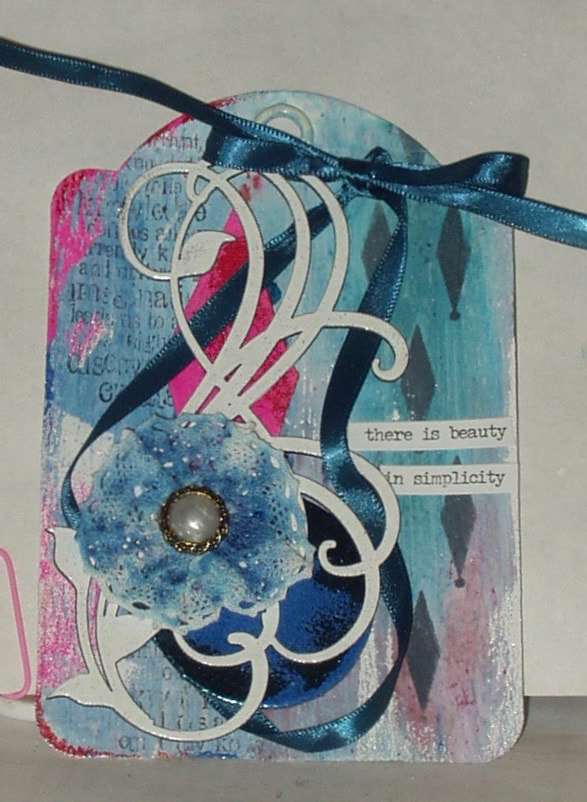
Picture
A sentiment...
Picture
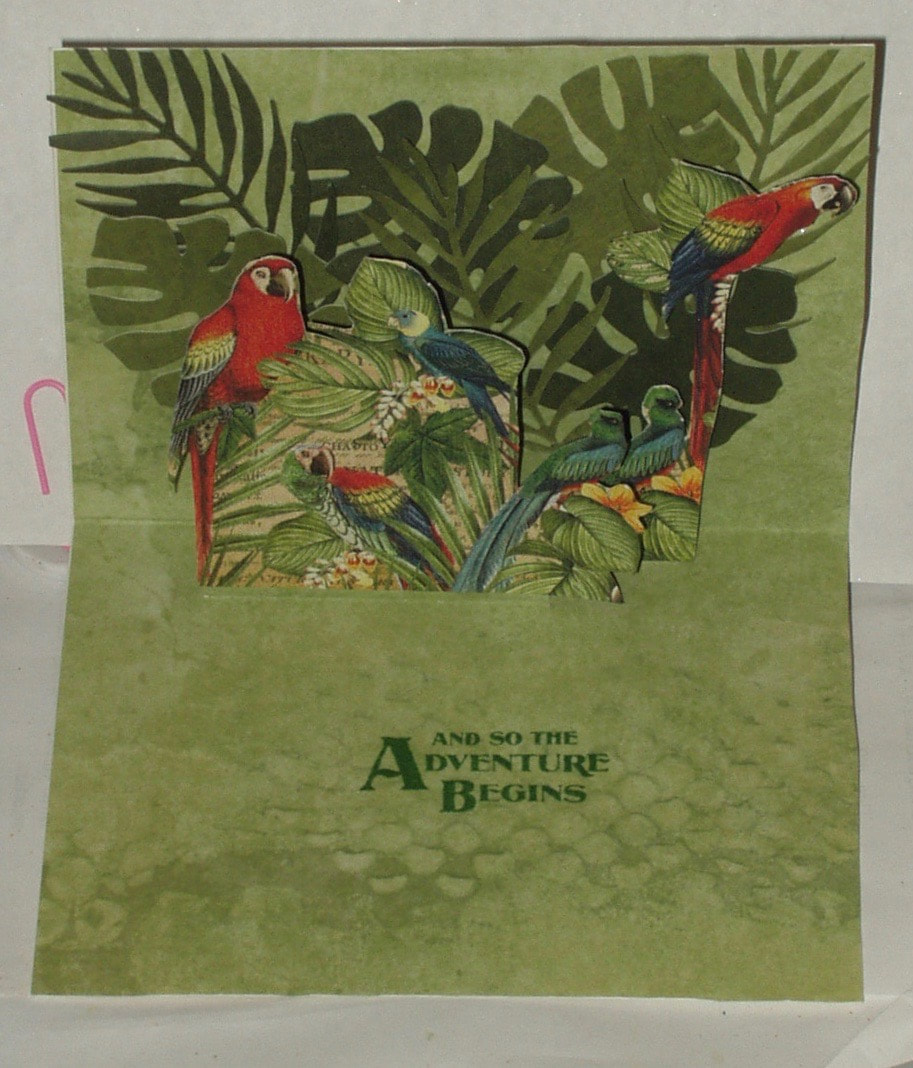
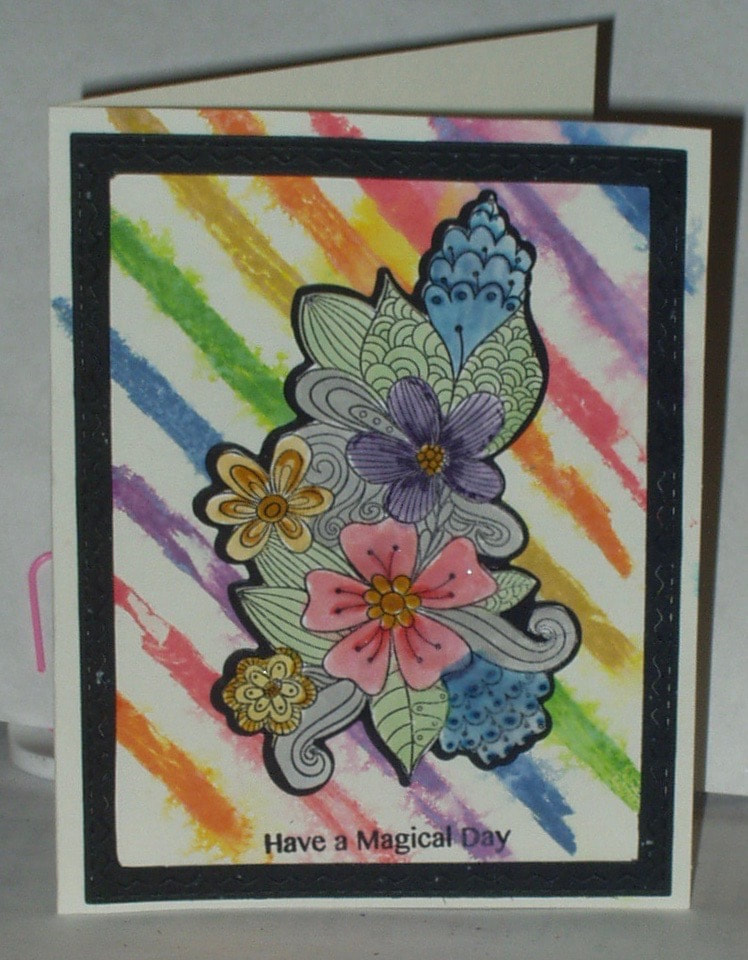
and a card face to finish:
Picture
Products used in the making of this card were:

  • Stamps: Graphic45/Hampton Arts “Safari Adventure #`” (ICO362) and “Safari Adventure #2 (ICO363)
  • Dies: Sizzix Thinlits “Tropical” (661207)
  • Inks: Versamark; Hero Arts “Pine”
  • Embossing Powders: Stampendous “detail white” (47788)
  • Papers: Paper Studio A2 Notecard “ivory” (225219); Graphic45 Safari Adventure 8x8 ( “Jungle Expedition” and “Birds of a Feather” - 4501368) and Patterns & Solids 6x6 (4501367); FiberScraps TintZ paper 12 x 12 “Moss-Verdigris”
  • Adhesives: Duck Easy Stick Double Stick Adhesive
3 Comments

Challenge: September Color Palette

9/12/2018

0 Comments

 
The color palette and photo inspiration of September 2018 for the Lindy's Gang blog and facebook page is as follows:
Picture
This bright collection of colors led me down a different path from my usual.

I started with an ivory tag, coated it with white gesso, added some magical sprinkles (randomly shaking all three colors that I had that matched the suggested color list), and brushed the tag again with gesso:
Picture
The result reminded me of a weathered painted piece of wood so I ran the tag through my Big Shot with a new Tim Holtz 3D Embossing folder:
Picture
While  the texture was there, it isn't that visible on the painted side, so I dry-brushed more gesso one the high points to call out the wood grain:
Picture
Next, using Distress Oxide Ink, I stenciled some diamonds down the right side of the tag:
Picture
and randomly stamped some text in Archival ink:
Picture
I applied Versamark randomly to the tag edges and het embossed with four colors of embossing powders:
Picture
Using Versamark Ink, I applied embossing powders to some chipboard pieces. For the circle and diamond, I embossed a second time with a different powder in the same color way to add texture.  I layered these chipboard pieces on the tag:
Picture
I threaded a dark teal ribbon through the flourish, tied it in a bow, and added a lace flower which I had tinted with magicals and a spritz of water. An Idea-ology sticker provided a sentiment:
Picture
Products used in the making of this tag were:

  • Stamps: Stampers Anonymous “Flights of Fancy” Holtz Visual Artistry Collection (2011)
  • Stencils: Stampers Anonymous “Shifter Diamonds” (THS110)
  • Embossing Folders: Sizzix 3D Texture Fade “Lumber” (662718)
  • Inks: Lindy’s Gang Magicals “Time Travel Teal”, “Bavarian Blue” and “Cuckoo Clock Cardinal”; Distress Oxide “Black Soot”: Archival “Jet Black”; Versamark
  • Embossing Powders: Lindy’s Gang “Midnight Teal Obsidian”, “Bavarian Blue”, “Purely White”, “Hi Maintenance Magenta”, and “Cuckoo Clock Cardinal”
  • Papers: Graphic45 Staples “regular Tag Album Ivory” (4501221)
  • Embellishments Creative Embellishments chipboard flourish; JoAnn’s Chipboard Pack shapes (45327); Prima Flowers “Madrigal Blossom White” (541028); teal ribbon; Idea-ology “Small Talk” (TH93193)
  • Media: Liquitex Acrylic Gesso “white”
  • Adhesives: Wendy Vecchi “Perfect Card Adhesive” (62134); EK Tools 3D foam dots
0 Comments

Challenge: Use More Than One Stencil

9/12/2018

1 Comment

 
The Design Team over at Simon Says Stamp Monday, on September 10, 2018, has challenged us to use more than one stencil in a project. I decided to see if I could combine two of the many stencils in my stash which have recently arrived in my mailbox and not been opened, let alone put away properly.

I started with one of the new "shifter" layering stencils from Stampers Anonymous and Tim Holtz. I masked it off and used two colors of Distress Oxide Ink to create some rows of diamond along one side of an A2-sized cut of Neena Solar White card. Then, placing a new Altenew half-tone stencil so that the dots matched the little dots at the tips of the diamonds, I used one of the same Distress Oxides to randomly apply different sized dots across the remaining blank portion of the card. Trimming the card and matting it with card matching one of the inks, I mounted it on an ivory card base:
Picture
Now I searched my stamps for a suitable sentiment. I was thinking Mardi Gras as these colors work for that celebration, but I didn't have a sentiment that worked for that so I found a different, more generic sentiment on a Concord & 9th set, and decided the card would work better as a top-folding card. I stamped the sentiment in an Archival Ink that matched one of the Distress Oxides used in the diamond border:
Picture
It still needed a little something-something so I pulled a sheet of mini-gems in the magenta color and added them randomly to the card face:
Picture
Products used in the making of this card were:

  • Stamps: Concord & 9th “Dahlia Tirnabout” (10293)
  • Stencils: Stampers Anonymous Layering Stencil “Shifters Diamonds” (THS110; Altenew “Half Tone” (ALT1627)
  • Inks: Distress Oxide “Bundled Sage” and “Seedless Preserves”; Archival “Cactus Flower”
  • Papers: Neena Solar White; Paper Studio notecard “ivory” (225219); scrap of magenta card
  • Embellishments: Multicraft Glitterazzi mini gems (WZ050A)
  • Adhesives: Duck Easy Stick Double Stick Adhesive
1 Comment

My Christmas Card Project, part 1.

9/9/2018

0 Comments

 
Some time ago, the Ink Road Stamp people posted on Instagram about another blog - “The Best Things in Life Are Pink” - where the blogger Kristie had posted a You Tube Tutorial (one of her many tutorials on creating MANY cards cards from a single pad of 6x6 papers). The blog post referenced used Carta Bella papers and the Ink Road stamp set “Fir Real”, as well as a number of published sketches from other card-making blogs as inspiration for Christmas cards.

This post  and video intrigued me, as my husband and I had talked often about me making some (or all - 150?) of our annual holiday cards and this tutorial looked like it might be doable. Whether I could get all 150 done in time is questionable but I thought I could make a healthy dent in the number we would need to purchase!

So, over the last ten days, I have been tackling this project, using some randomly selected sketches from the Operation Write Home blog site, although I took some liberties with some sketches based on the supplies I had on hand (substituting ovals for circles and diamonds for squares, for example) and I used some dimensional embellishments (which are prohibited in Operation Write Home cards). Apologies if I spelled some sketch designer names wrong --- they were often hard to make out in the grey-tone print-outs I had. 

Each set of cards shown below use some products in common: 


  • Stamps: Ink Road Stamps “Fir Real”; Personal Impressions (201J); Wiggins Stamp Art
  • Papers: Whimsy Stamps “Christmas Cheer” 24 single-sided 6x6 paper pad (TWDP102); Parklane Paperie A2 card base “white” (15919608)
My MISTI Stamp Positioner and a Fiskers paper trimmer were essential tools, as was a heat tool.
​

Additional paper scraps, various inks and embossing powders, and assorted embellishments round out the products used and I will post these under each card set.

For purposes of space, I am including gallery views which, in some instances, crop the card. Click on the card image to see the full card.

​~~~~~
Card set #1 used sketch #09 by Seongsook D:
:Additional products used included:
  • Inks: Archival “Library Green”; Versamark
  • Embossing Powders: JoAnn CraftEssentials “black”
  • Papers:  scraps of cream and green card
  • Adhesives: Ross Gel Stick; RedLine 1/8” Embossing Tape

~~~~~
​Card Set #2 used sketch #10 by Ali Manring:
Additional products used included:
  • Inks: Archival “Library Green"
  • Papers:  scrap red card; small white tags
  • Embellishments: Bliss self adhesive rhinestones “red”
  • Adhesives: Ross Gel Stick; RedLine 1/8” Embossing Tape: Wendy Vecchi “Perfect Card Adhesive” (62134)

~~~~~
​Card Set #3 used sketch #13 by Karen G:
Additional products used included:

  • Stamps:  Stacy’s Stamps 830-C
  • Inks: Archival “Library Green”; Versamark
  • Embossing Powders: Stampendous “detail white” (47788)
  • Embellishments: Stampendous “Snowflake Silver” stickers (AC6195)
  • Adhesives: RedLine 1/8” Embossing Tape

~~~~~
​Card Set #4 used sketch #11 by Carol P
Additional products used on the cards on the left and in the center included:
  • Inks: Versamark; Snowman pen “gold”; Distress Ink “Fossilized Amber”; Distress Ink “Fossilized Amber”
  • Embossing Powders: Stampendous “detail white” (47788)
  • Papers: metallic gold cardstock
  • Embellishments: K & Company Grand Adhesions “Christmas Cheer” (569317)  
  • Adhesives: RedLine 1/8” Embossing Tape
  • Tools: Marvy Corner Punch CR-S
The card on the right used the same materials except that K & Company Die-Cut Stickers “Christmas Cheer” (569294) substituted for the K & Company Grand Adhesions “Christmas Cheer” (569317) and UpTown “detail gold” substituted for the Stampendous "detail white" embossing powder.

~~~~~
​Card Set #5 used sketch #12 by Carol L:
Additional products used included:

  • Inks: Archival “Jet Black””; Versamark
  • Embossing Powders: UpTown “detail gold”
  • Papers:  metallic gold cardstock; scraps of cream and yellow card
  • Adhesives: RedLine 1/8” Embossing Tape; Wendy Vecchi “Perfect Card Adhesive” (62134)
  • Tools: Marvy Corner Punch CR-S

~~~~~
​Card Set #6 used sketch #15 by Bev E:
Additional products used included:
  • Inks: Archival “Leaf Green”
  • Embossing Powders: UpTown “detail gold”
  • Papers: scraps of green and cream card
  • Embellishments: gold star brads
  • Adhesives: RedLine 1/8” Embossing Tape
  • Tools: Marvy Corner Punch CR-S

~~~~~
​Card Set #7 used set #16 by Vieve:
Additional products used on the card on the left included:
  • Inks: Hero Arts “Moss”; Distress Marker “Forest Moss”
  • Papers: scrap of  cream card
  • Embellishments: Paper Bliss “Swirl Holly” (39053-PE-00)
  • Adhesives: RedLine 1/8” Embossing Tape

The card on the right used the same materials except that Versamark Ink and Stampendous “detail white” embossing powder (47788) substituted for the Hero Arts and Distress Marker colors, gold metallic card substituted for the cream card,  and K & Company Grand Adhesions “Christmas Cheer” (569317) substituted for the Paper Bliss "Swirl Holly" embellishment.

 ~~~~~

Card Set #8 used sketch #14 by Shirley S

Additional products used on the card on the left included:
  • Inks: Archival “Library Green"; Versamark; Snowman pen “gold”
  • Embossing Powder: Stampendous “detail white” (47788)
  • Papers: scrap green card, handmade paper rectangles 
  • Embellishments: gold star brads
  • Adhesives: RedLine 1/8” Embossing Tape

For the card on the right, Archival “Vermillion” substituted for Archival "Library Green" ink and a scrap of red card substituted for green card 

~~~~~

Card Set #9 used sketch #08 by Shirley S:
Additional products used for this first pair of cards were:
  • Inks: Archival “Library Green”; Versamark
  • Embossing Powder: Stampendous “detail white” (47788) 
  • Papers:precut green ovals
  • Embellishments: gold star brads for two
  • Adhesives: RedLine 1/8” Embossing Tape 

A few days later, I used the same sketch for two  cards which finished out the paper pad (except for a selection of 1/2" strips and a few trimmings which may come in handy in future)...
UpTown “detail gold”  was substituted for Stampendous “detail white” embossing powder and precut cream ovals were added. No gold brads were used in this second set.  Duck Easy Stick Double Stick Adhesive substituted for redLie 1/8" embossing Tape because, by the time I made these two cards (they were the last two I made), I had run out of RedLine.

~~~~~

Card Set #10 used sketch #6 by Vera S:
Additional products used in these three cards were:
  • Inks: Archival “ Vermillion”; Liquid Gold marker
  • Papers: scraps of gold metallic and cream card
  • Embellishments: K & Company Classic Metal Art  “K Bailey Chipboard Flower Brads” (558649)
  • Adhesives: RedLine 1/8” Embossing Tape; Wendy Vecchi “Perfect Card Adhesive” (62134)

~~~~~Card Set #11 used sketch  #07 by Erika P:
Additional products used in these three cards were:
  • Inks: Archival “ Jet Black”; Versamark on card #3
  • Embossing Powder: Stampendous “detail white” (47788)
  • Papers: Whimsy Stamps “Christmas Cheer” 6x6 (TWDP102); Parklane Paperie A2 card base “white” (15919608)
  • Adhesives: RedLine 1/8” Embossing Tape; Wendy Vecchi “Perfect Card Adhesive” (62134)
The card on the right used leftover strips that were too short to use on a portrait-format so I used them on a landscape card and added Versamark and Stampendous "detail white" embossing powder on a scrap of black card to finish it off.

~~~~~
Card Set #12, the final set in this paper pad transformation,  used sketch #05 by Caryl P

Additional products used for these cards were: 
​
  • Stamps: Ink Road Stamps “Fir Real”; Personal Impressions (201J); Wiggins Stamp Art
  • Inks: Archival “ Fern Green”
  • Papers: scraps of green card
  • Embellishments: Idea-ology Design Tape “Rose” (TH93354)
  • Adhesives: RedLine 1/8” Embossing Tape; Duck Easy Stick Double Stick Adhesive

Because of the patterned paper on the card in the lower right, in order to highlight the sentiment, I used a scrap of white and a mat of dark green card.

~~~~~

In all, 31 cards (and one trashed because of multiple irreparable errors - i.e. stamping sentiments upside down TWICE on one of  three green and gold cards in the 12th set! AAACK!)  in 10 days — not too shabby, if I do say so myself. 

What did I learn? Well, each
 set of two cards took roughly one hour to make, including time deciding which of the papers to use together. That means I have to find 60 working hours in the next two months to make my 150-card goal. Also, not all 6x6 paper pads of Christmas-themed papers will be as easy to work with as this one was; most that I have are more patterned and/or aren't as color-coordinated. I will have to pick and choose carefully and probably bring in some solid card-stock from my stash to flesh out the resources. This could slow me down a bit. 

Nonetheless, I now have a stack of 6x6 Christmas themed papers beside my desk, I have replenished my supplies of adhesive and I am ready to tackle more cards…

31 down, 119 to go!


0 Comments

Challenge: Stamp It On

9/6/2018

2 Comments

 
The Simon Says Stamp Monday Challenge for September 3, 2018 (the first week of Stamptember®) is to use stamps - i.e. "Stamp It On! And, not surprisingly, the challenge from Simon Says Stamp Wednesday, September 5, 2018, is similar: "Stamp It for Stamptember®"

​I decided to experiment with color and, while I'm not at all sure the card works, I'm submitting it anyway.

FIrst, I used a stamp and Distress Oxide Inks to create a rainbow-striped background on a white notecard. I spritzed the card with water to make the Distress Oxides bleed and run: 
Picture
Next, I stamped an outline floral stamp in Archival "Jet Black" and colored it with Distress Markers (same colors as the Distress Oxides) and a water brush. I die cut it with the coordinating die and then trimmed with a craft knife to remove all white borders:
Picture
Because the watercolored flowers are so pale compared to the background, I decided they needed an outline so I die cut a back "shadow" of the floral bouquet and mounted the painted image on it:
Picture
I die cut a black frame and mounted the frame and the bouquet on the card front. The flowers were still too pale for the background, however, so I repainted with markers and a water brush to darken them up a bit. Then I aded Wink of Stella clear shimmer to make the blooms sparkle (although it really doesn't show up well in this photo). I stamped a sentiment in Archival and trimmed the white card to fit the frame:
Picture
Lesson learned from this card: tame the background (maybe use water on the stamps with the Distress Oxides or cover it with velum to knock back the color a little) and bump up the color on the floral bouquet so it becomes the star of the piece.

Products used in the making of this card wee:


  • Stamps: Simon Says Stamp “Brush Stroke Messages” (SSS1011711) and “Spring Flower Burst” (SSS101846; WOW! “Starburst” (STAMPSET49)
  • Dies: Simon Says Stamp “Spring Flower Burst” (SSS101846) and Sizzix Thinlits “Stitched Rectangles” (661189)
  • Inks: Distress Oxides “Abandoned Coral”, “Squeezed Marmalade”, “Fossilized Amber”, “Mowed Lawn”, Faded Jeans” and "Dusty Concord”; Distress Markers “Abandoned Coral”, “Squeezed Marmalade”, “Fossilized Amber”, “Mowed Lawn”, Faded Jeans”, "Dusty Concord” and “Pumice Stone”; Archival “Jet Black”; Wink of Stella “clear” (999)
  • Papers: Paper Studio notecard “ivory” (225219); Neena “Solar White”; scraps of black
  • Adhesives: RedLine 1/8” Embossing Tape; Wendy Vecchi “Perfect Card Adhesive” (62134)
2 Comments

My August Progress in my 2018 Organization Resolution

9/1/2018

0 Comments

 
Back at the end of December, 2017, I blogged about the mess my craft space was in, and how I hoped that, in 2018, I would make some progress in getting it all put back together and neatened up. I posted my January progress here. My February progress report on that organization is here. My March organization efforts can be found here. My April report is here. And my May report is here, my June report is here, and my July report is here.

​I started August with the building a a small wheeled cart from Totally Tiffany.

Picture
It came with two organizer baskets and was relatively easy to assemble (all it needed was a phillips head screwdriver and some coordination!).  When I purchased it, i was on sale *and* I had a coupon so I figured I couldn't lose! I wasn't sure what I was going to use it for but I thought it would find its own use once assembled.

I know what it will NOT work for... these ArtBin storage bins and Totally Tiffany drawer units  are simply too large, even for the  top "shelf":
Picture
The top bin WILL work for the Totally Tiffany punch storage bags...
Picture
but a) it was a little top-heavy N b)I can't think what the bottom two "shelves" would be used for. Besides, I don't use  punches all that often that they need to be so easily at hand.

It might work for my Big Shot - as it would save me getting and fetching it every time I need it...
Picture
and while the bottom "shelves" might work for accessories like spare cutting plates, platforms and the like, and even my SideKick and Cuttlebug, but... it was kind of messy and not as convenient as I thought it might be. 

But right now, the Big Shot is working nicely for me on my cutting table (getting up and moving about is critical now and then, when crafting, don't you think?) and most of the embossing folders and dies are in storage boxes which will NOT fit in those lower shelves, so...

I tried arranging storage tins of mini ink pads, Distress ink pads, etc to clear my work surface. and that didn't work either because they really weren't any more accessible than they are now, piled on my table. 

I suspect the cart will sit where it is, in front of my large cabinet, until I come up with a better idea.
0 Comments
Forward>>

    Author

    Born in New Jersey, I grew up in Southeastern Ohio. Attended university at Bowling Green State University (B.Sci  in biological science, 1964), University of Southern California (M. Sci in biological science, 1967) and University of Florida (Ph. D in zoology, 1971).
    Worked in environmental consulting for a little more than a decade and then seven years as an instructor in biological science at various community colleges in California and Texas. Moved to London in 1992, then Beijing (1996) and Saudi Arabia (1998), before returning to NW Ohio in 2002. I am currently living in NW Ohio with my husband and three Bombay cats.  I love to read (mystery, science fiction, history) and stitch (have done crewel, currently experimenting with free embroidery and needlepoint but blackwork and cross stitch are my main genres); have been known to knit; and now I'm heavily into papercrafting!
    Retired upon the return to the US so lots of time for our hobbies...

    Archives

    December 2019
    November 2019
    October 2019
    September 2019
    August 2019
    July 2019
    June 2019
    May 2019
    April 2019
    March 2019
    February 2019
    January 2019
    December 2018
    November 2018
    October 2018
    September 2018
    August 2018
    July 2018
    June 2018
    May 2018
    April 2018
    March 2018
    February 2018
    January 2018
    December 2017
    November 2017
    October 2017
    September 2017
    August 2017
    July 2017
    June 2017
    May 2017
    April 2017
    March 2017
    February 2017
    January 2017
    December 2016
    November 2016
    October 2016
    September 2016
    August 2016
    July 2016
    June 2016
    May 2016
    April 2016
    March 2016
    February 2016
    January 2016
    December 2015
    November 2015
    October 2015
    September 2015
    August 2015
    July 2015
    June 2015
    May 2015
    April 2015
    March 2015
    February 2015
    January 2015
    December 2014
    November 2014
    October 2014
    September 2014
    August 2014
    July 2014
    June 2014
    May 2014
    April 2014

    Categories

    All
    12 Tags Of 2015
    12 Tags Of 2016
    2018 Craft Space Clean-up
    All About ATCs
    Altenew
    Altenew Academy
    Art Swap
    Christmas Project
    Club Posh
    Compendium Of Curiosities
    Create 2014
    Create 2017
    Creative Carte Blacnhe
    Creative Chemistry 101
    Creative Chemistry 102
    Creative Chemistry 103
    Dina Wakely
    Dyan Reaveley
    Ellen Hutson
    Frilly & Funky
    Funkie Junkie Style
    Graphic 45
    Guest Designer
    Hero Arts
    #hipforsummer
    #holtzforhalloween
    #holtzfortheholidays
    Honey Bee
    InkRoad
    Just Playing Around
    Lindy's Stamp Gang
    More Than Words
    OnLIne Card Class
    Seven Hills
    #sharewithsizzix
    Simon Says Stamp
    Stamptember
    Summer Of Creative Chemistry 2016
    Sunday Stamper
    Tim Holtz Kits
    WOW!

    RSS Feed

    Picture
    Picture
    Picture
    PAST PARTICIPATION

    Picture
    Picture
    Picture
    Picture
    Picture
    CHALLENGE BLOGS
    Simon Says Stamp Monday Challenge Blog
    Picture
    Picture
    Picture

    So proud!

    Picture
    for my August 2015 tag!
    for my entry into "Author, Author". October 5, 2016
 honored to be asked to be guest designer for Simon Says Stamp Monday Challenge, September 2017

for my entry in the Frilly and Funkie November 22, 2017 Challenge: Give Thanks
for my entry in the Frilly and Funkie December 9, 2017 Challenge: Most Memorable Gift
Proudly powered by Weebly